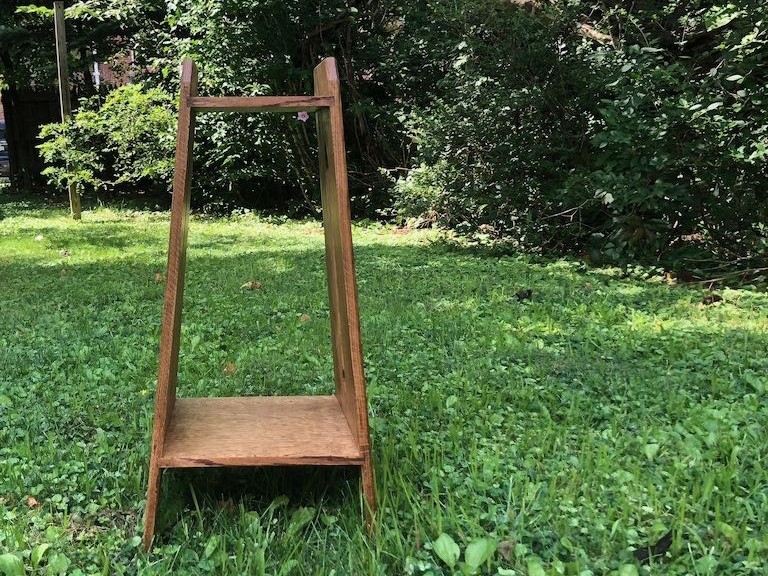
This project started based on a request for a small stand to hold a vase. I initially started to consider building a small Shaker-style side table. However, I had a few pieces of red oak in my lumber rack which were calling out to build something in the Arts and Crafts style.
The Design
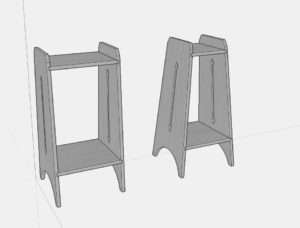
The plan for the stand involved sides would taper in width from bottom top. I had initially considered using straight sides with tapers. However, working with SketchUp allowed me to play with adding splay to the sides that both sloped inward toward and tapered in width from bottom to top. The sides would have arrow-point piercings and arches to define feet.
Build Process
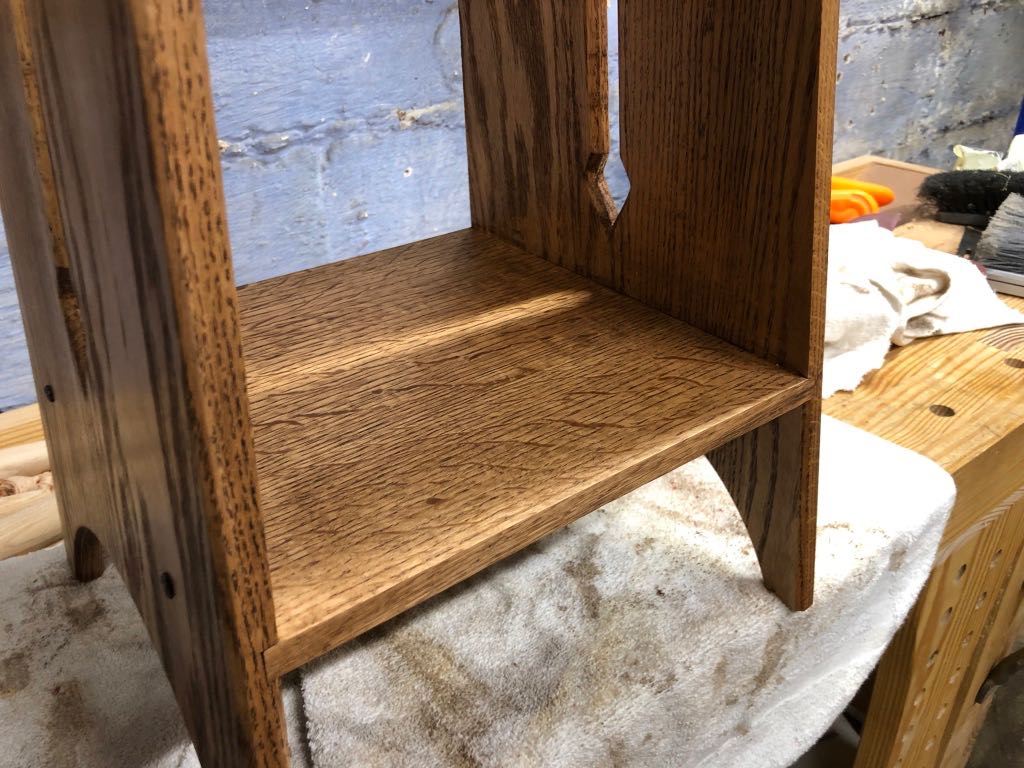
The piece as fairly straight forward to build, with the only “trick” being to save tapering the sides until last. Oak panels were glued up to reach the maximum width on the bottom of 13 inches and length of 28 inches. The sides ended up 5/8″ thick. Two shelves were glued up, with the bottom shelf measuring about 12 1/4″ wide and 13″ long, and the top measuring 9 3/8″ wide by 10″ long. These were 1/2″ thick.
Once the sides were glued up, flattened, and squared, I set the table saw to a 5º bevel and beveled the top and bottom edge of each side to match the intended 5º splay of the legs. I then swapped out my combo blade for a 1/2″ dado stack, leaving the 5º bevel setting intact. Dados were then cut into the sides for both the top and bottom shelves on each side.
After the dados were cut, the combo blade was swapped back into the saw, leaving the 5º bevel. I then began the process of trimming the ends of each self to the proper length. The bottom shelf was trimmed first, maintaining a length as close to 13 inches as possible. One end of the top shelf was then beveled. The stand was partially assembled with the bottom shelf in place. The top shelf was then aligned (but not inserted as it was still too long), and the unbeveled end was marked to find the final length. This was a tedious process and I’m considering a better way to do this going forward.
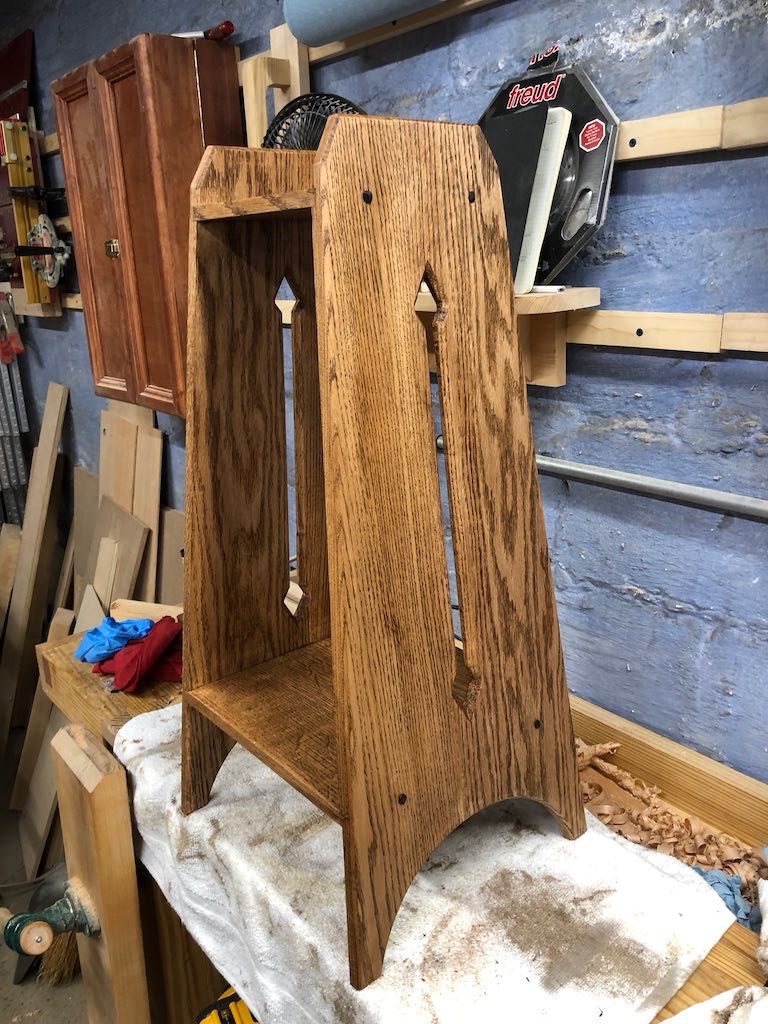
Before tapering the sides of the stand, I turned my attention to the arrow point piercings. These piercings involved up and down arrow points connected with a 1/2″ channel. I started by creating a template of the arrow point shape. The template was then used to draw the arrow points in both top and bottom locations, centered on the 1/2″ channel. With a Forstner bit, I removed the bulk of the waste in each point. I then pulled out a router with fence and spiral upcut bit installed. Setting the fence on the router to dead center of the sides, I then routed out the channels in each side. I returned to the arrows with chisels, cutting to the lines and defining the full arrow. Then, with a chamfer bit installed in the router, I routed around the piercing. This was finished with a chisel and knife to reestablish the points at the very top of each arrowhead, leaving the sides rounded.
After the piercings were complete, each side was then tapered 5º from bottom to top using the band saw, cleaning up the marks with a jointer plane. I then measured and marked in from the top corner 3/4″. Using a bevel gauge set to match the angle of the arrow points, I marked a line and cut the final bevels. the outside edges of both sides where then chamfered with the router.
The piece was then dry fit to allow for marking each shelf’s final depth. These were then ripped down on the table saw and cleaned up with hand planes to match the taper of the sides. The stand was glued up and finished using a wash coat of shellac, followed by a dark walnut stain, and topped with black paste wax. Wrought rosehead nails were then put through the sides into each shelf.
Thoughts for the Next Batch
There were a few mistakes along the way in execution of the design. First, I would prefer to make the next round entirely out of quartersawn stock. I had only enough quartersawn oak for the shelves. The sides were glued up out of the remaining stock which was mostly flat sawn. I didn’t notice until the piece was in the finishing stage, but I should have flipped one of the sides to align the flat sawn pieces. The panel glue up was also somewhat glue starved, as I found when inserting tight shelves. It resulted in a partial glue joint failure. This was remedied by wicking in some hide glue, but I’d rather not have to deal with this mid-build.
Second, if making the piece again, I’d likely make a full template of the sides and piercings to allow for template routing. Roughing out tapers on the band saw and cleaning it all up with a flush trim bit would save significant time over repeated resetting of the table saw, particularly given the jobsite saw that I work with.
Finally, I’d need to consider a better method to size and trim the shelves. What that method is I’m not yet sure.