When I first saw the Roorkee Chair in an episode of the Woodwright’s Shop, I knew it was a project that would go on the build list. I later bought Chris Schwarz’ book Campaign Furniture and read through it several times. I really can’t recommend the book enough. It explores a forgotten style whose influence can be found throughout contemporary furniture. I have plans to build several pieces in the style, including a campaign chest/secretary.
I decided to make the chair the first project to build out of the book. I enjoy working at the lathe. The piece requires minimal lumber. The joinery of the chair, conical mortise and tenon, would be easy to execute. The piece is also very practical. It would also give me a chance to work with leather for the first time. The only hold up was that my lathe could turn only 18 inches between centers.
In January of this year, I purchased a bed extension for the lathe. The bed extension added about 20 inches of distance between centers, easily enough for this chair.
Finding Lumber
I thought about a number of different wood species for the chair. I ended up settling on using ash. The species is strong and easy to work. Finding good lumber sources is always an adventure. As this work required working with 8/4 (2 inch thick) material, I wanted to be careful on the source of the wood. I haven’t had the best luck in the past with material that thick. Watching a piece of soft maple turn into a pretzel when cut in the past has turned me off of one lumber yard. For this project, I reached out to a local sawyer, Jones Saw Mill. The selection at the saw mill was fantastic. After working with the material, including having it sit and remain stable for several months after initially milling it, proved that this will be a good source in the future.
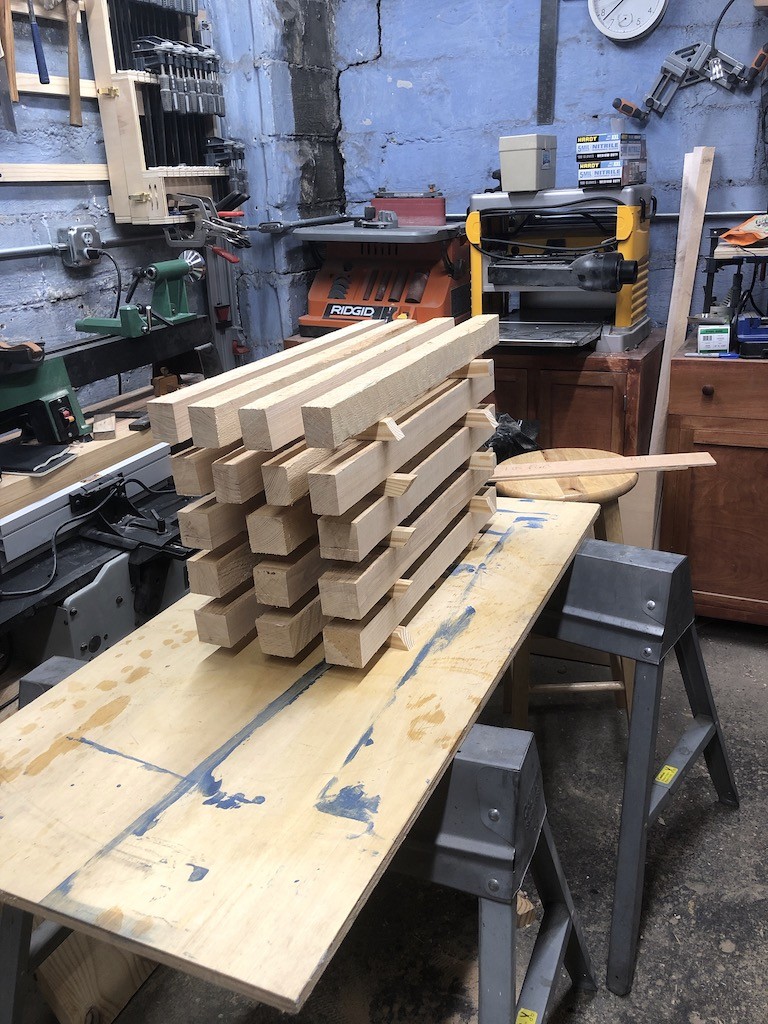
I brought the material home and proceeded to the band saw to rip it to rough size. The importance of this step can’t be overstated. First, this allowed me to help speed process of acclimating the wood to my workshop by exposing more surfaces to air. Second, the parts in this chair, specifically the four stretchers, need to be made out of dead-straight grain. If these aren’t made from straight grain, there is a larger chance that they will break under the weight of a person sitting in the chair.
After the parts were cut down to rough length, width, and thickness, they were placed on stickers (strips of wood) and stacked to allow them to further dry and acclimate to the shop.
Turning the Parts
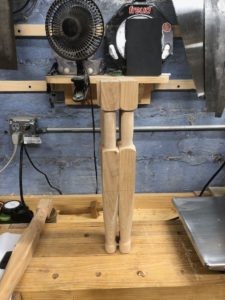
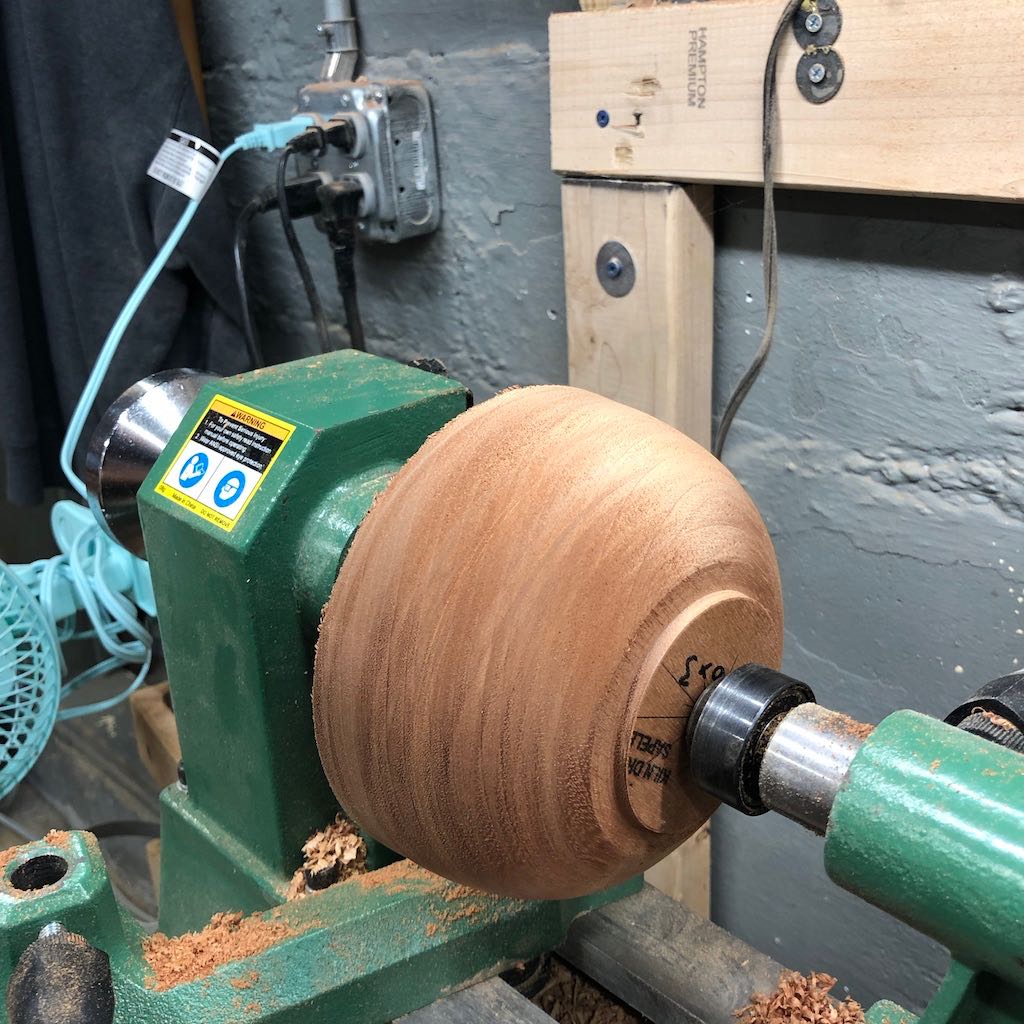
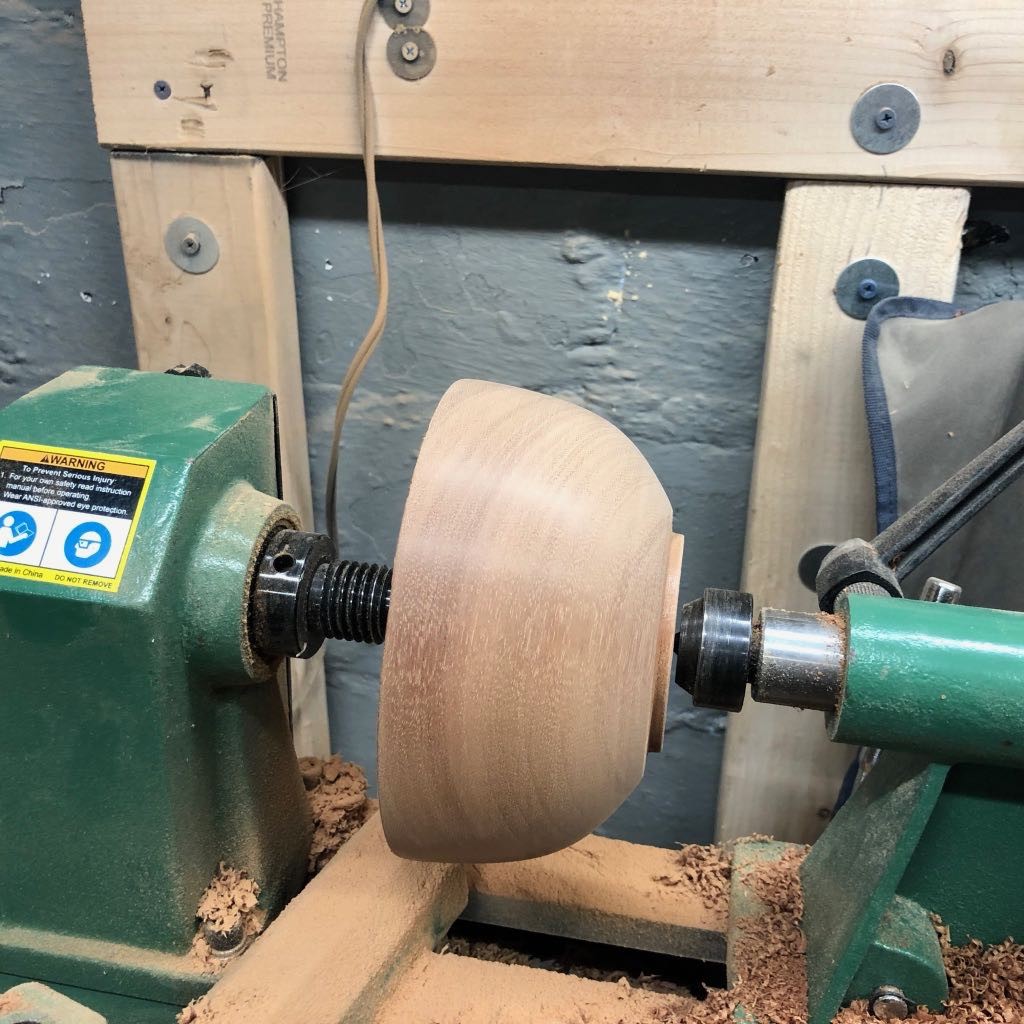
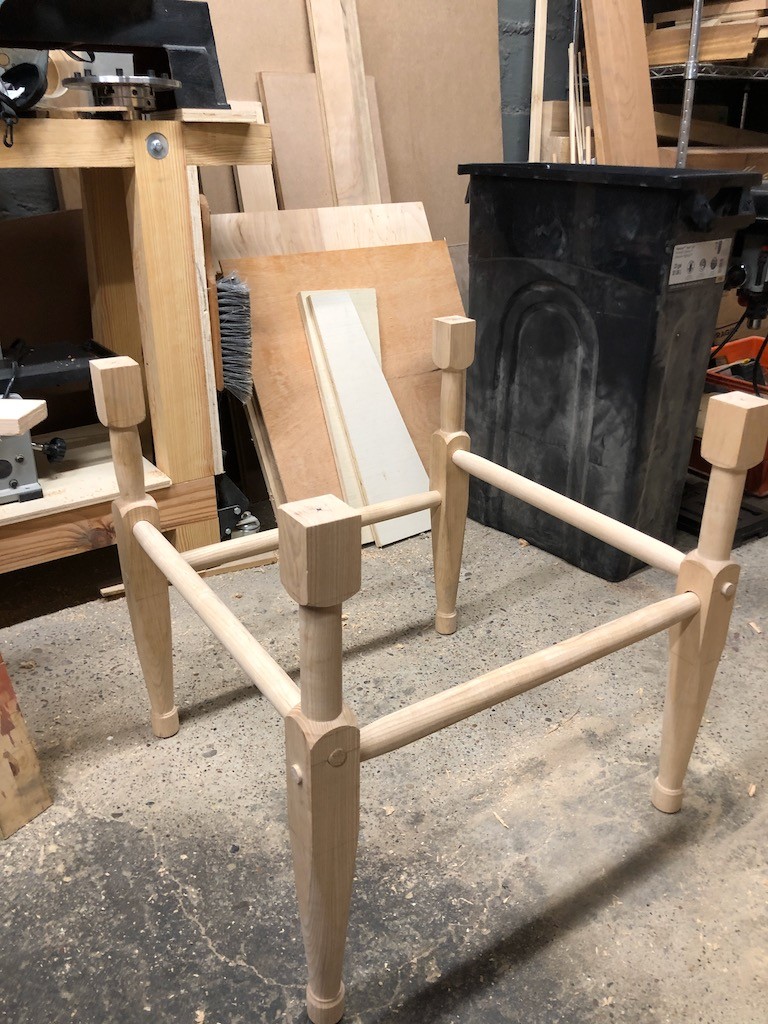
The first step was to turn down the legs. I started by making a story stick for the legs and stretchers. This allowed me to mark out the locations of elements (feet, handles) and transitions. It should allow for identical parts. However, you can see that I had some variation in the location of transitions. I can’t speak to whether this sort of variation was present on period campaign pieces.
However, a recent article in Popular Woodworking from George Walker looks at the same sort of variation in turnings. You can see that the same elements were present in each foot. However, the execution of those elements differed significantly from part to part. These aren’t made by a duplicating lathe. Rather, they are made by a person holding a tool.
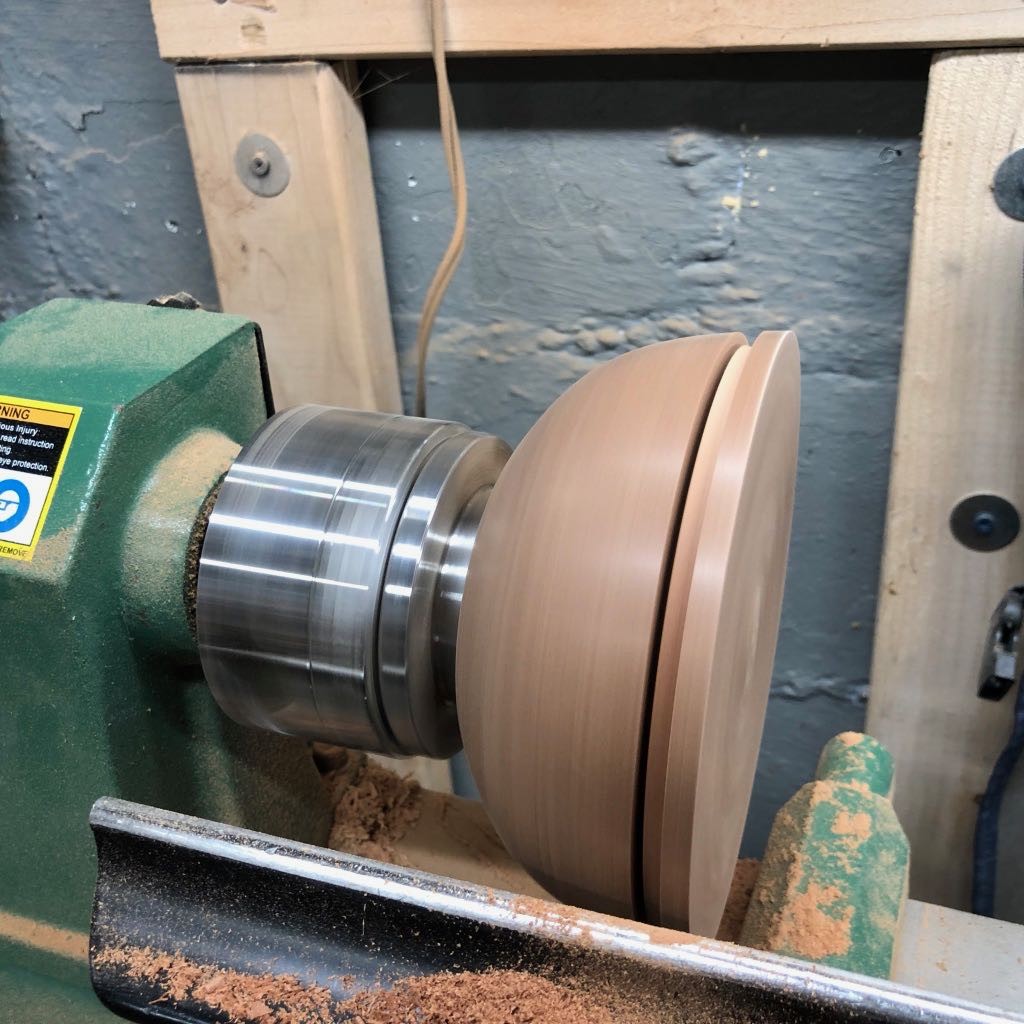
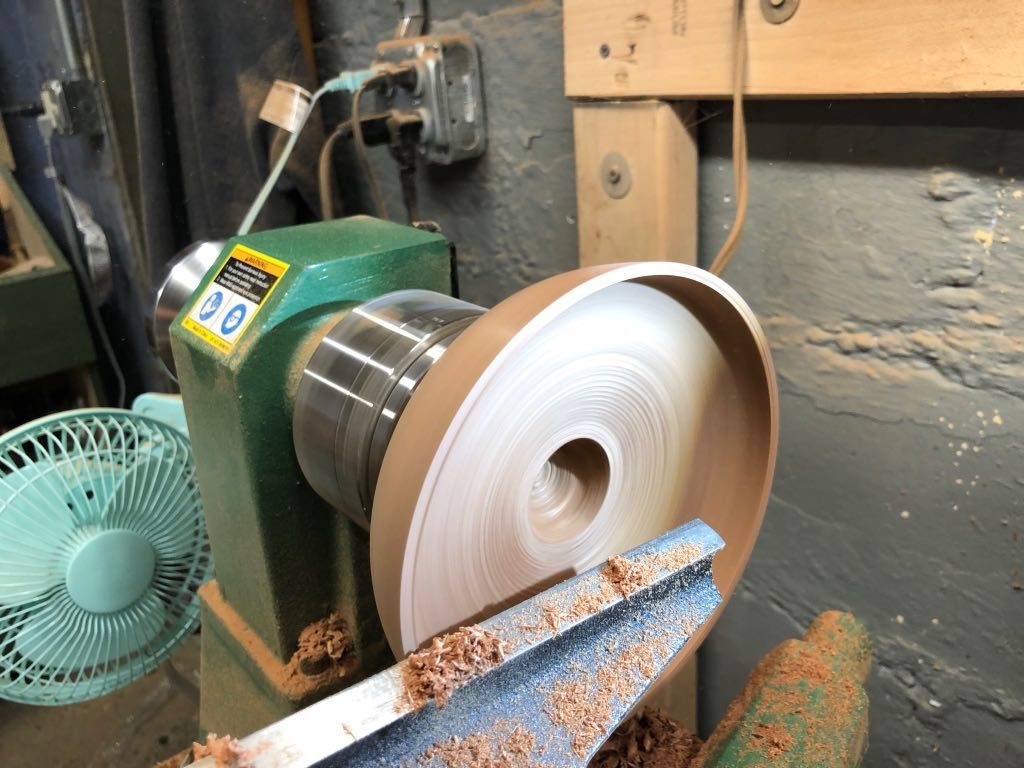
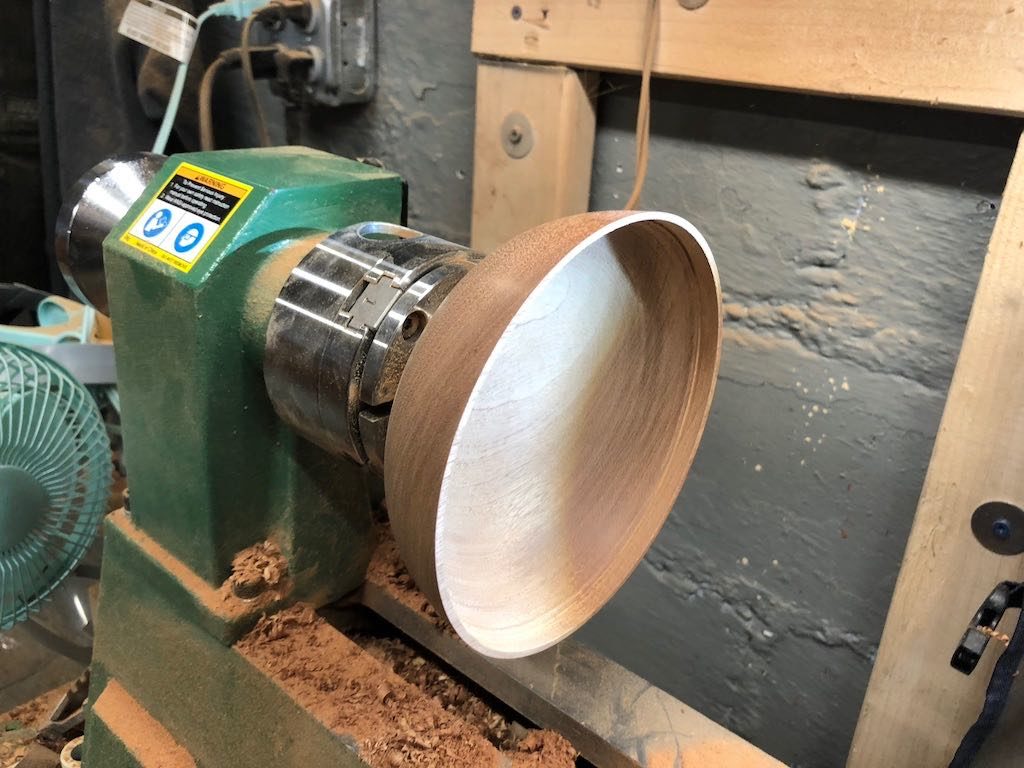
After completing the legs, the stretchers are then turned down, with rough turning of the conical tenons. Those tenons are further refined by hand with a tapered tenon cutter.
Cutting (Drilling?) the Joinery
The joinery for this chair is all loose. After roughing down the shape of the tenons on the ends of the stretchers, they are finished off with a tapered tenon cutter (think large pencil sharpener). The mortises are first drilled out. They are them reamed out to get a shape that matches the tapered tenons. It was in the reaming step that I ended up hitting a bit of a block.
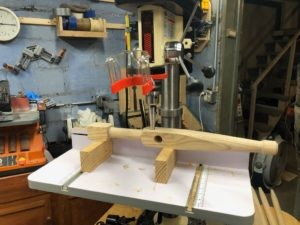
I have been using a cheap bench-top drill press from Lowes for several years. The drill press has been nothing but trouble. The table on the drill press refused to be square to the bit. While the table could be adjusted side to side to account for tilting, the machine could not be adjusted front to back, where the problem was. This meant adding a sub-table to the drill press along with shims to get it level. This was a constant battle resulting in more wasted time checking for square than I care to admit. In the end, it wasn’t the issues with the table that led me to upgrade my tooling, but rather the lack of power from the drill press. It was simply unable to ream out the mortises, constantly stalling in the wood.
As a result, the chair sat in the lumber rack for a few months while I debated a solution (researched other drill presses). I settled on the 13 inch bench-top drill press from Shop Fox. It had more than enough power and is substantially beefier than the old tool. Once the new drill press arrived and was assembled, it made short work of all of the mortises.
A Brief Detour
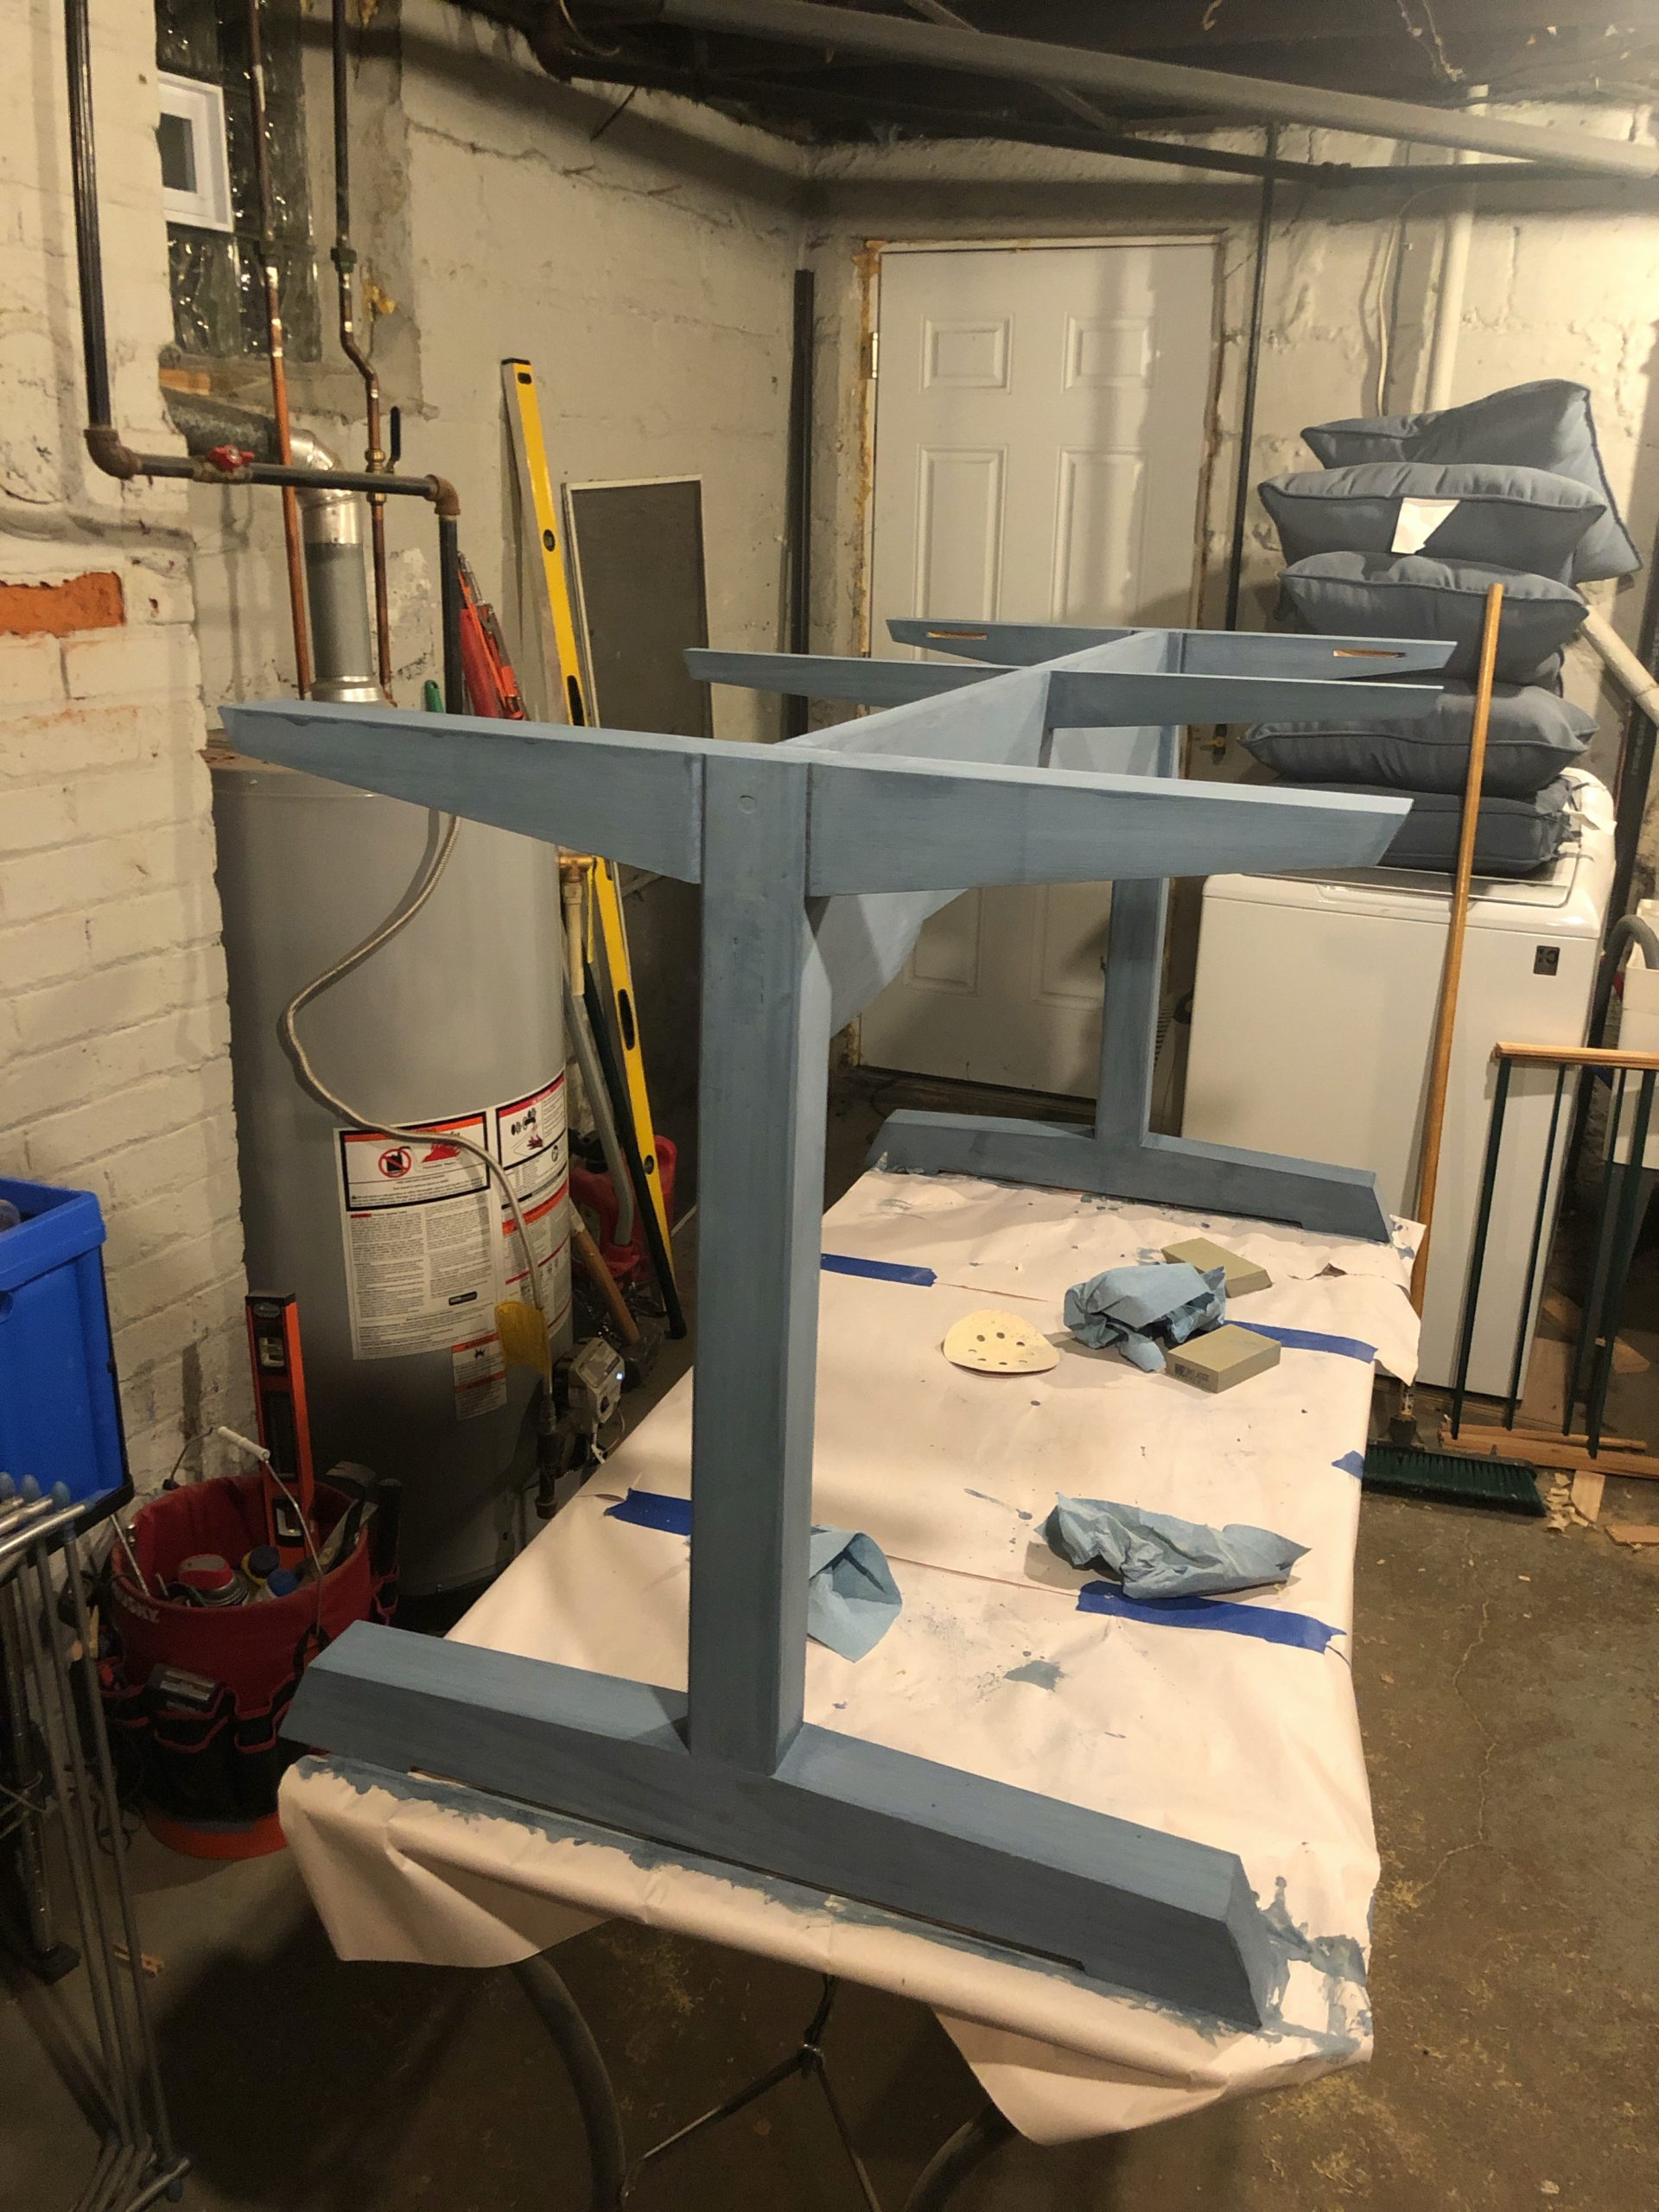
The chair sat in it’s partly-finished state from July until late October. During that time, a number of other projects took precedence over it, including instruments, our dining room table, and the plant stand. Additionally, I didn’t want to dive right into the leather work for this chair without a warm-up project. Looking to the book, Campaign Furniture, I decided to make a camp stool for an introduction to working with leather.
The stool is straight forward. It’s three straight-grained turned legs. The legs are joined together using a tri-bolt that allows the legs to pivot around a central point. A leather seat is then added to the top. The stool is light, portable, and durable. It also gave me the chance to cut, join, dye, and finish leather on a much smaller scale than the chair would require.


Finishing The Chair
The final work on the chair included finish-planing the legs, making the tapered pieces for the back, applying garnet shellac and wax, and attaching the hardware. I also decided to dye my own leather.
After starting the chair in June, I made a final push to complete the chair in November, just in time for the annual Western PA Woodworkers November Meeting and Show-and-Tell. The chair turned out well. While it was in parts from June to November, the actual time spent building the chair was less than a full day. The turnings are simple, the joinery is straight forward, and the leather work is fairly easy. I look forward to making more of these in the future.
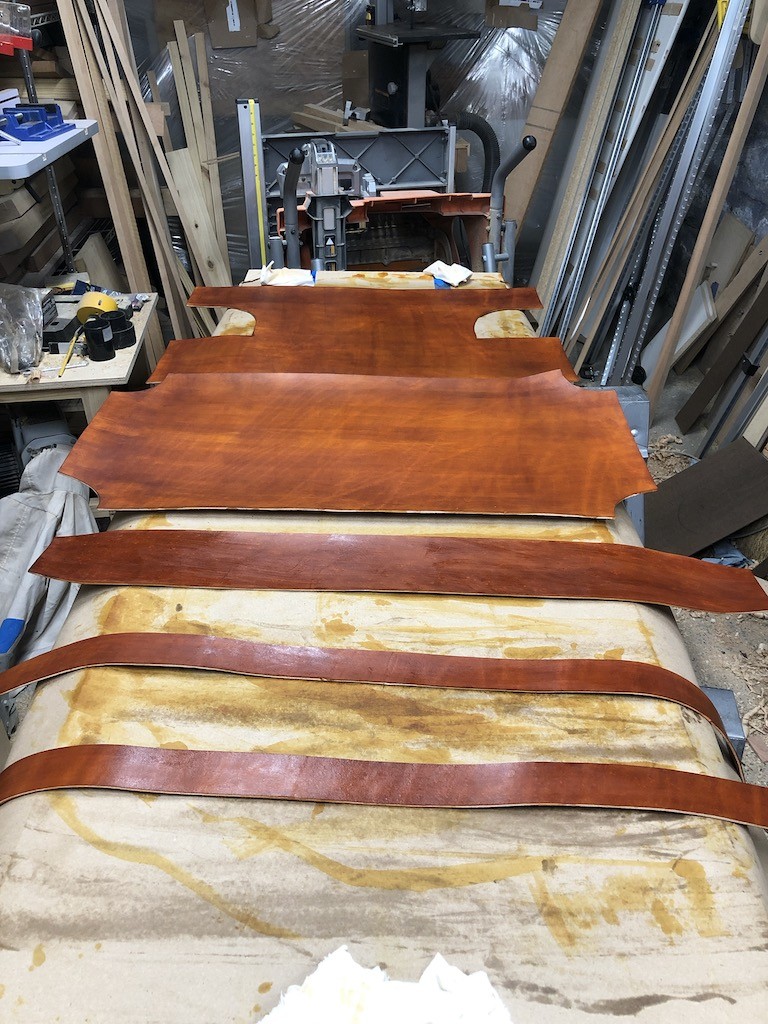
Dyed leather parts 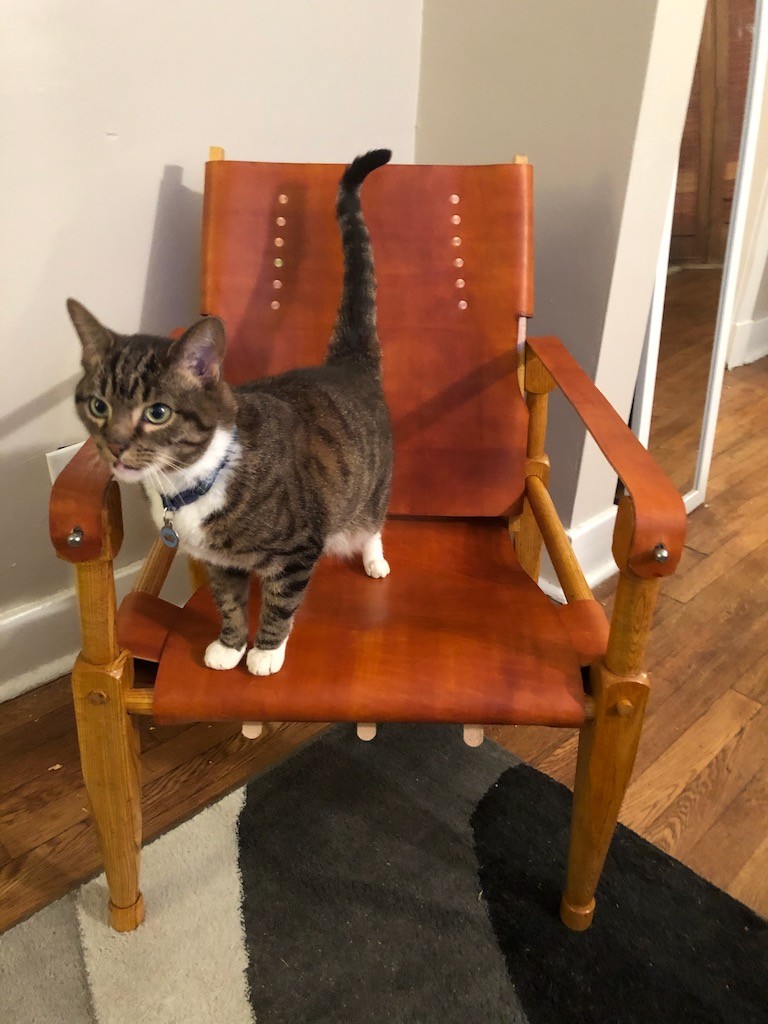
Finished and cat-approved chair