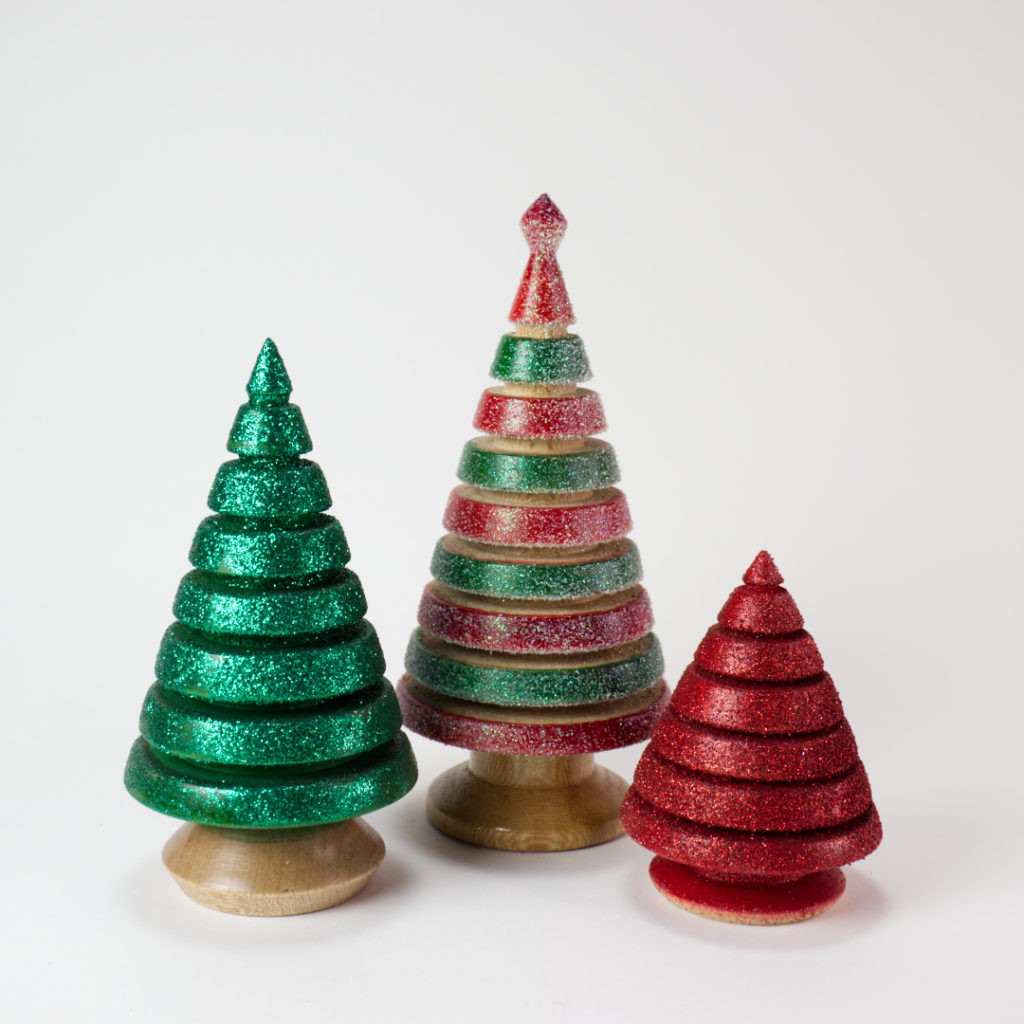
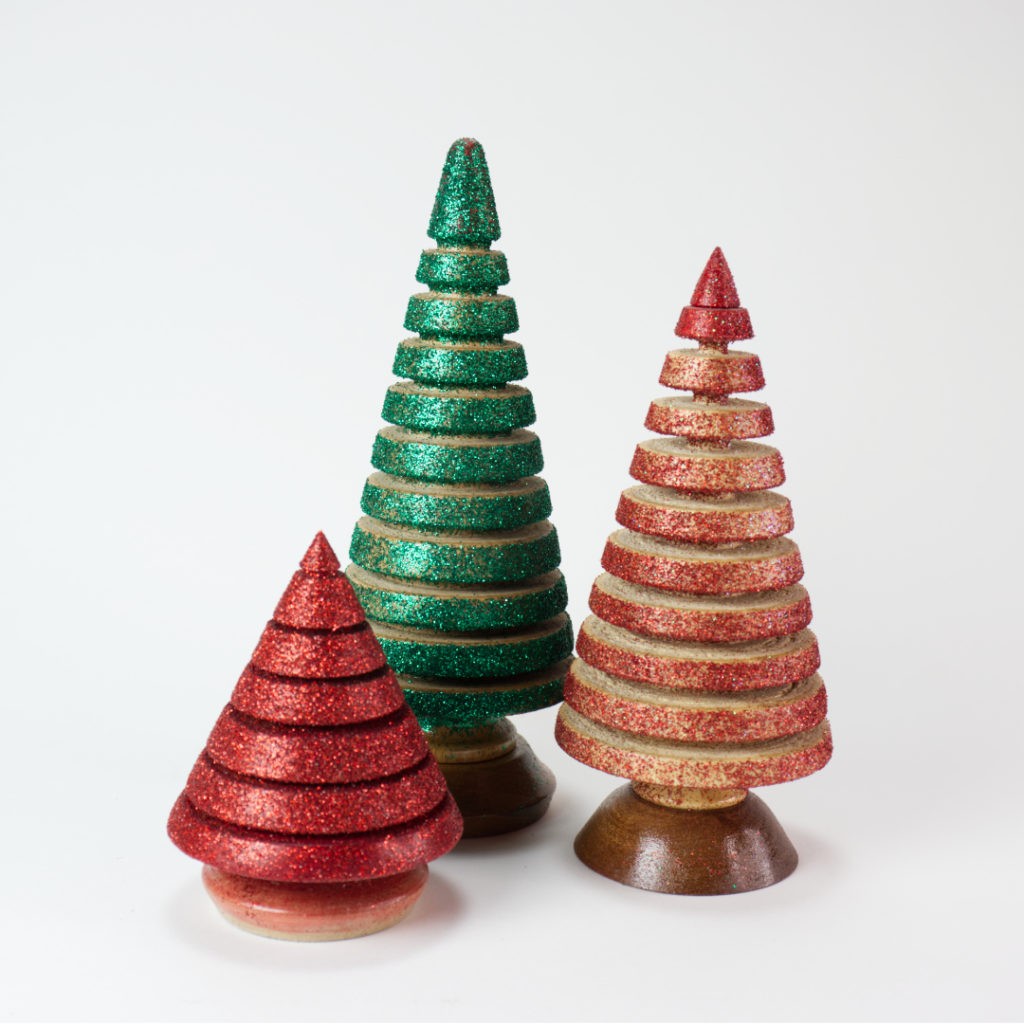
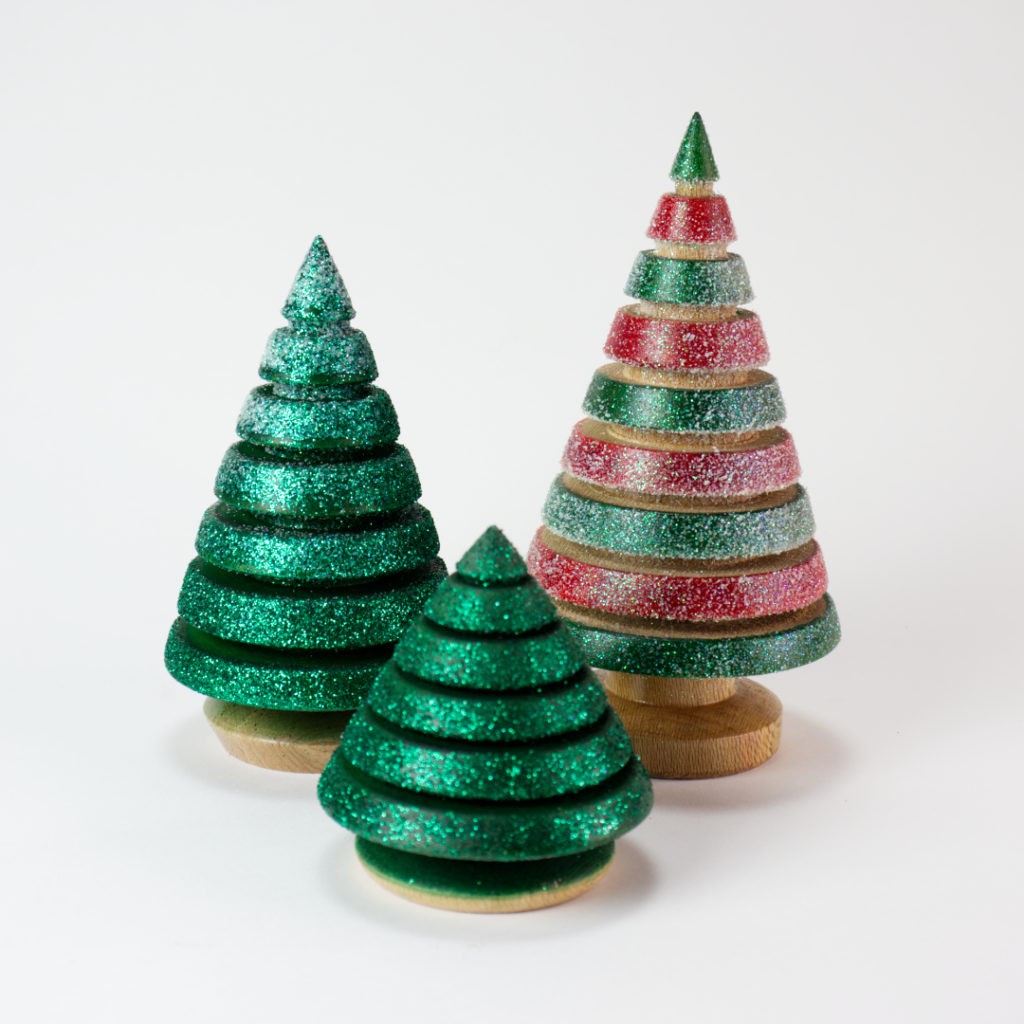
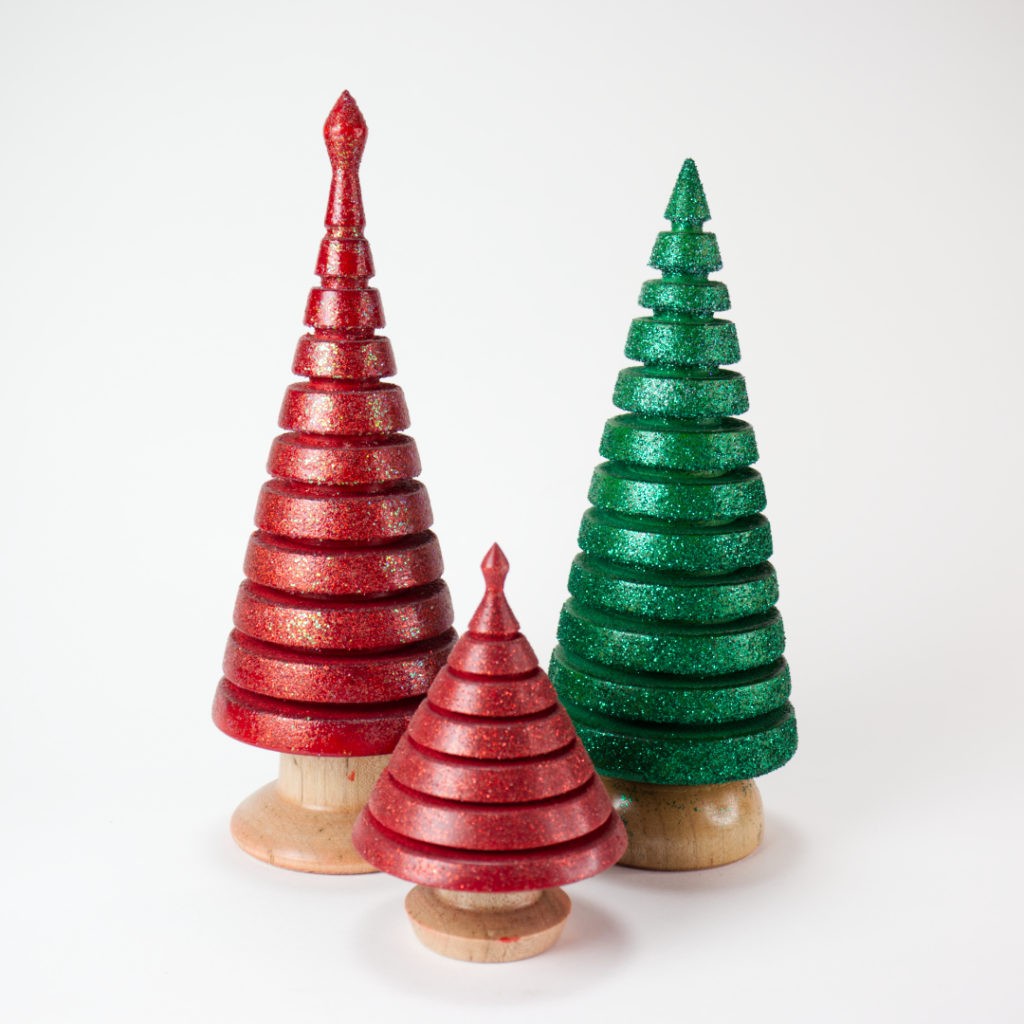
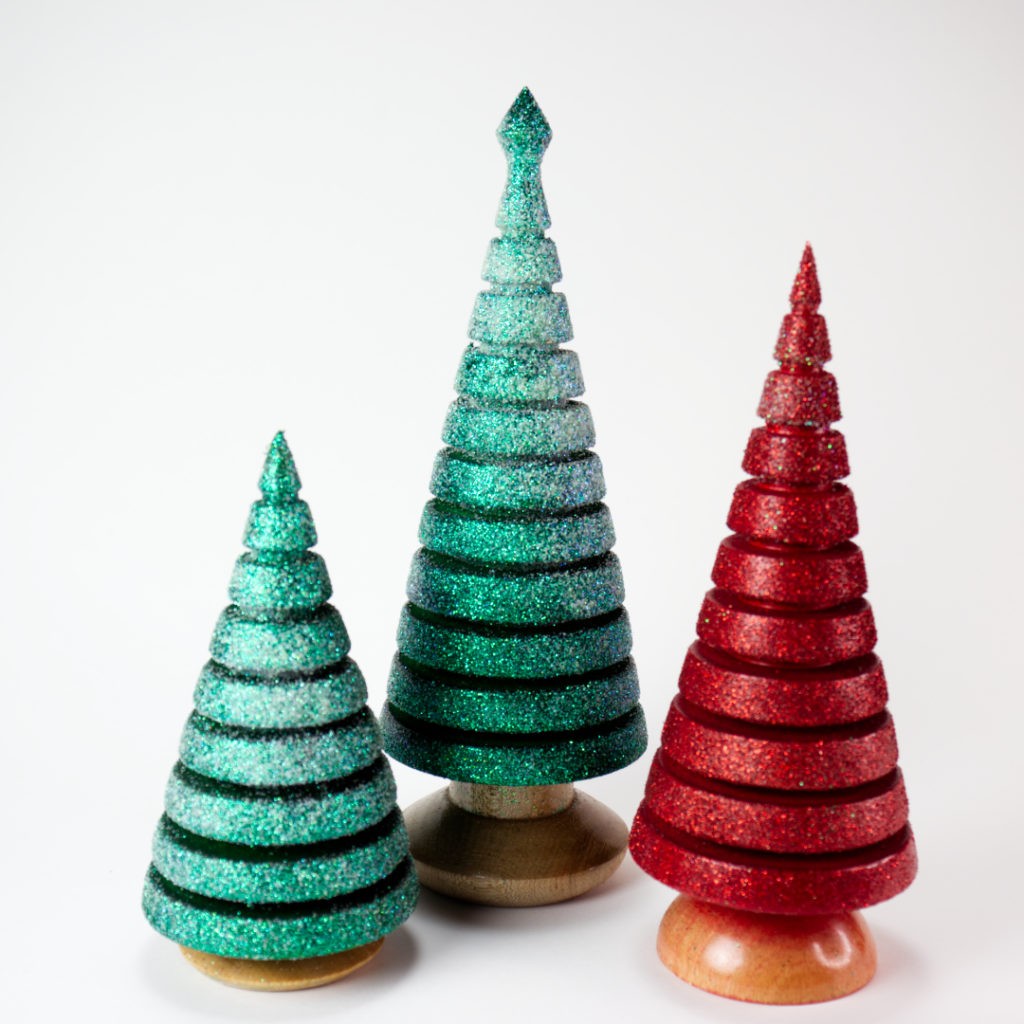
Christmas is upon us and the decorations are ramping up. This year I’ve put together a run of sparkling Christmas trees. They’ll be in the store soon and will be sold in groups of three as pictured.
Category: Turning
The Long and Short of the Year So Far
I looked at my queue of posts to write today and realized that I’ve been slacking since March. That is about the long and short of the year so far. With the pandemic shutting things down in March, followed by what has to be one of the hottest summers I can recall, I haven’t had a chance to do much woodworking this year.
But Mousie, thou art no thy-lane,
To a Mouse – Robert Burns
In proving foresight may be vain:
The best laid schemes o’ Mice an’ Men
Gang aft agley,
An’ lea’e us nought but grief an’ pain,
For promis’d joy!
To say that this is a disappointment is an understatement. I had arranged to teach a class on kalimba making this summer. Unfortunately, that was cancelled due to the pandemic. The plan for the year was also to do at least one show. It appears most craft shows have been cancelled or are severely cut down. Add to that some of the other goings on since March and there is just no way I’ll have enough stock to do a show this year. That, of course, is no excuse for not getting what items I do have in stock photographed and up on the website for sale.
While I was able to travel to The Woodwright’s School in June for classes with Roy Underhill and Cara O’Connell, the whole experience was a bit surreal. Roy and Cara did a great job given the circumstances. Ed Lebetkin’s tool store, located above the school, was open to those of us in classes. This place is like a candy store for woodworking tools. I ended up leaving with a new rip panel saw, a 6 inch Starrett combination square, and a small incannel gouge. On the way down to Pittsboro, I stopped in Thurmond, WV, a ghost town in the bottom of the New River Gorge. The thing is, most of the places I drove through felt a bit like Thurmond – eery and abandoned. I stayed at the Celebrity Dairy, bed & breakfast and working goat farm, located between Siler City and Pittsboro. Fleming and Brit were wonderful hosts.
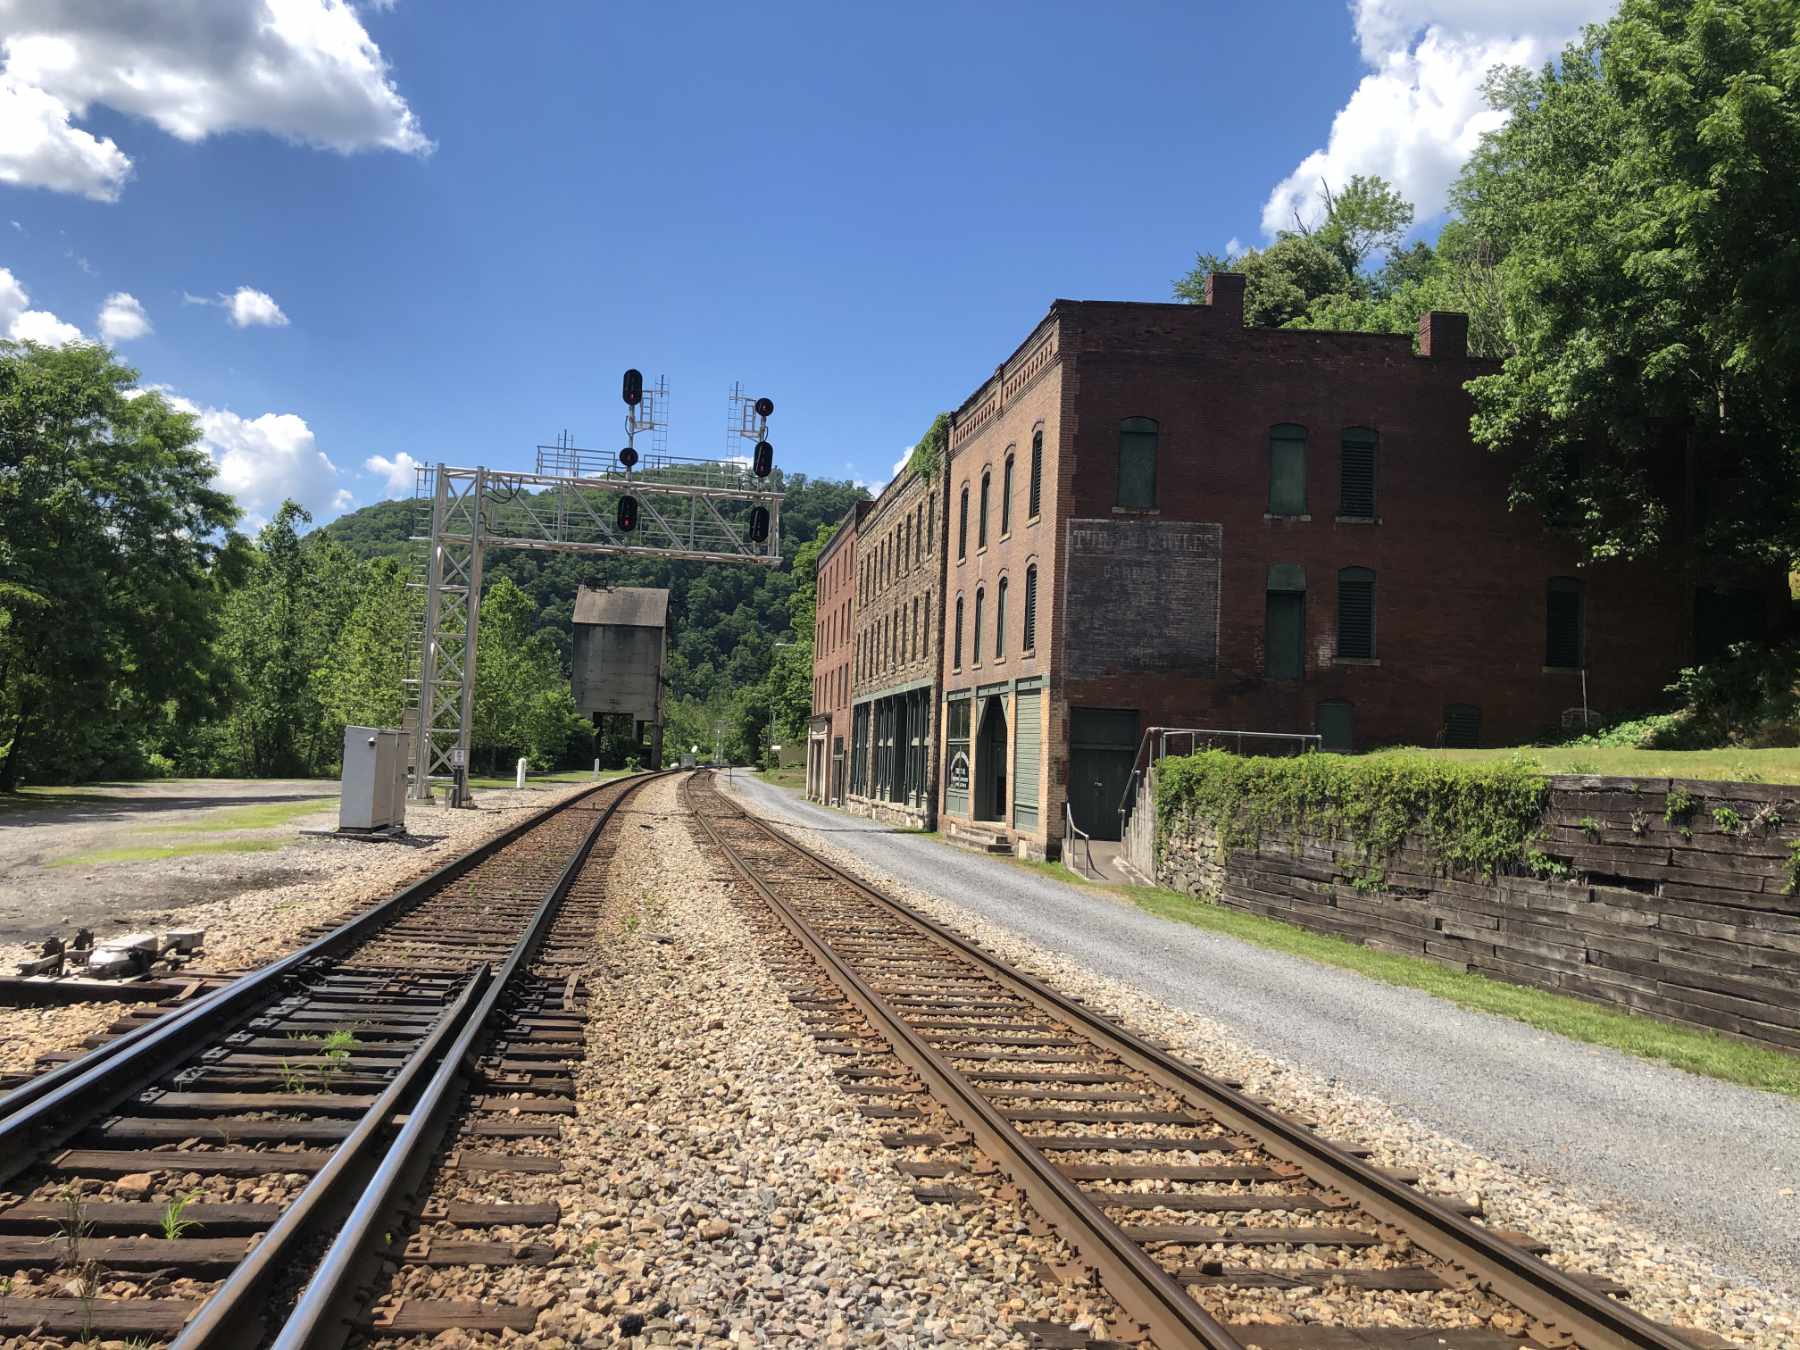
Main Street, Thurmond, WV 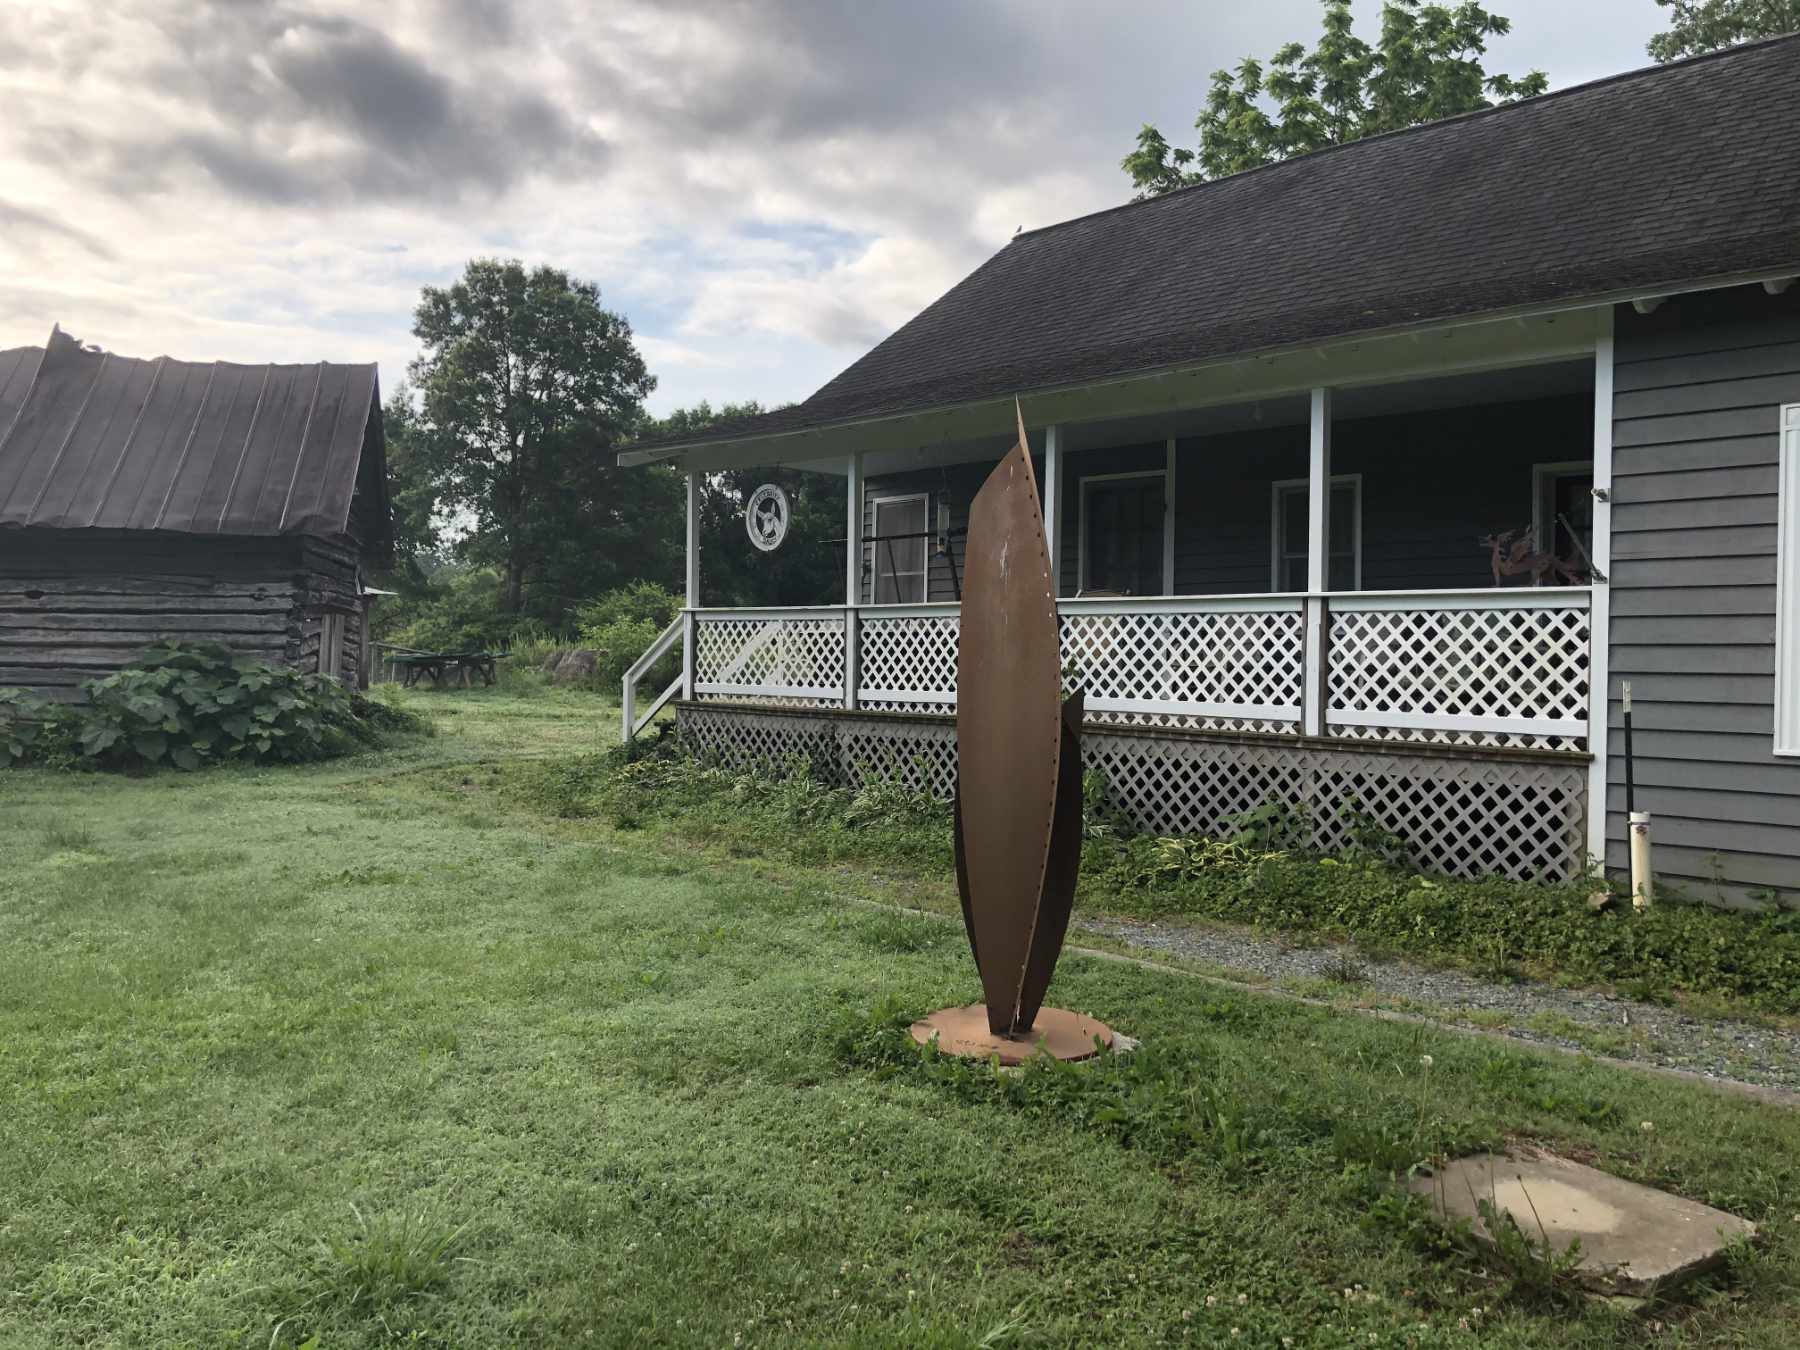
The Inn at Celebrity Dairy 
Metal sculpture and other art can be found throughout the grounds. 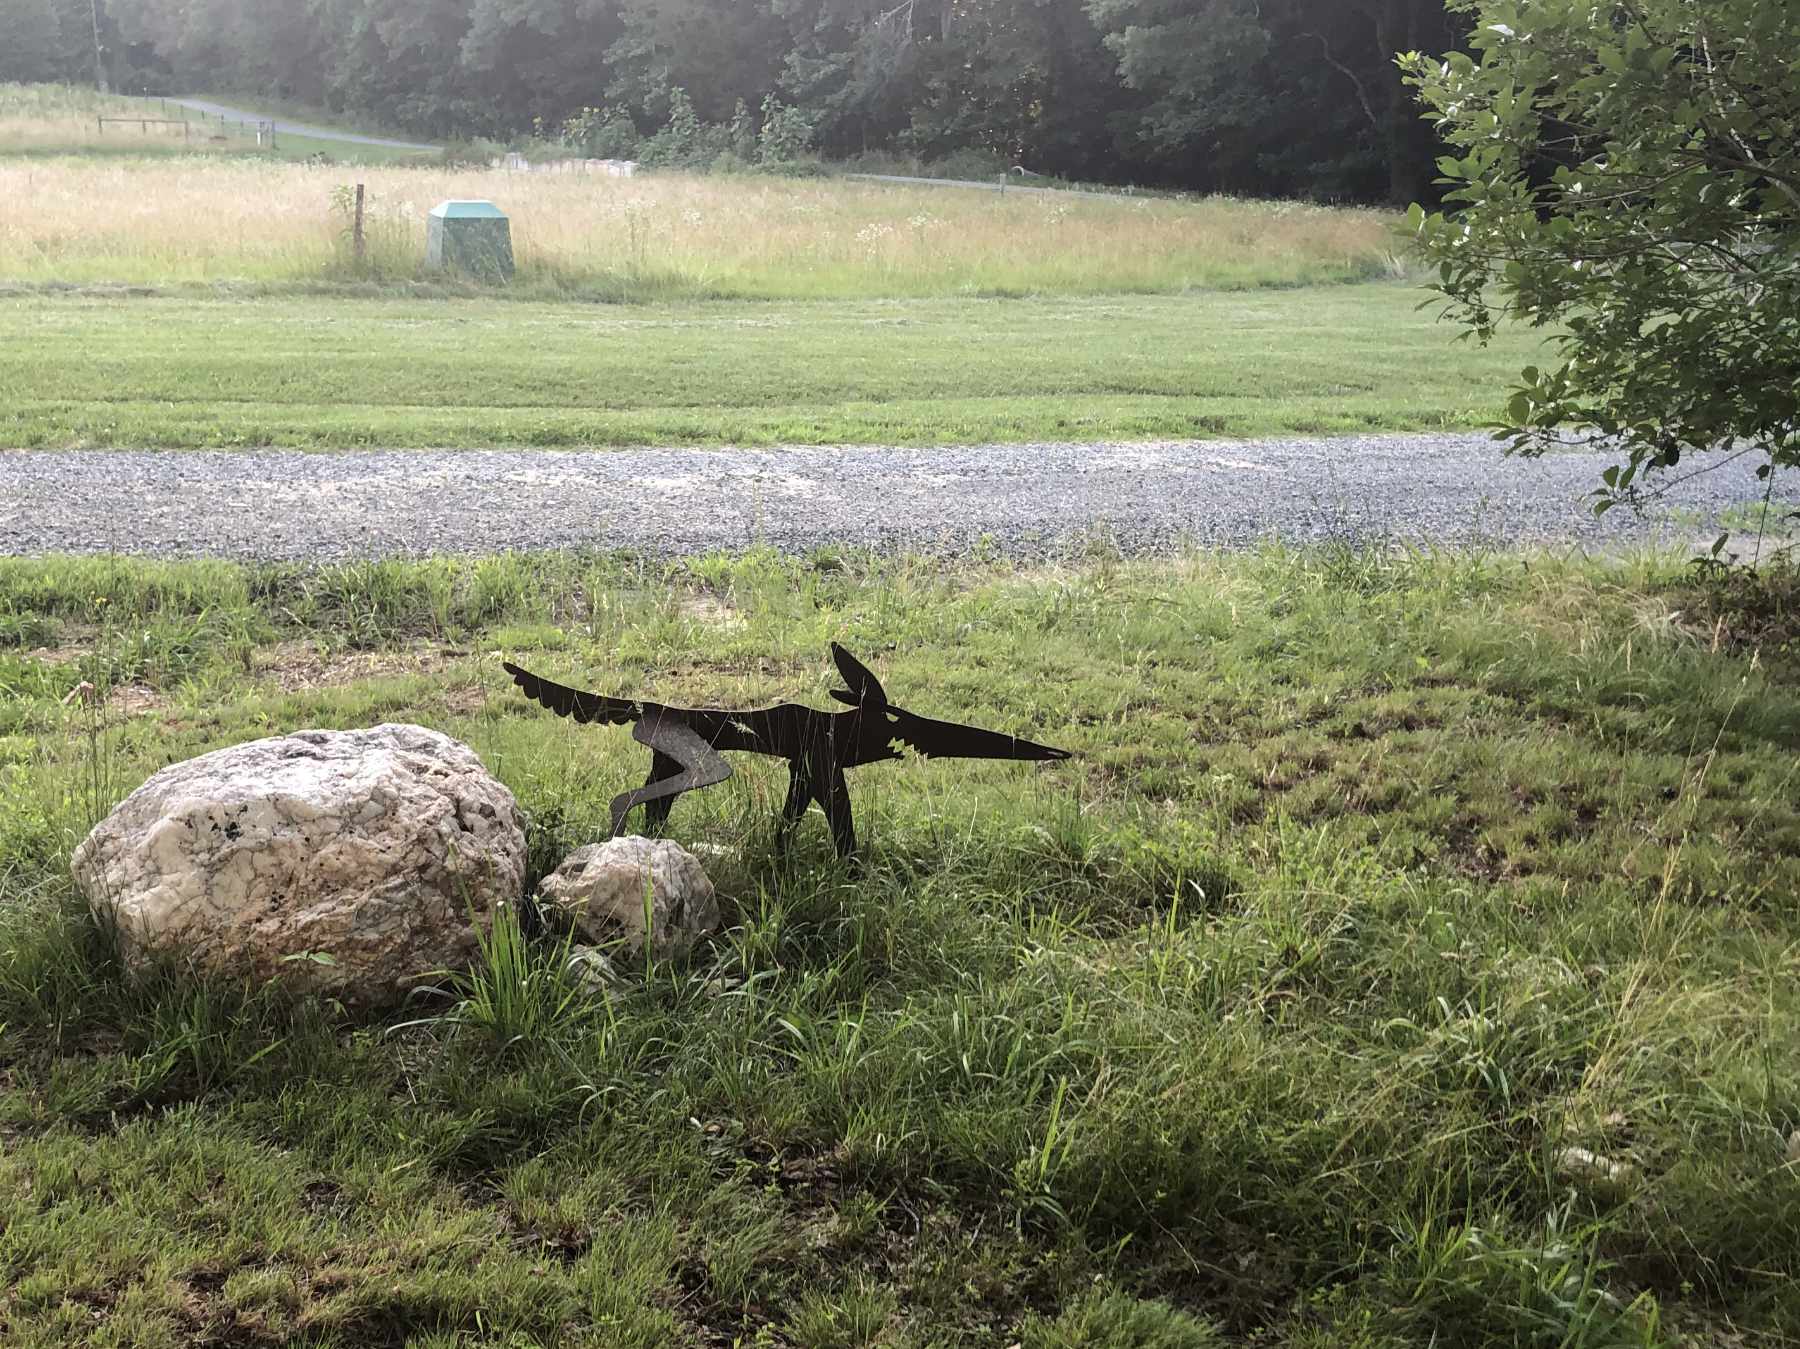
Looking toward the duck pond. 
Interesting pattern in the building 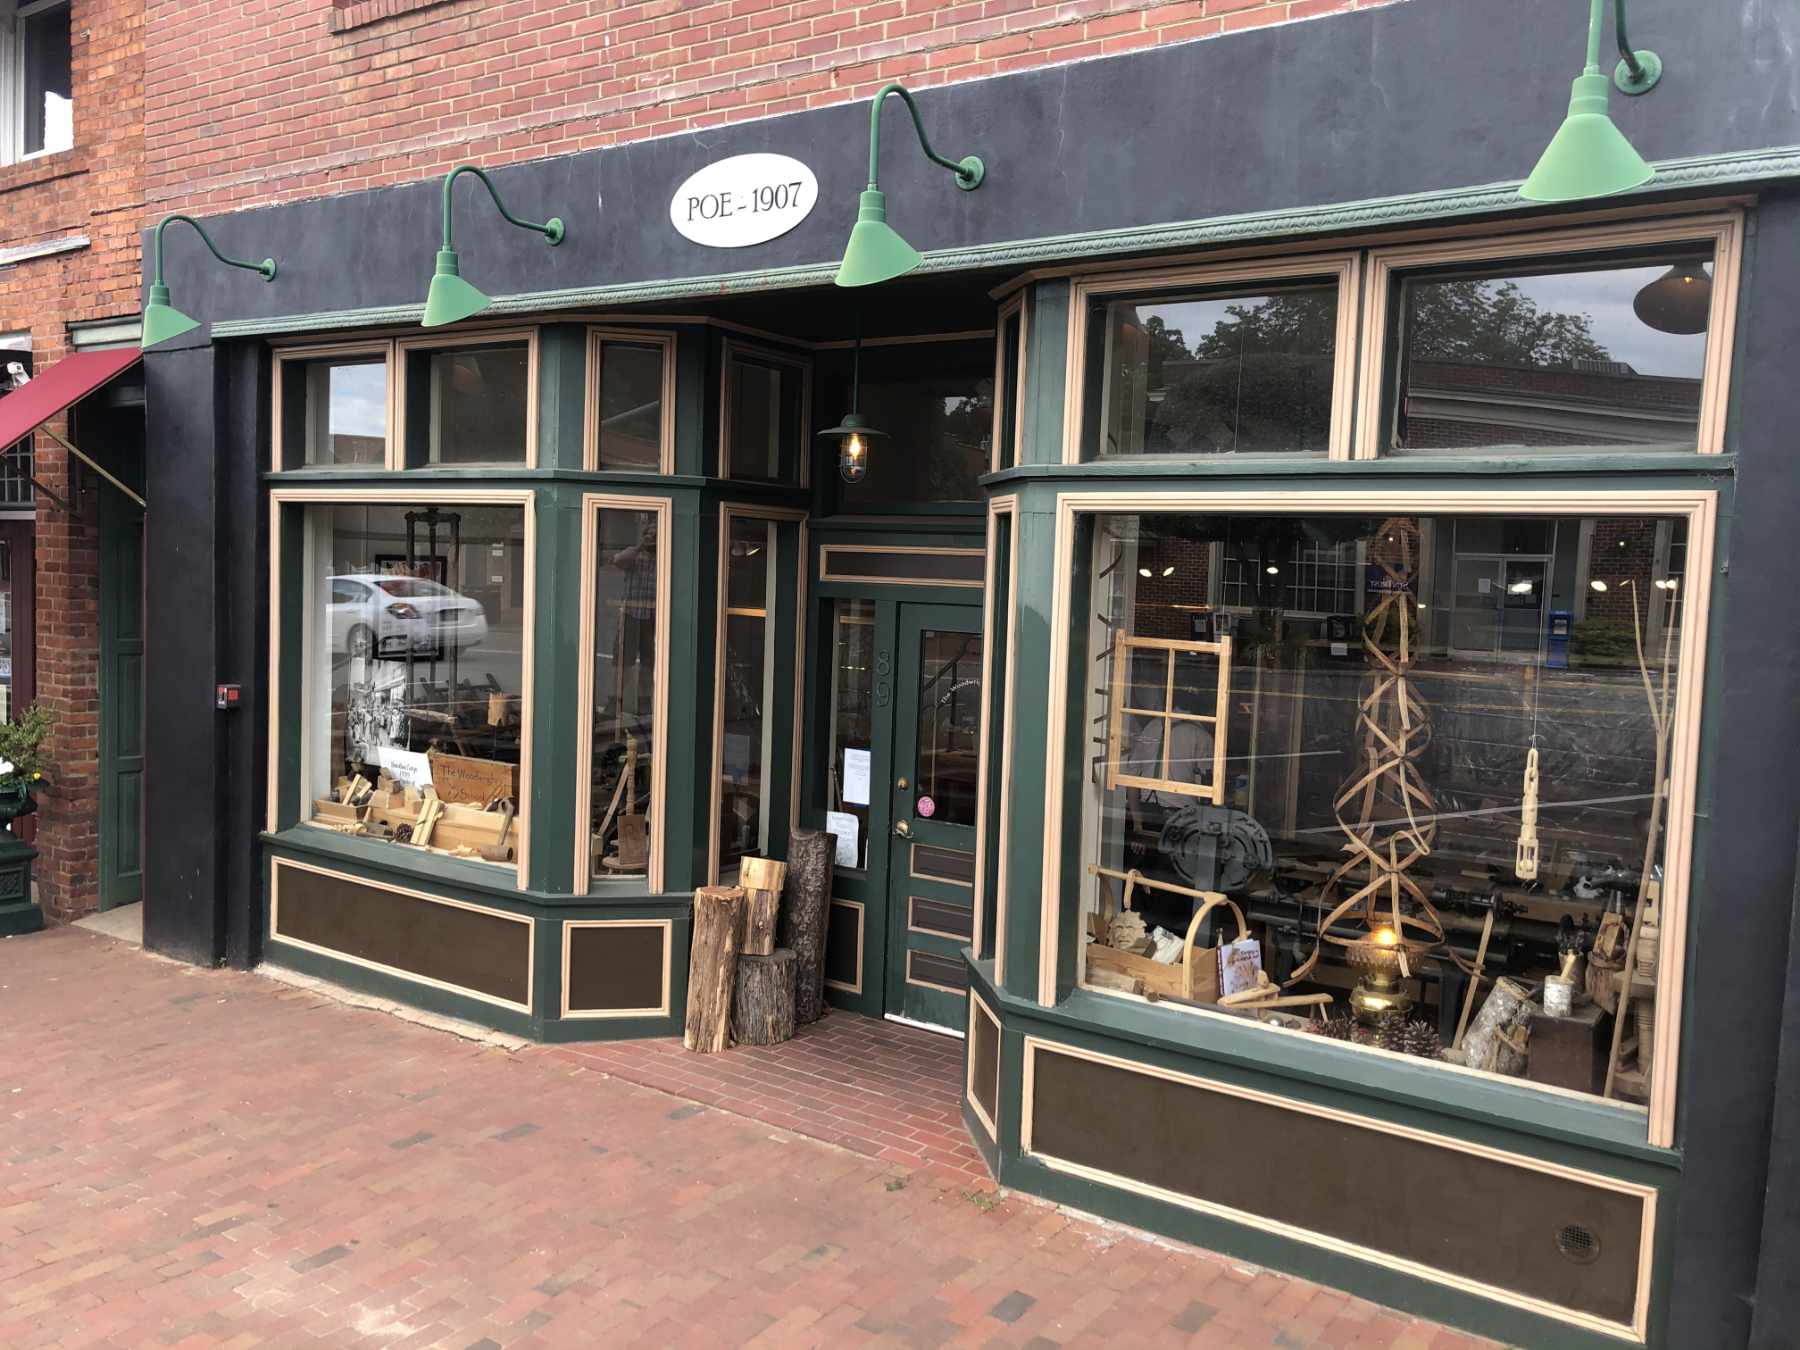
The Woodwright’s School 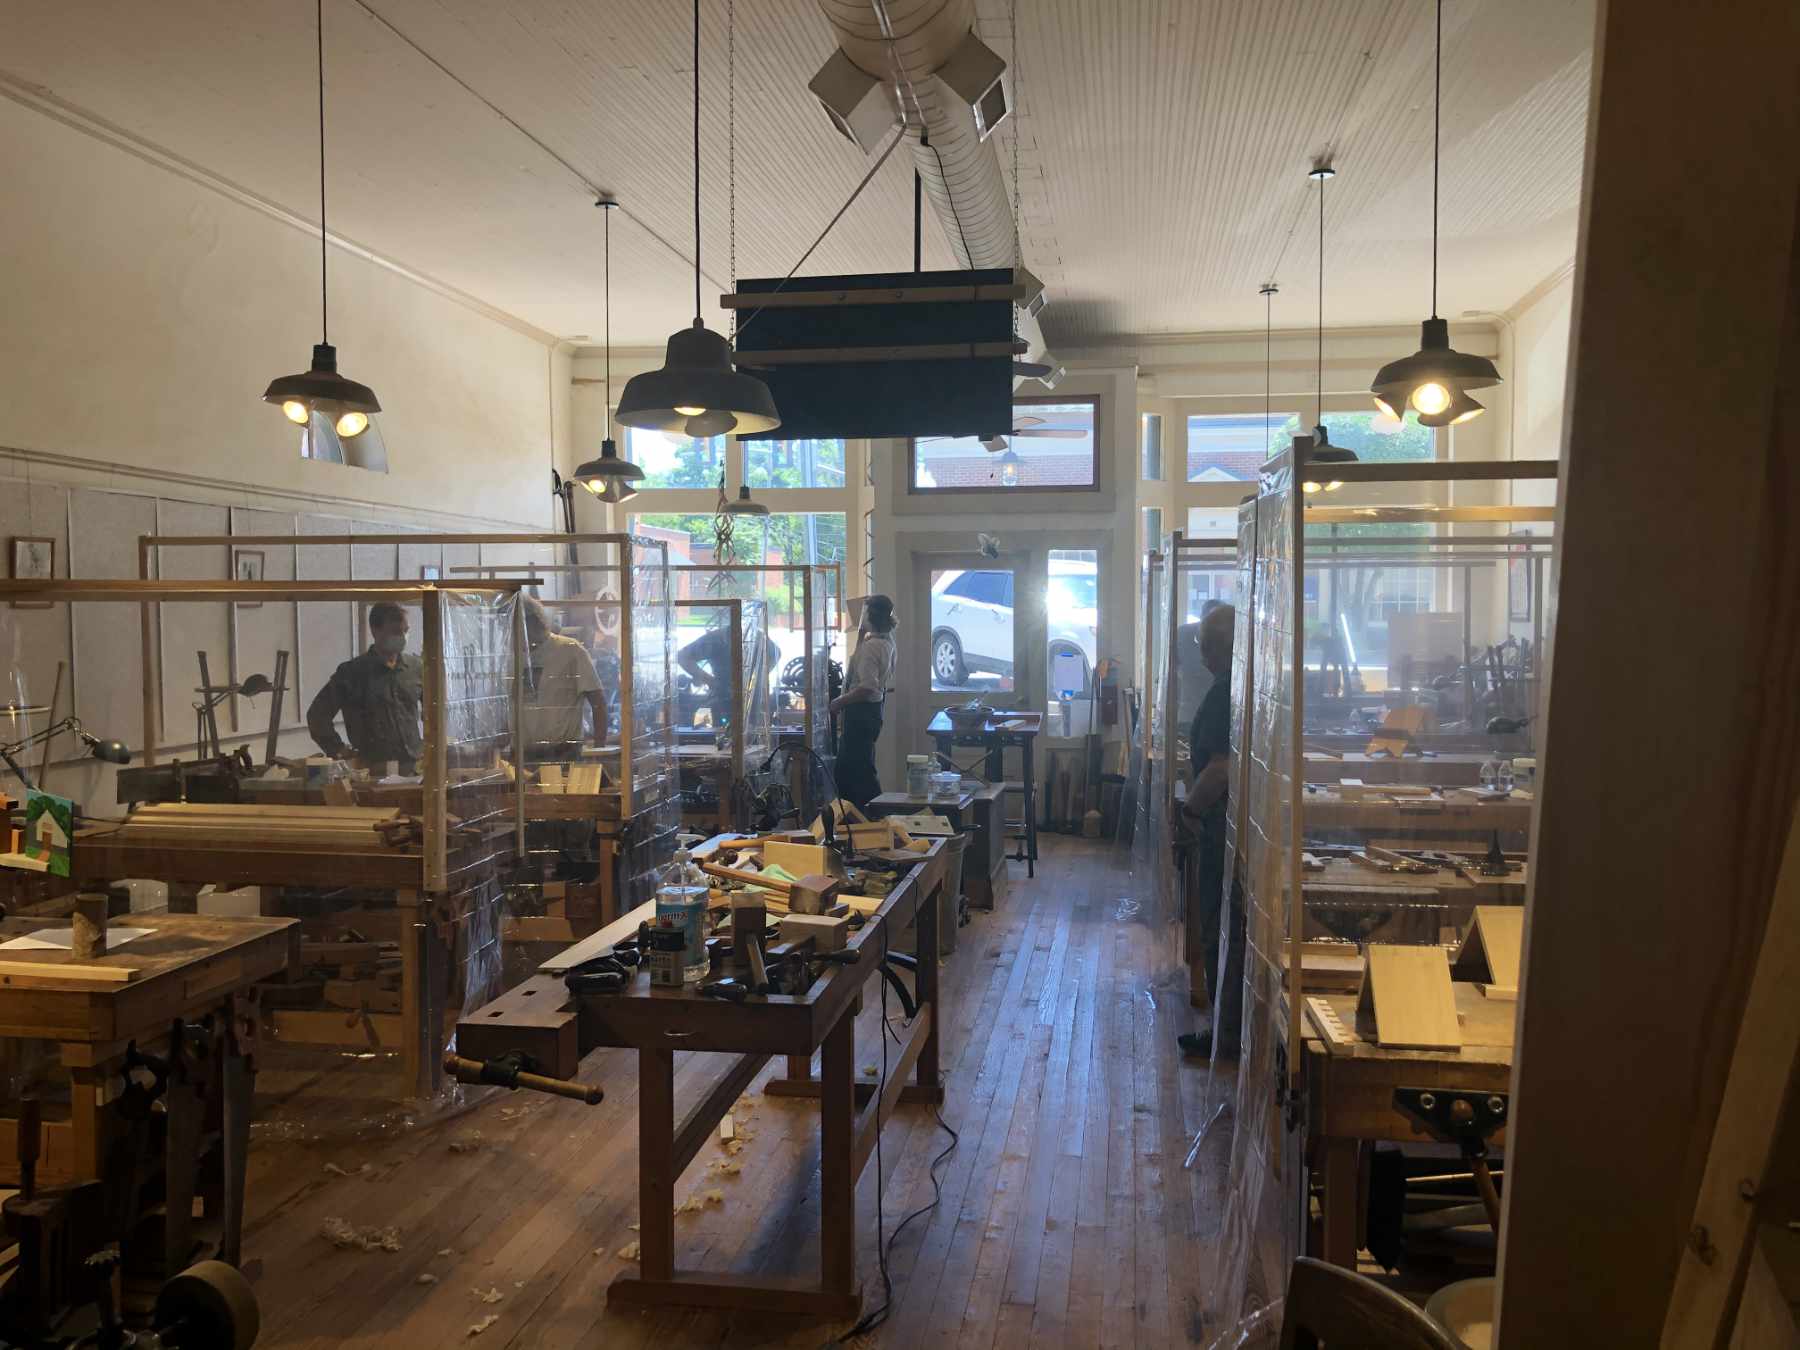
Inside the bench room 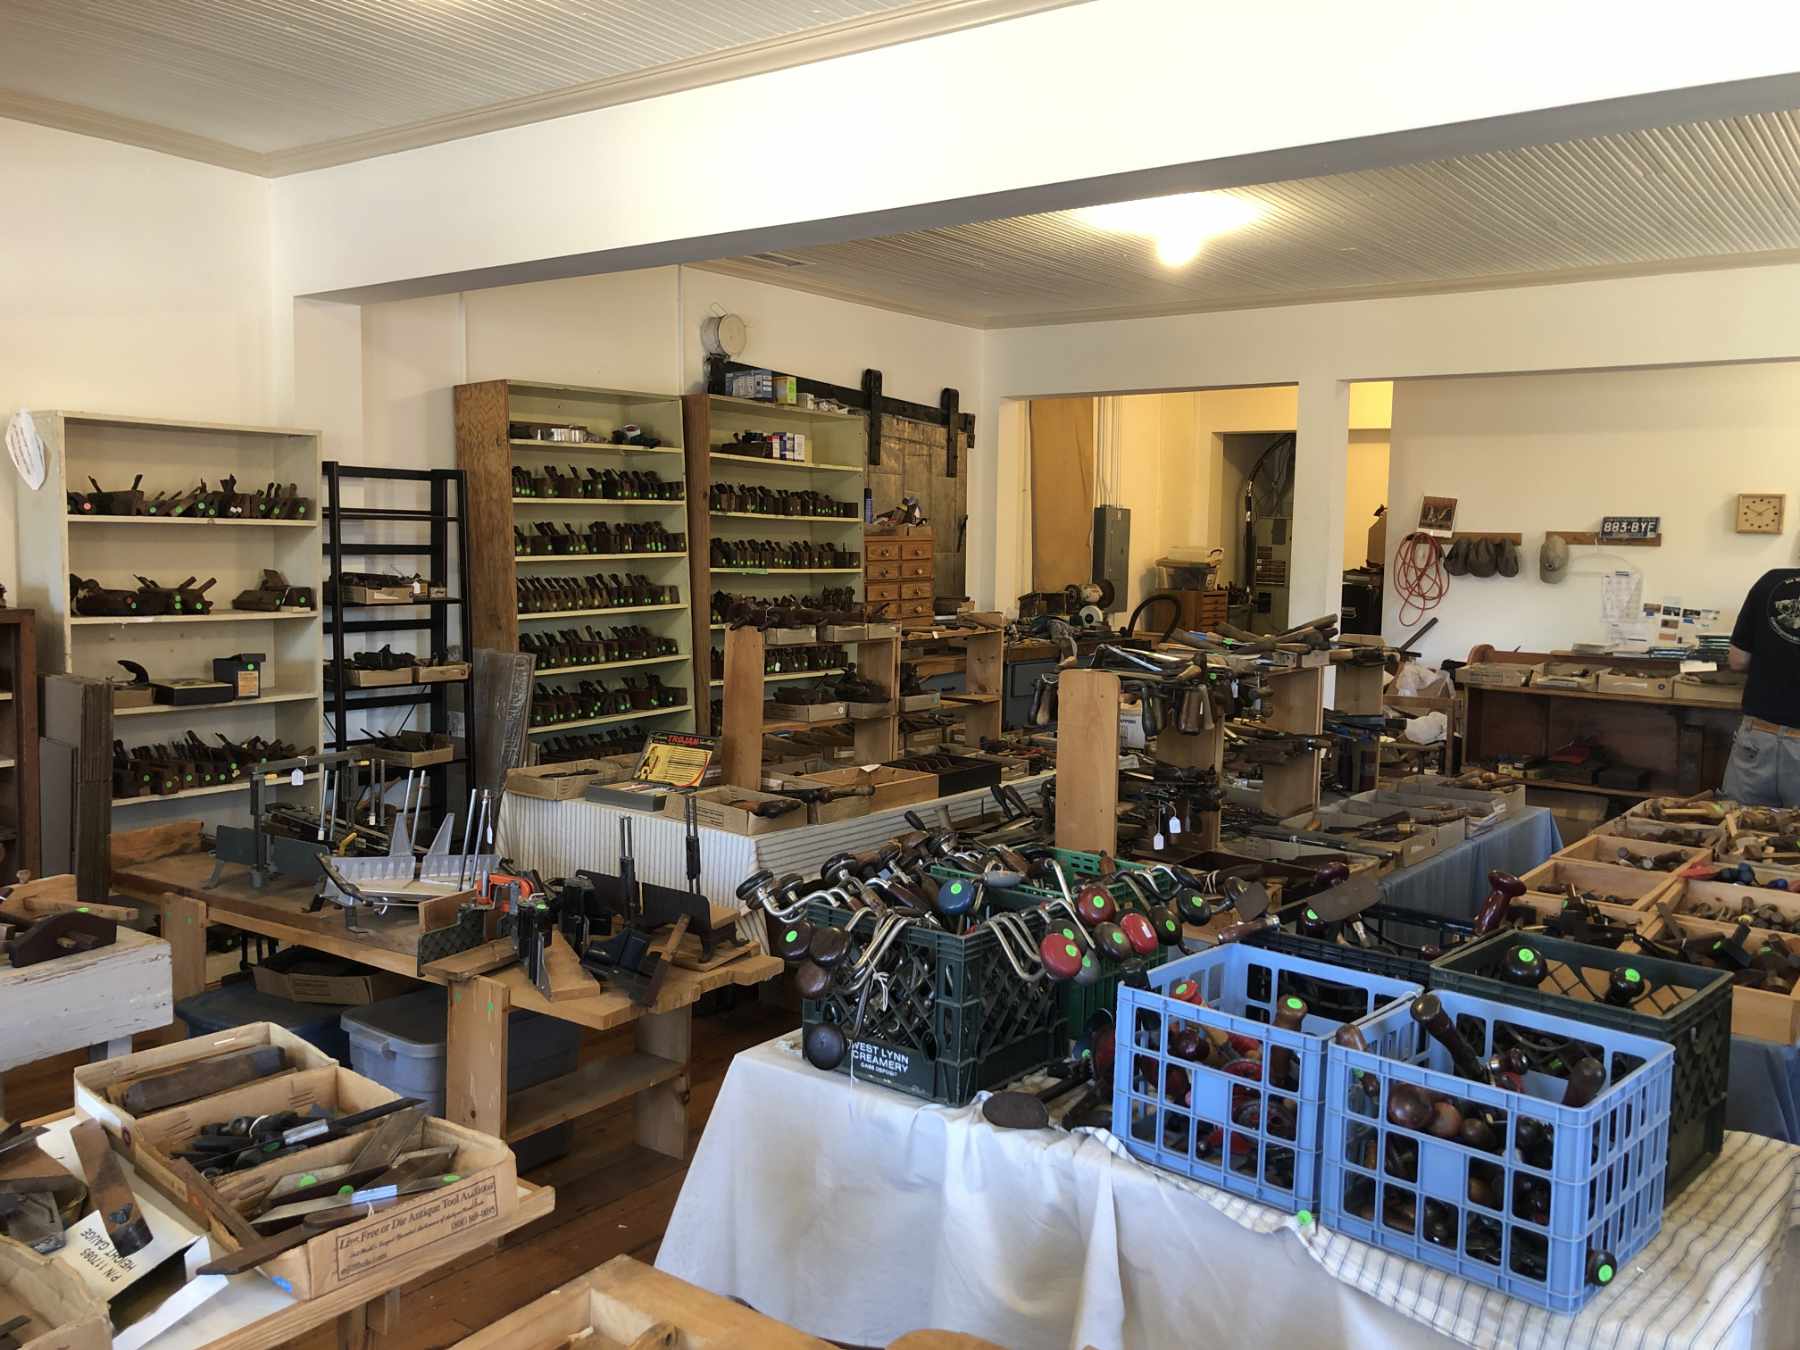
Ed’s Tool Store
As if the heat this summer weren’t enough to keep me out of the workshop, we also embarked on Operation Kitten Fixin’ in May/June. The feral colony in our back yard produced four kittens this year. The process of trapping them, getting them fixed, and in the case of three of the kittens, socializing them, took a lot of time (and I wasn’t even the person who was doing most of the work!). I’m happy to report that three of the four kittens are now in their forever homes. One of them was captured a bit too late for socialization. The adult cats (minus one who has an appointment coming up) in the colony have also been trapped and fixed. With luck, no more kittens for at least a few years.
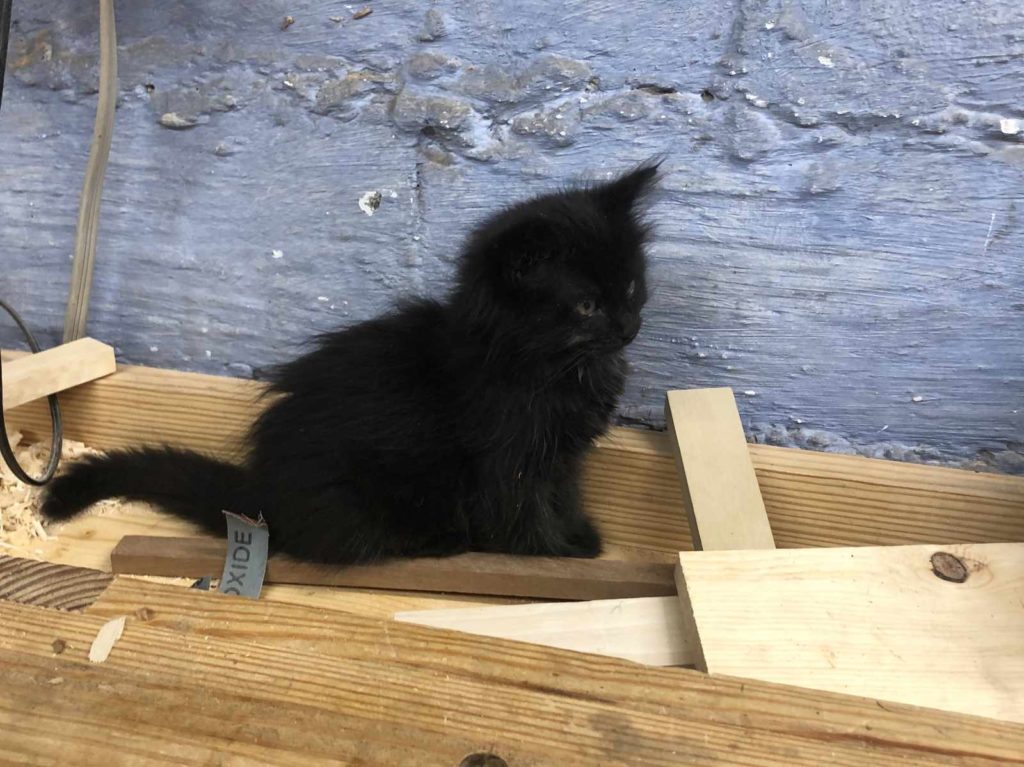
Sootball 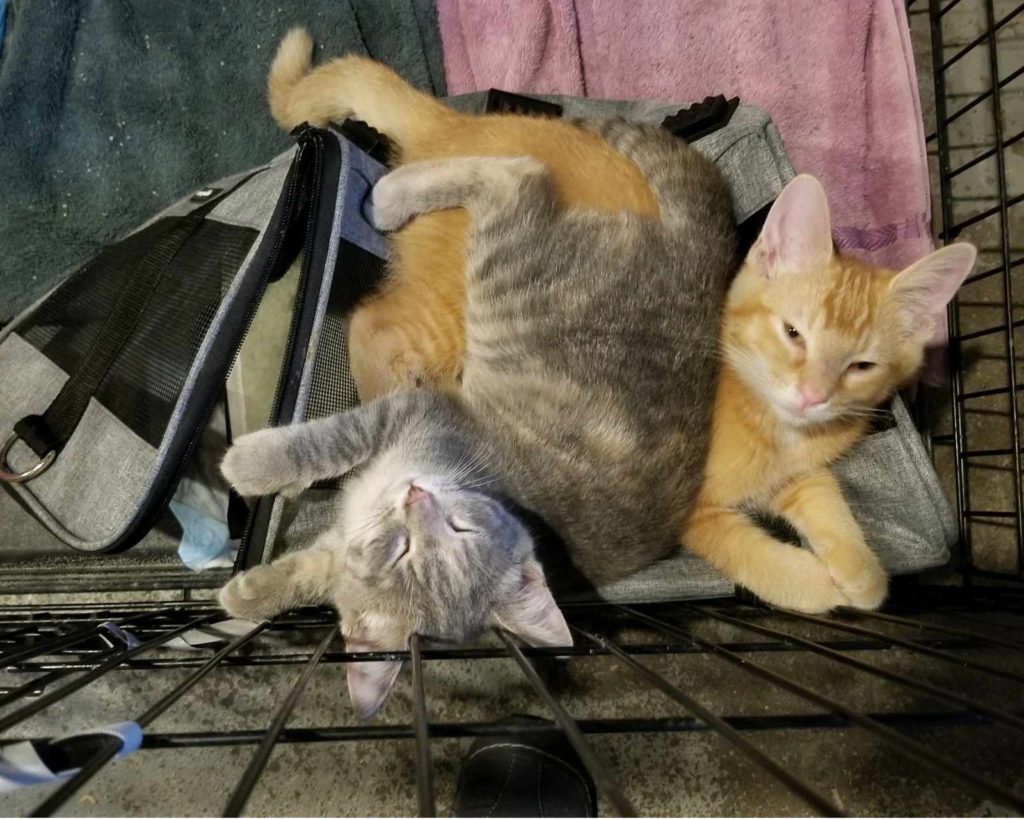
Comet (Orange) and Bernie
I have been able to build a few small projects on the lathe, including some coasters, a ring box, and a small vase. I haven’t taken photos of the coasters as I never applied finish to them. They are doing duty right now, but they really should have received a coat some sort of finish. I have some ideas for doing sets of these, including adding colored resin, but that’ll wait for another day.
The ring box was made during a period of shop cleaning and organizing. I’d started on the box at some point at least a year ago and never completed it. I’m still in the process of figuring out the best way to handle the interior foam/ring holding.
The vase was a bit of an experiment. I had a free day where the temperature in the shop wasn’t atrocious. I also had a scrap offcut of some ash that I had glued up (I can’t recall the original piece). It was a nice enough first go at the form. I painted the base with an oil paint mixed with boiled linseed oil. Danish oil was used for the top finish. The phrase “watching paint dry” clearly refers to oil, not modern latex, paint. Either way, it turned out well and is currently living on our front porch.
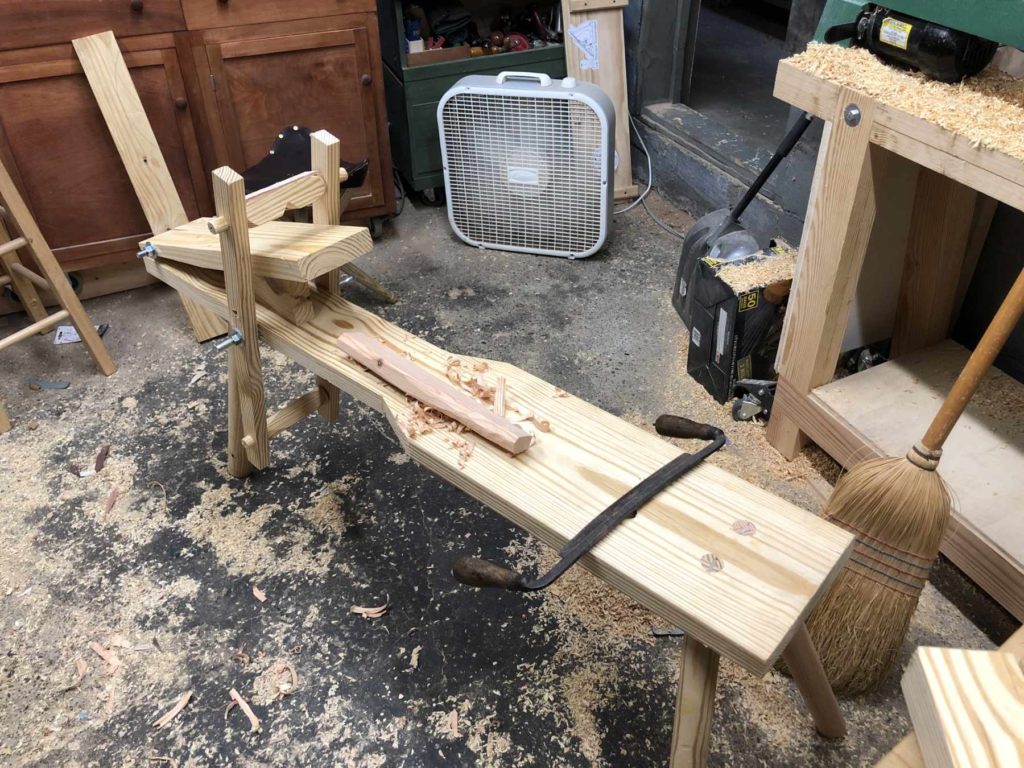
After my return from Pittsboro, and having taken a class on Slyod and green woodworking, I was inspired to build a shaving horse. This based on plans I found from Peter Follansbee, though I used only three legs instead of four.
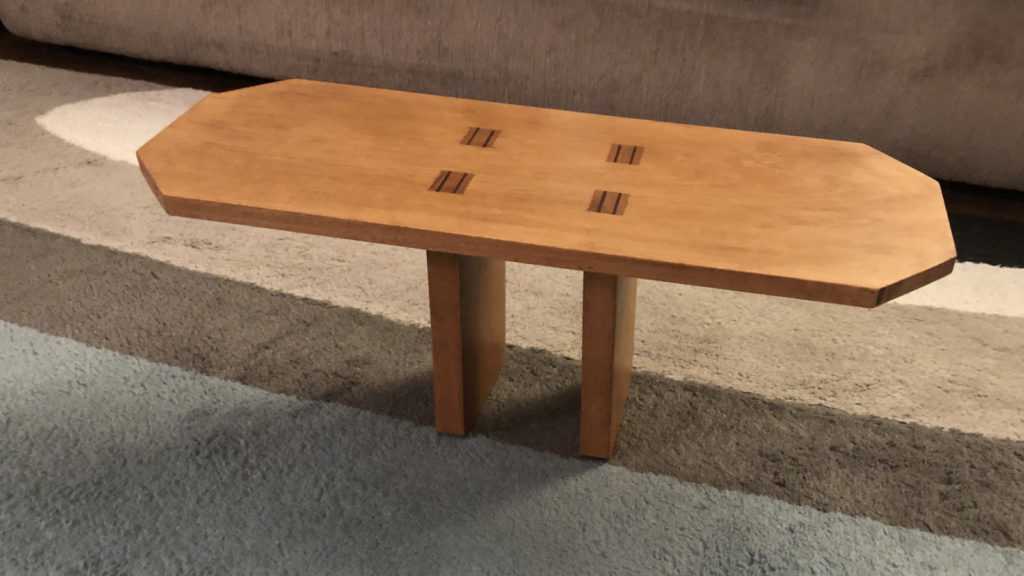
In addition, I designed and build a seiza bench. The bench is about 7 inches off the ground and angled forward slightly. The bench is made from beech with sapele wedges, finished with black wax and danish oil. The seat is an oblong octagon, with an underbevel to reduce its visual weight. The legs are set into shallow mortises that house the full width of the leg. Each leg is further secured with double-wedged double tenons. The shaping of the seat, as well as adjustments to the angle of the legs was a fun exercise. I have some beech left over and may make a small table to match.
So that’s about the long and short of Wave I of the 2020 pandemic. With luck, the fall and winter will be much more productive and much less devastating for the world.
Roorkee Chair
When I first saw the Roorkee Chair in an episode of the Woodwright’s Shop, I knew it was a project that would go on the build list. I later bought Chris Schwarz’ book Campaign Furniture and read through it several times. I really can’t recommend the book enough. It explores a forgotten style whose influence can be found throughout contemporary furniture. I have plans to build several pieces in the style, including a campaign chest/secretary.
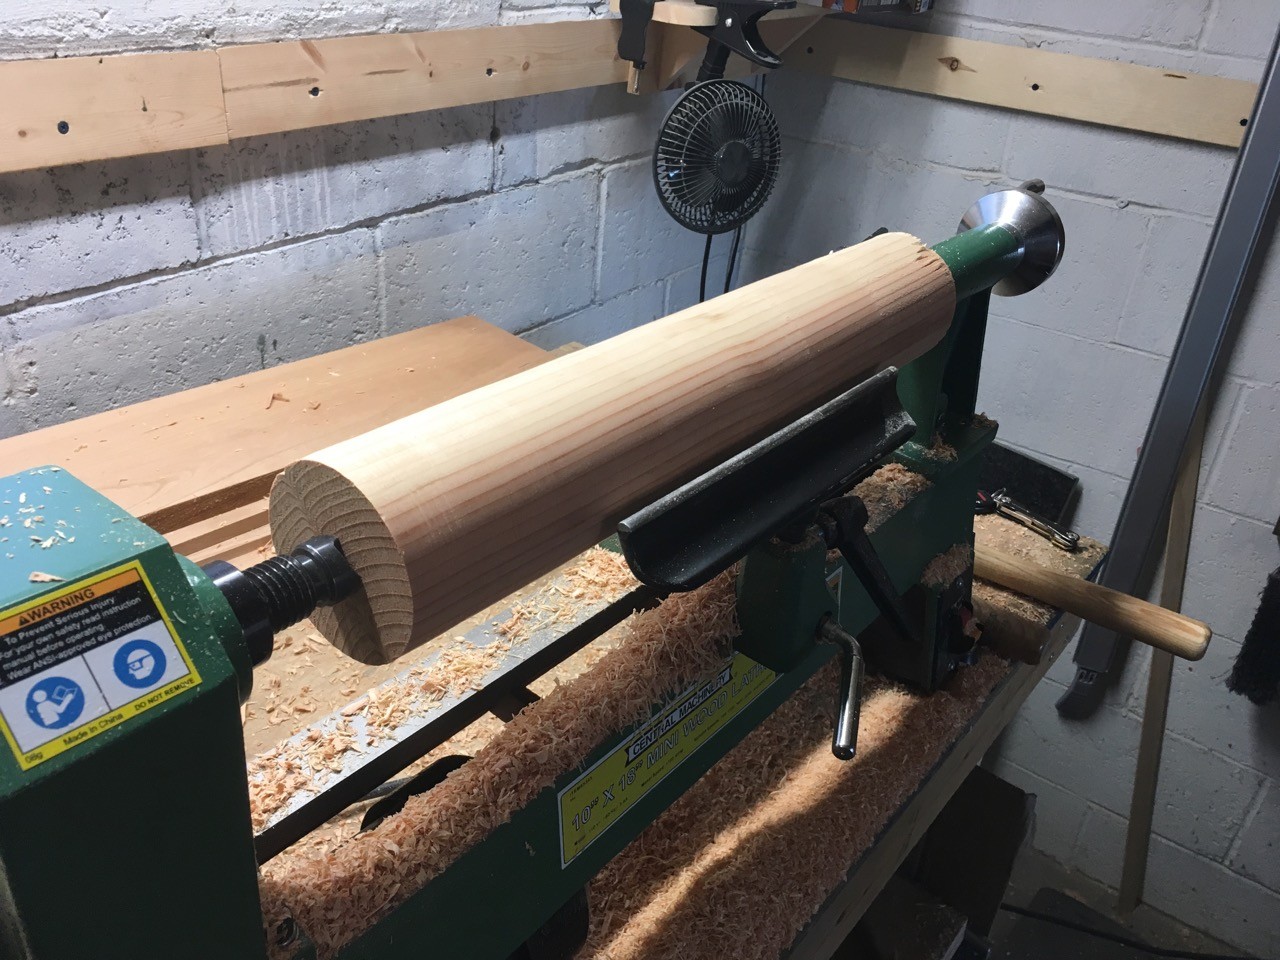
I decided to make the chair the first project to build out of the book. I enjoy working at the lathe. The piece requires minimal lumber. The joinery of the chair, conical mortise and tenon, would be easy to execute. The piece is also very practical. It would also give me a chance to work with leather for the first time. The only hold up was that my lathe could turn only 18 inches between centers.
In January of this year, I purchased a bed extension for the lathe. The bed extension added about 20 inches of distance between centers, easily enough for this chair.
Finding Lumber
I thought about a number of different wood species for the chair. I ended up settling on using ash. The species is strong and easy to work. Finding good lumber sources is always an adventure. As this work required working with 8/4 (2 inch thick) material, I wanted to be careful on the source of the wood. I haven’t had the best luck in the past with material that thick. Watching a piece of soft maple turn into a pretzel when cut in the past has turned me off of one lumber yard. For this project, I reached out to a local sawyer, Jones Saw Mill. The selection at the saw mill was fantastic. After working with the material, including having it sit and remain stable for several months after initially milling it, proved that this will be a good source in the future.
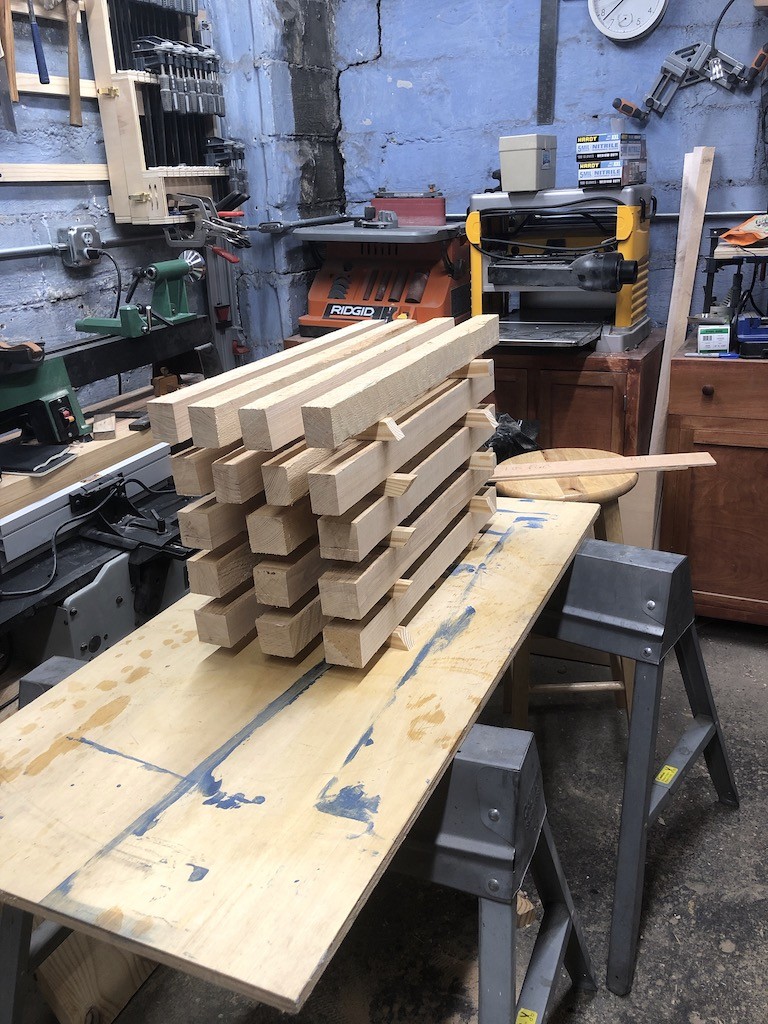
I brought the material home and proceeded to the band saw to rip it to rough size. The importance of this step can’t be overstated. First, this allowed me to help speed process of acclimating the wood to my workshop by exposing more surfaces to air. Second, the parts in this chair, specifically the four stretchers, need to be made out of dead-straight grain. If these aren’t made from straight grain, there is a larger chance that they will break under the weight of a person sitting in the chair.
After the parts were cut down to rough length, width, and thickness, they were placed on stickers (strips of wood) and stacked to allow them to further dry and acclimate to the shop.
Turning the Parts
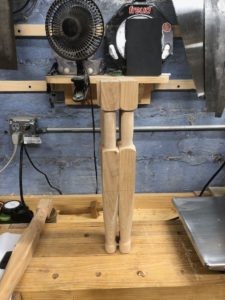
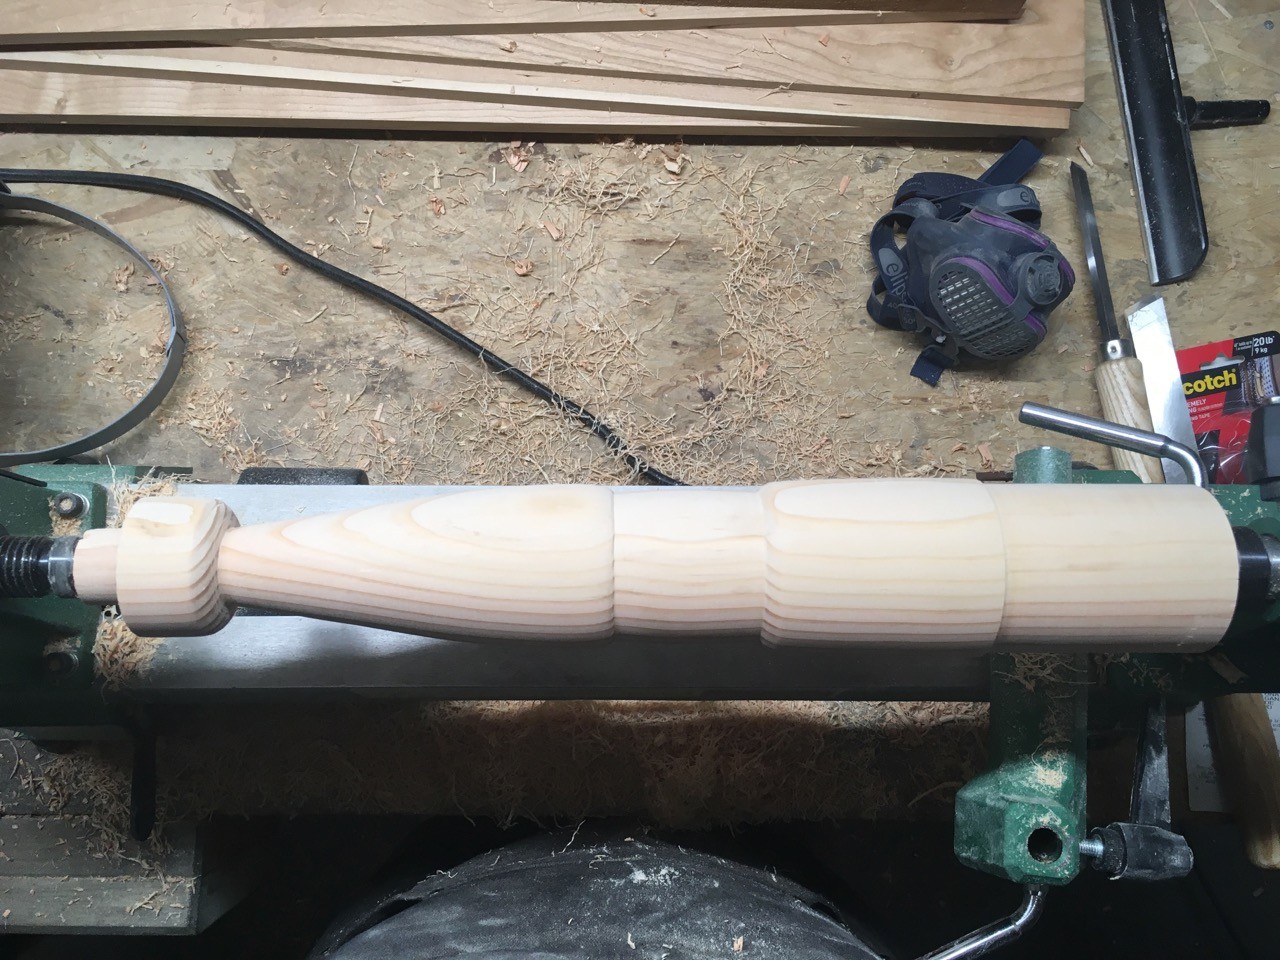
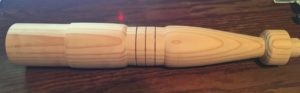
The first step was to turn down the legs. I started by making a story stick for the legs and stretchers. This allowed me to mark out the locations of elements (feet, handles) and transitions. It should allow for identical parts. However, you can see that I had some variation in the location of transitions. I can’t speak to whether this sort of variation was present on period campaign pieces.
However, a recent article in Popular Woodworking from George Walker looks at the same sort of variation in turnings. You can see that the same elements were present in each foot. However, the execution of those elements differed significantly from part to part. These aren’t made by a duplicating lathe. Rather, they are made by a person holding a tool.
After completing the legs, the stretchers are then turned down, with rough turning of the conical tenons. Those tenons are further refined by hand with a tapered tenon cutter.
Cutting (Drilling?) the Joinery
The joinery for this chair is all loose. After roughing down the shape of the tenons on the ends of the stretchers, they are finished off with a tapered tenon cutter (think large pencil sharpener). The mortises are first drilled out. They are them reamed out to get a shape that matches the tapered tenons. It was in the reaming step that I ended up hitting a bit of a block.
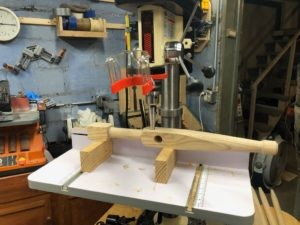
I have been using a cheap bench-top drill press from Lowes for several years. The drill press has been nothing but trouble. The table on the drill press refused to be square to the bit. While the table could be adjusted side to side to account for tilting, the machine could not be adjusted front to back, where the problem was. This meant adding a sub-table to the drill press along with shims to get it level. This was a constant battle resulting in more wasted time checking for square than I care to admit. In the end, it wasn’t the issues with the table that led me to upgrade my tooling, but rather the lack of power from the drill press. It was simply unable to ream out the mortises, constantly stalling in the wood.
As a result, the chair sat in the lumber rack for a few months while I debated a solution (researched other drill presses). I settled on the 13 inch bench-top drill press from Shop Fox. It had more than enough power and is substantially beefier than the old tool. Once the new drill press arrived and was assembled, it made short work of all of the mortises.
A Brief Detour
The chair sat in it’s partly-finished state from July until late October. During that time, a number of other projects took precedence over it, including instruments, our dining room table, and the plant stand. Additionally, I didn’t want to dive right into the leather work for this chair without a warm-up project. Looking to the book, Campaign Furniture, I decided to make a camp stool for an introduction to working with leather.
The stool is straight forward. It’s three straight-grained turned legs. The legs are joined together using a tri-bolt that allows the legs to pivot around a central point. A leather seat is then added to the top. The stool is light, portable, and durable. It also gave me the chance to cut, join, dye, and finish leather on a much smaller scale than the chair would require.


Finishing The Chair
The final work on the chair included finish-planing the legs, making the tapered pieces for the back, applying garnet shellac and wax, and attaching the hardware. I also decided to dye my own leather.
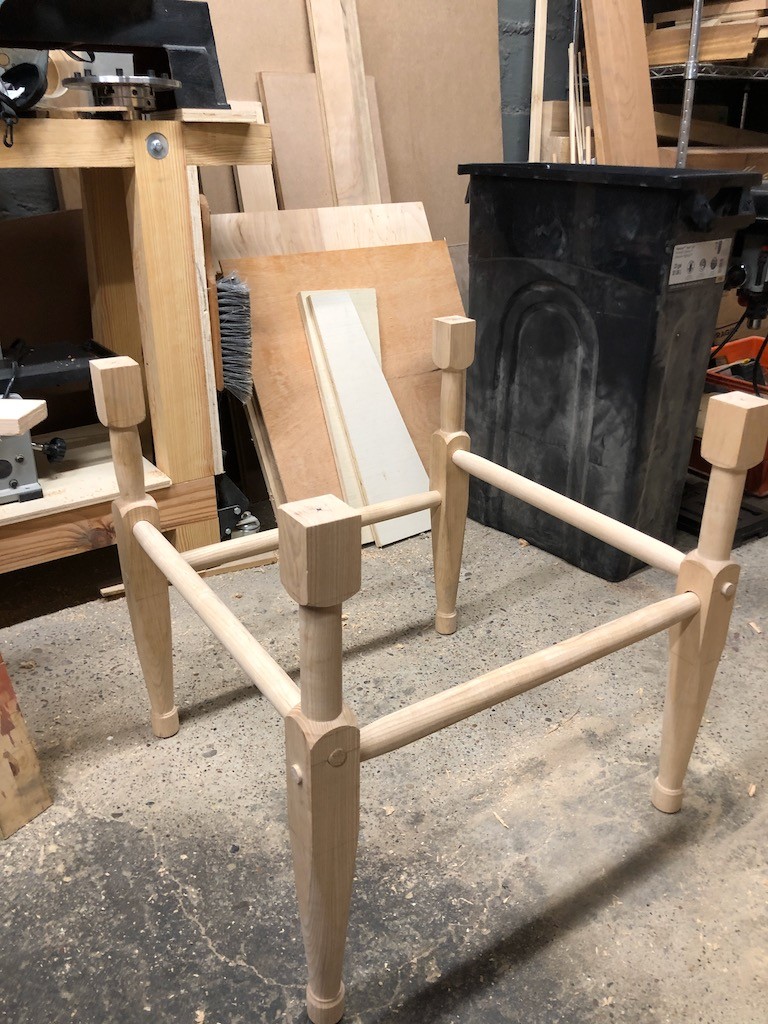
After starting the chair in June, I made a final push to complete the chair in November, just in time for the annual Western PA Woodworkers November Meeting and Show-and-Tell. The chair turned out well. While it was in parts from June to November, the actual time spent building the chair was less than a full day. The turnings are simple, the joinery is straight forward, and the leather work is fairly easy. I look forward to making more of these in the future.
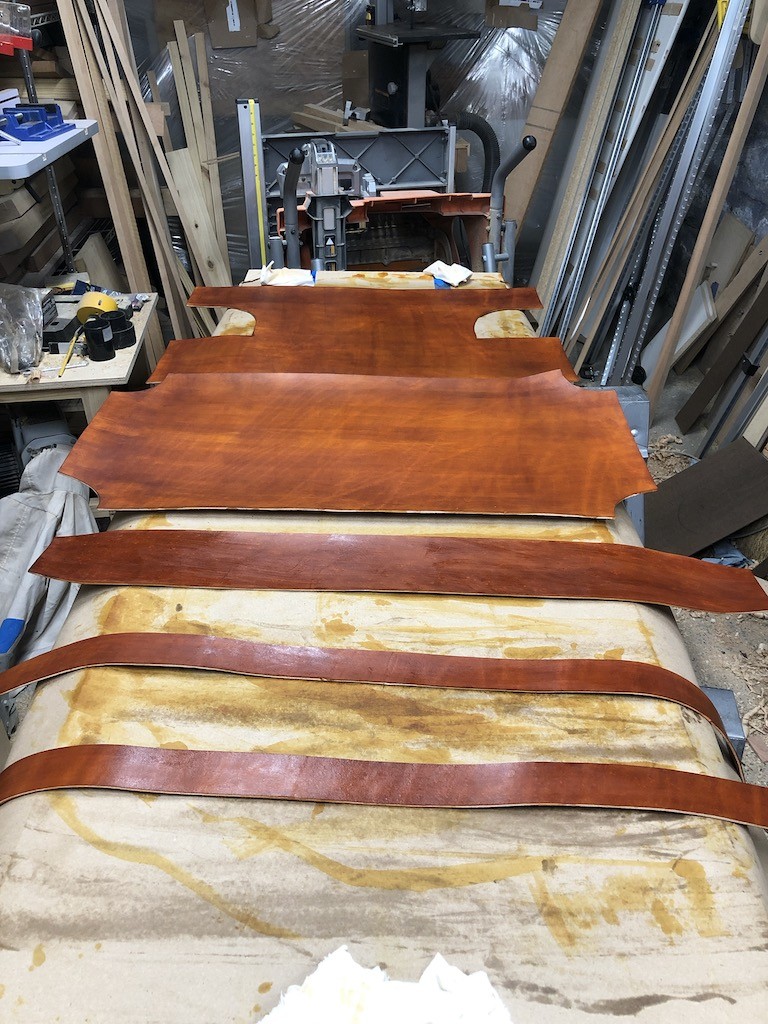
Dyed leather parts 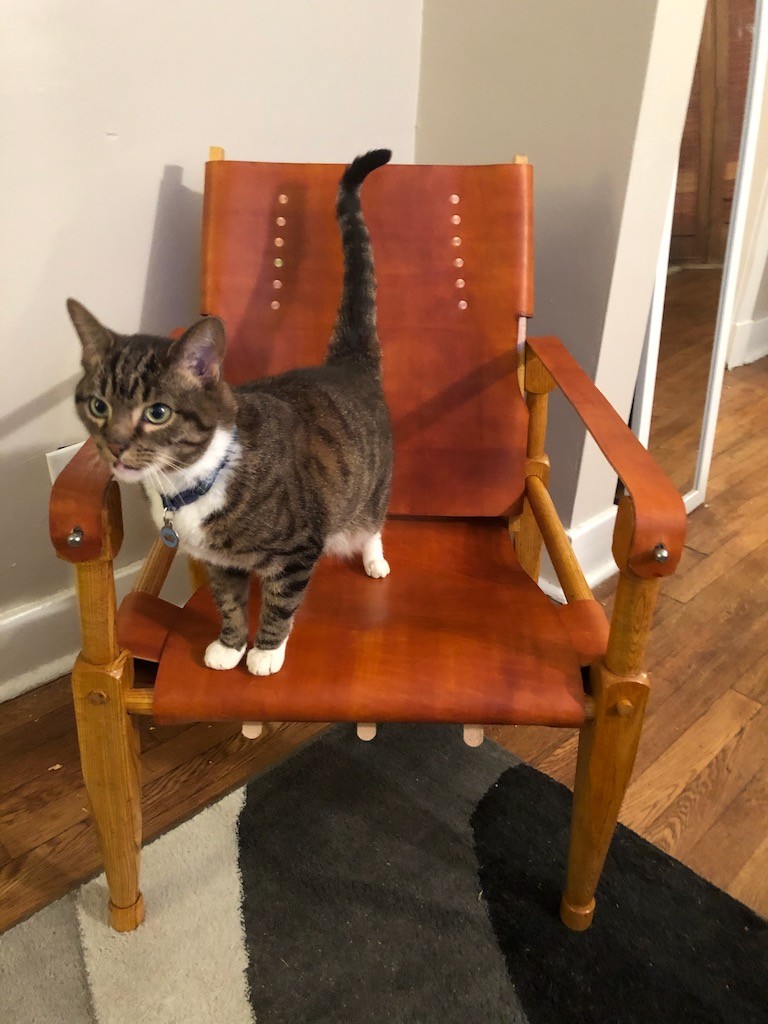
Finished and cat-approved chair
A Fair in the Park (or Kalimba Madness with Turners Anonymous)
The weekend of September 6th, 7th, and 8th brought the annual Fair in the Park in Pittsburgh. For anyone unfamiliar with this event, it’s a three day arts fair put on by the Craftsmen’s Guild of Pittsburgh. The event features artists working in ceramics, fiber, glass, metal, jewelry, leather, and wood. Every year, the western Pennsylvania chapter of the American Association of Woodturners, Turners Anonymous, has a booth, not to sell, but to show work from members and demonstrate.
With Fridays free from the 9-5 job, I signed up to spend the day in the booth talking to folks and demonstrating. There were lots of wonderful folks that stopped by to talk art and woodworking, watch shavings fly on the lathe, and look at the works on display. I also had the chance to browse the wonderful artist booths throughout the park.
In preparation for the event, I wanted to put together a few example pieces to show what I would be demonstrating. I considered small items like pens and stoppers, as well as candle sticks/holders, bowls, and boxes. However, I decided that I wanted to try my hand at a musical instrument.
I remembered an old episode of the Woodwright’s Shop from the 1980’s where Roy looked at different traditional African instruments. One of the instruments, a mbira or kalimba, could be as simple as a board with metal or wooden tines set to be able to vibrate. Adding a resonating chamber to the board helped amplify the sound. So, if a box is all that was needed, why not a turned box? I obtained a tines and bridge hardware and set about trying to figure out the size for the turning.
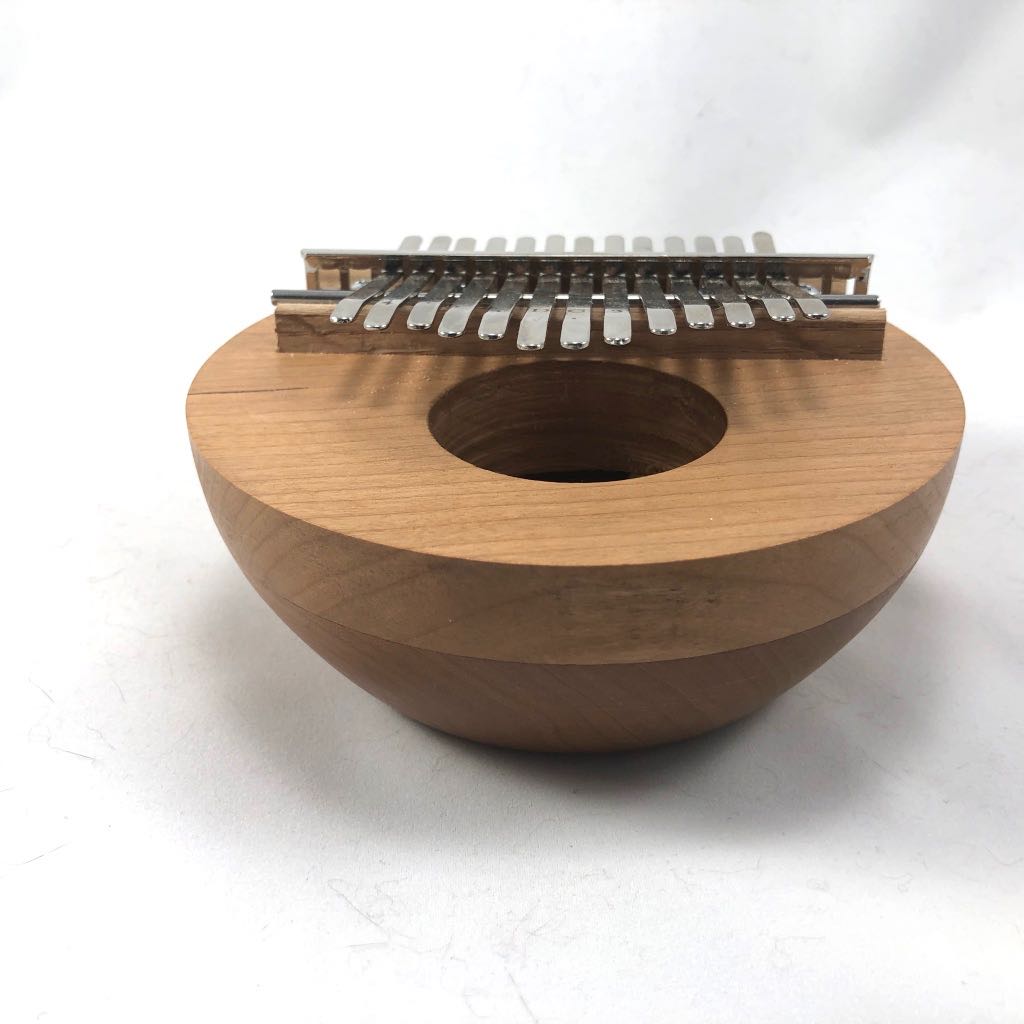
Kalimba #1 was made out of cherry and ended up a bit small. Additionally, the kit that I had obtained contained one inch screws, suggesting a need for a rather thick sound board. This first box was made with that in mind. The result is a much smaller resonating chamber and a quieter instrument.
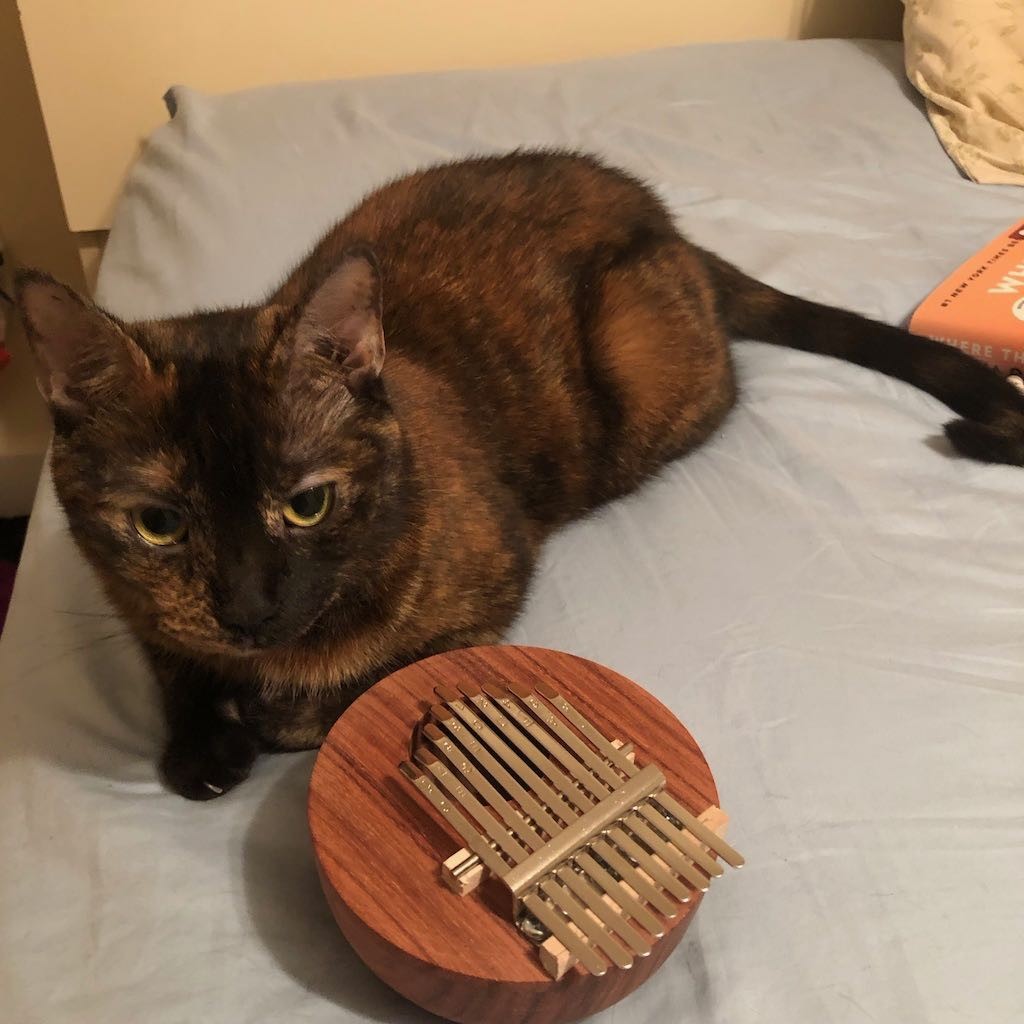
Kalimba #2 was made from Hormigo (also called Orange Agate, Macacauba, or Macawood), a central american hardwood. I’ve worked with this wood several times before and find it to be easy to turn. It also accepts a very nice finish. The sound board was made significantly thinner. Due to the initial size of the blank, I was left with a relatively small instrument that could only accept nine keys. It has a very nice sound and handles very well.
On the first day of Fair in the Park, I had an opportuntiy to demonstrate the making of the instrument. The process is fairly straight forward for anyone that has turned a lidded box before. After placing a bowl blank between centers, I turned down the blank, shaping the outside of the bowl and adding a tenon to the foot to allow the bowl to be placed into a four-jaw chuck. Once the outside was turned and sanded, the bowl is reversed placed into the chuck. The top of the blank is then flattened, taking care to remove any piercing from the spur center. Once the top is flattened, a lip is turned into the top where it will be fitted to the bowl. After the lip is established, the top is parted off. The cherry blank used for Kalimba #3 was larger than #1 or #2 and I did not have my handsaw with me. This made parting off a bit of a chore.
After the top is parted off, the next step is to start hollowing the bowl, taking care to establish the side walls so that the top will fit snuggly. Once the walls are established, the rest of the bowl can be hollowed out and sanded. Finish, if desired, should be applied to the inside of the bowl at this point.
Once the bowl is finished, the top inside lip of the top is coated with an epoxy and fitted to the bowl. After giving the epoxy time to set, I then cleaned up the transition between the bowl and the lid. The lid is then flattened, the sound hole drilled, and pilot holes for the screws for the grounding bar are also drilled at this point. The entire bowl can then be removed, flipped around, and placed in cole jaws to remove the tenon and clean up the bottom. Final finishing can then be applied. After the finish is cured, the grounding bar, bridge, and tines can be added, and the instrument given its first tuning.
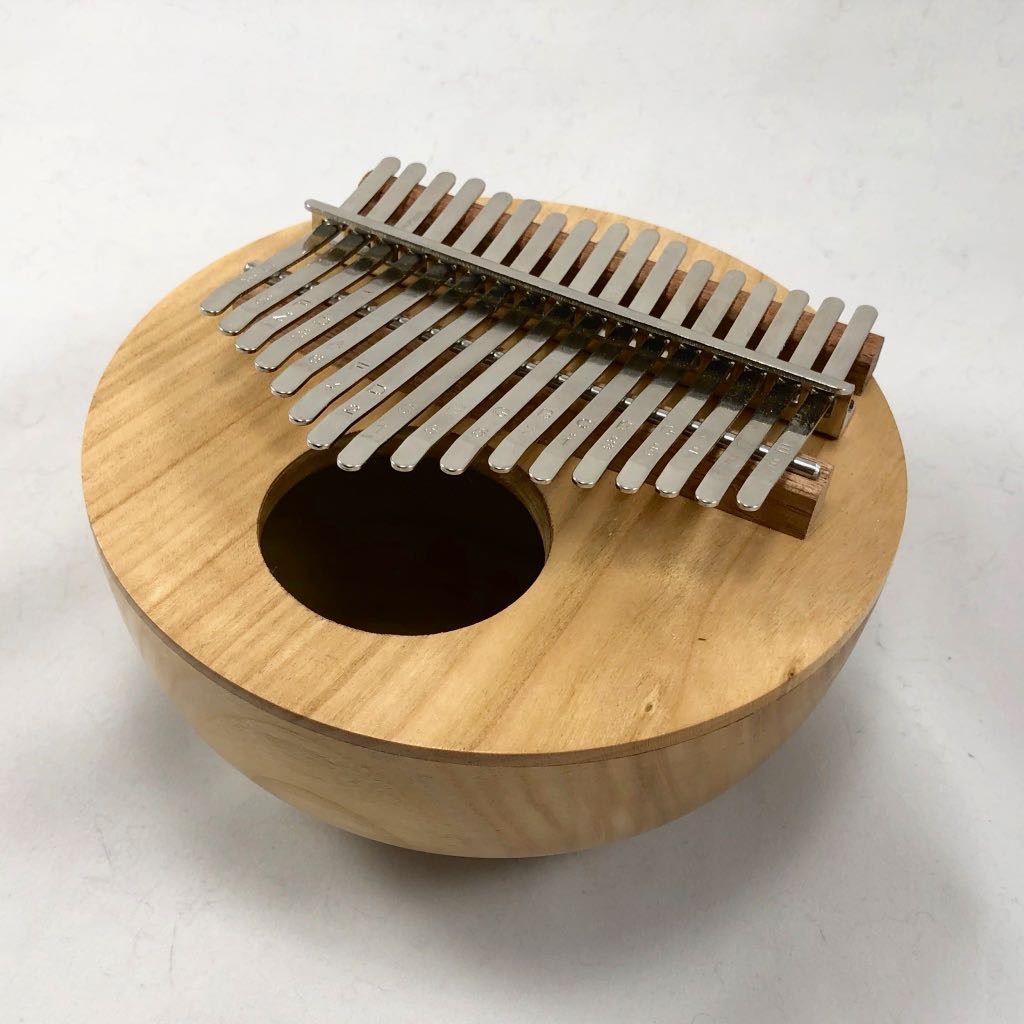
Kalimba #3 was made from cherry. The top was made significantly thinner and the bowl much thinner, resulting in a larger resonating chamber. The sound quality remained clear with the ability to amplify sound much better.
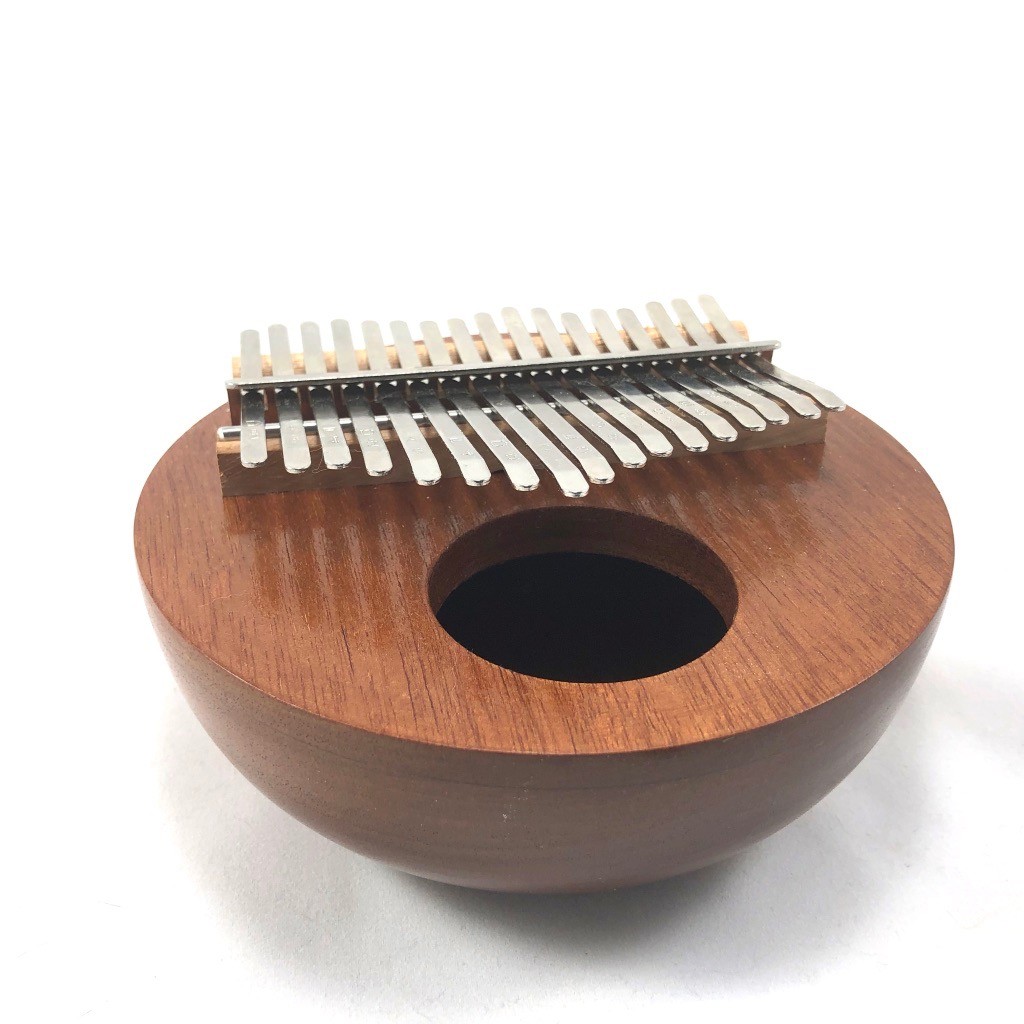
Kalimba #4 was made from sapele. The initial process for this was the same as the prior three instruments. However, I wanted to obtain a perfect grain match. The sound boards for kalimbas #1-3 were each made by flattening the top of the intact bowl, creating a lip on the outside of the bowl, and then parting off the top. The top was then flipped over and placed into the hollowed bowl. This resulted in an inability to get a perfect grain match.
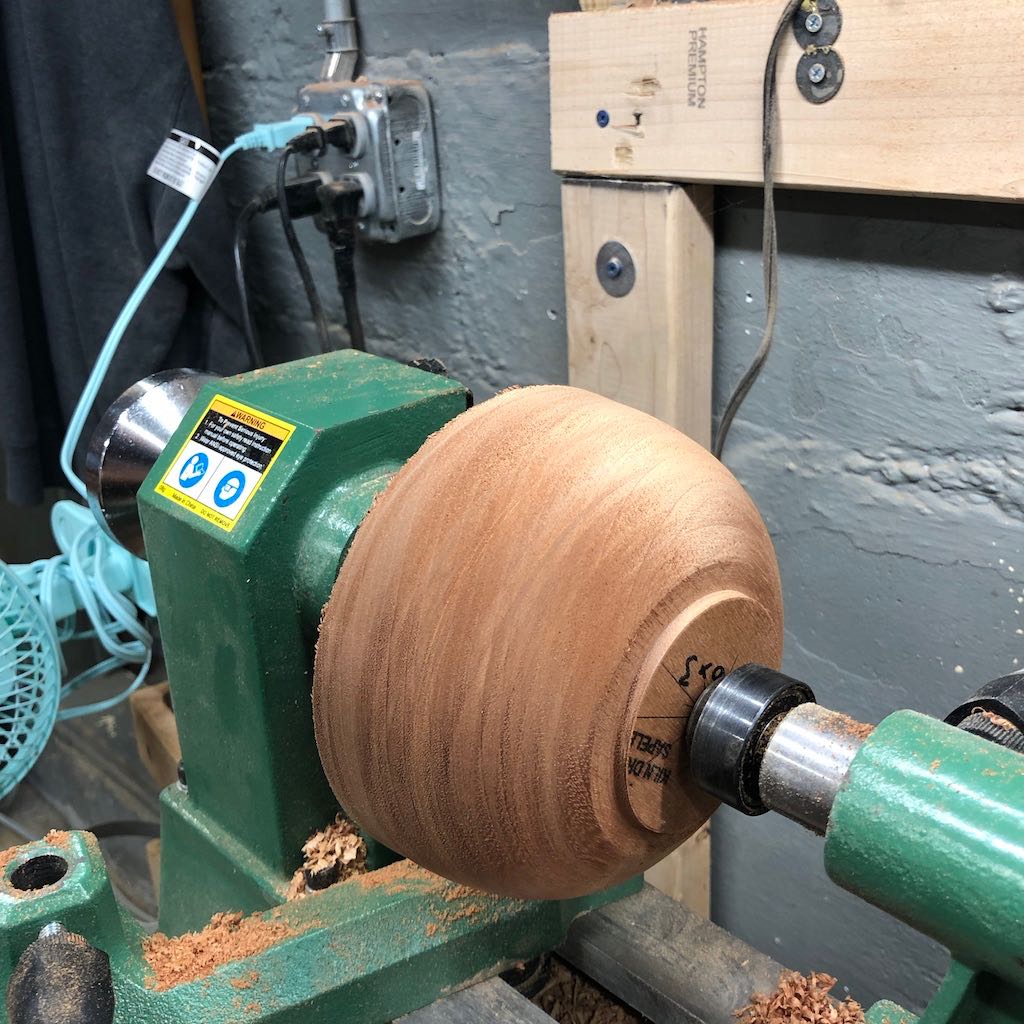
The blank is place between centers. A tenon is turned into the base and the outside of the instrument is roughly shaped. 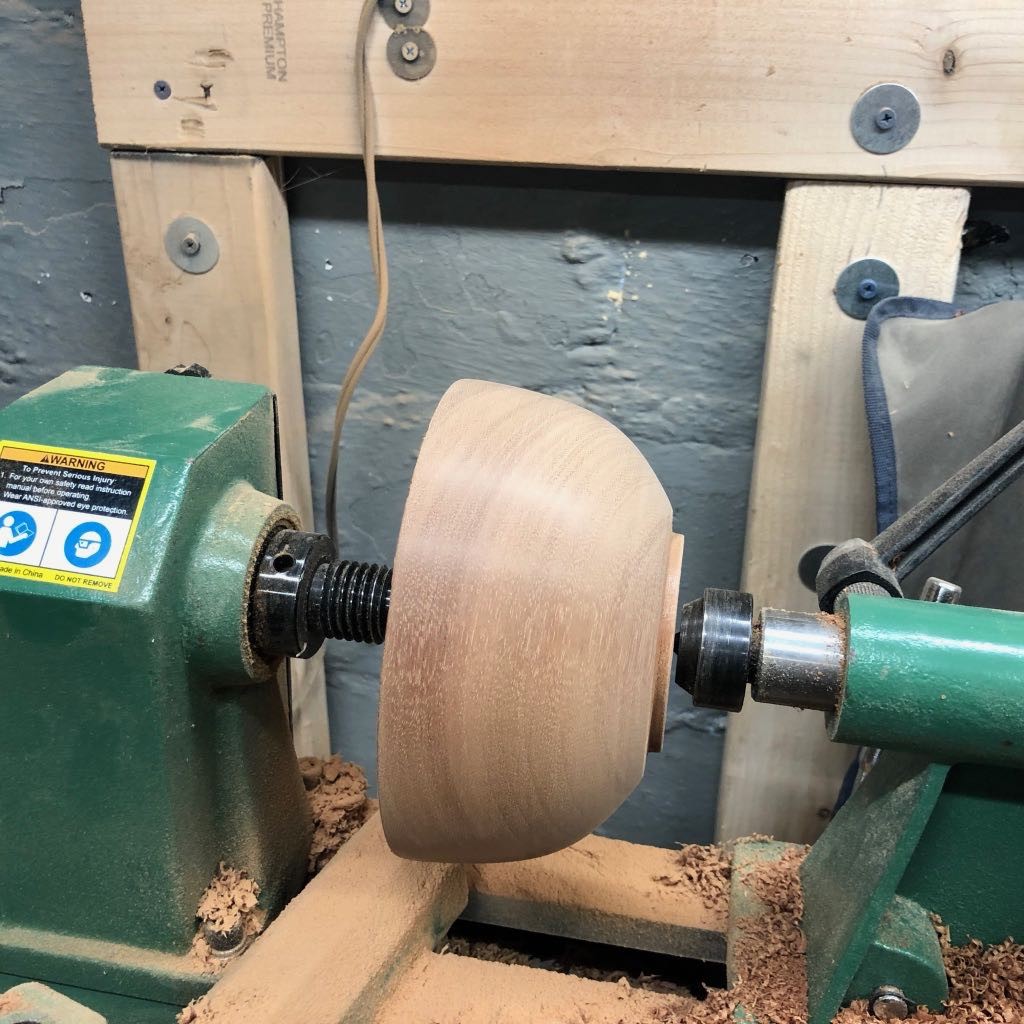
The final shape of the outside curve is established, including sanding up to 600 grit. 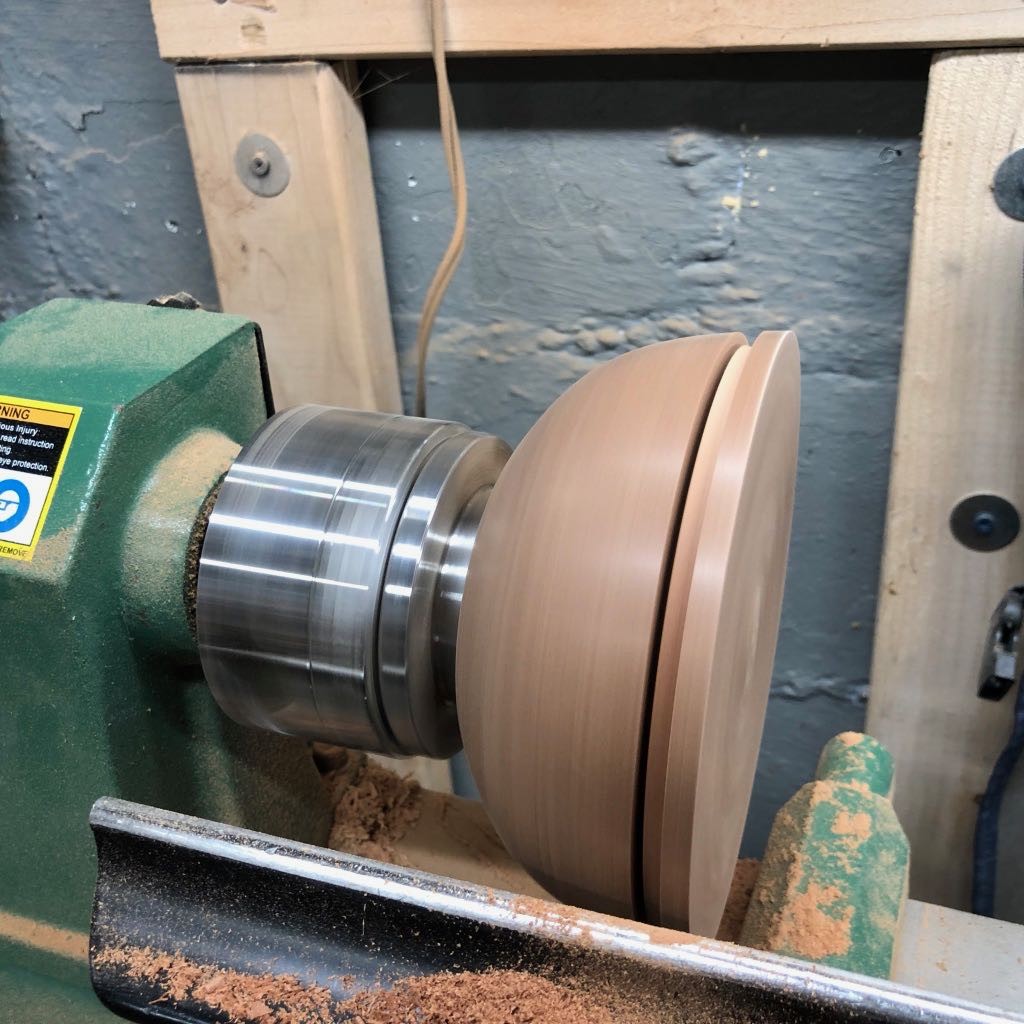
The bowl is turned around and placed in a 4-jaw chuck. The top is then flattened. A lip is turned and then the top is parted off. 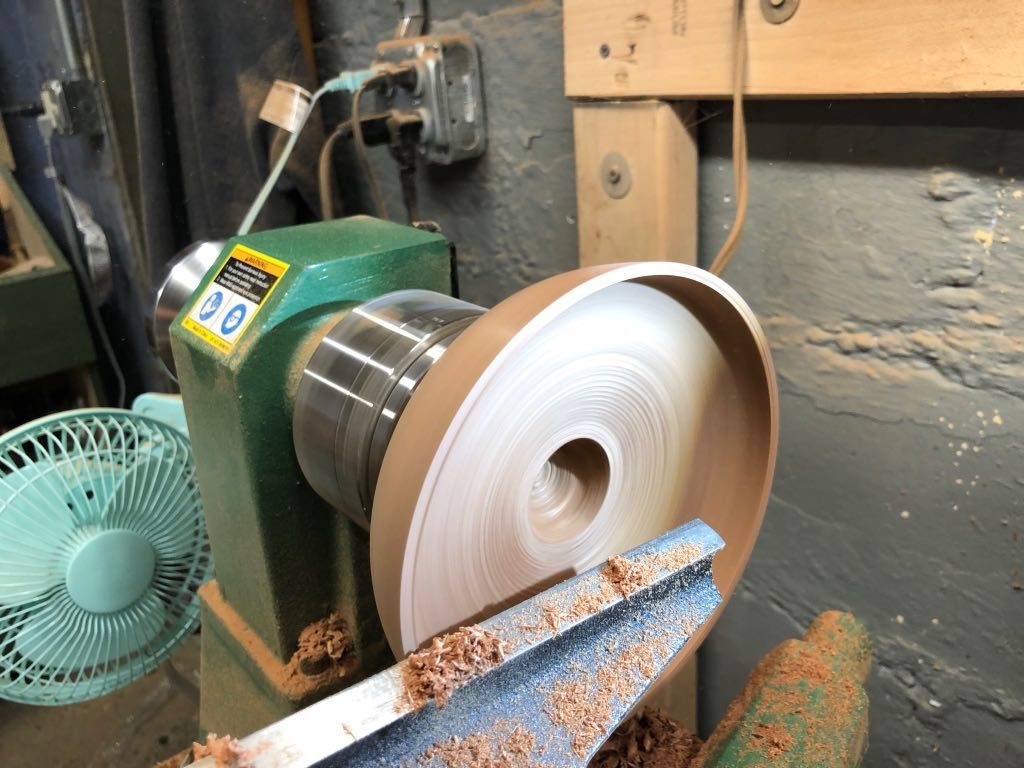
With the top parted off, a lip to accept the top is established and hollowing can begin. 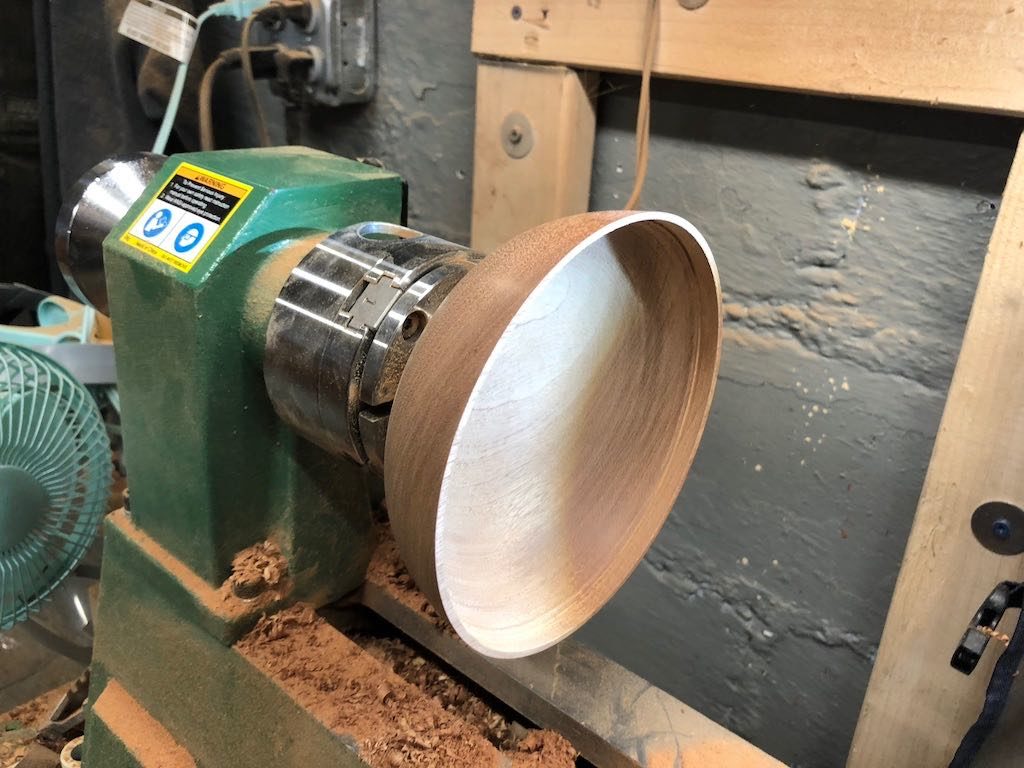
Checking the bowl thickness and depth is important at this step. Once the bowl is hollowed, it can be sanded down. 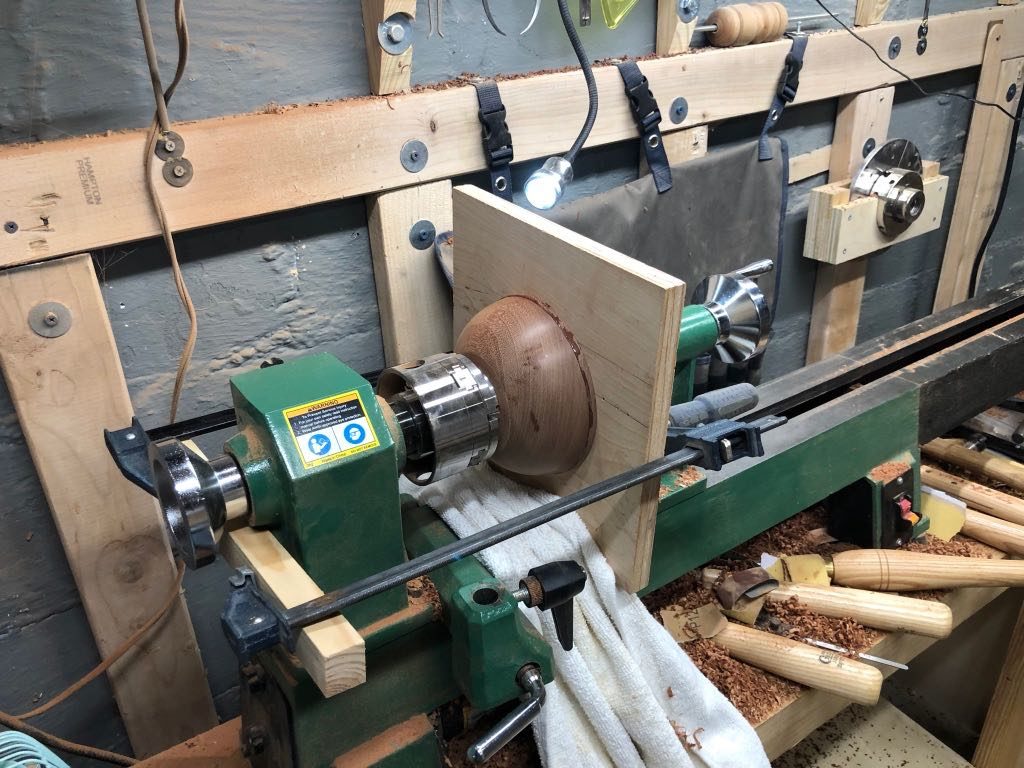
Epoxy is place around in inside of the lip and the two sides are fitted together. I used a piece of plywood pushed by the tail stock to apply clamping pressure.
Why build one when you can build two!
After a quick detour this weekend to participate in the Turn for the Troops event held at Woodcraft stores, it was back to the garage to try to make some progress on the chess table.
 I started to turn the post for the chess table. As planned, I decided to use some 4x4s leftover from building a cat tree about four years ago. The wood is good and dry, and more importantly, is the right size to work with.
Unfortunately, the grain was not with me and I had a lot of tear out. After rounding the blank, I defined the recess for the legs, the tenon for the top, and the half bead that defines the top of the post. The next step was to shape the stretched s-curve that is the main body of the post.
This is where I experienced significant tear out of the grain. The wood wanted to splinter if I looked at it the wrong way. Combine that with the substantial hardness difference between the early and late wood and I ended up with a bit of a ditch partway between the top of the legs and the bottom of the half bead. This meant that the s-curve would either end up being much thinner than anticipated, or I would have to start over.
A thinner post would substantially change the look of the piece, so I decided to start over. In light of the problems turning the particular species, I decided to see about acquiring some hard wood. I managed to secure some ash 3×3 blanks that I’ll be turning down for the finished table.
However, I still had a generally intact post that would be a shame to waste. A quick browse through the wood pile revealed some red oak boards that have been hanging out for a few years. These were just the right width for a second set of legs. I won’t be making this one into a chess table, but it will be good practice before working with the main project. This will just be a traditional candle stand.
 After cutting out the legs and putting them to the spindle sander, I returned to the problem post. I turned half-beads at the top and bottom of the problem area to divide out the higher areas. The bottom was then turned generally flat. The top part was turned into shallow curve toward the tenon. Finally, the problem area between the two was lowered and given a slight outward curve.
Three incised equally lines spaced incised lines were added to the center and burned with some maple. I ended up with a generally nice shape for the second table post. The burning is probably unnecessary as I think this will be painted when all is said and done. This was sanded to about 320 grit. Sanding this wood leaves an interesting undulation as the soft early wood (the light grain) wears away faster than the late wood (dark grain).
I’ve already cut the oak legs out. The pattern I cut out using Pixelmator and some MDF is getting a workout. They just need a bit more shaping. Then comes the dovetailing. More later.