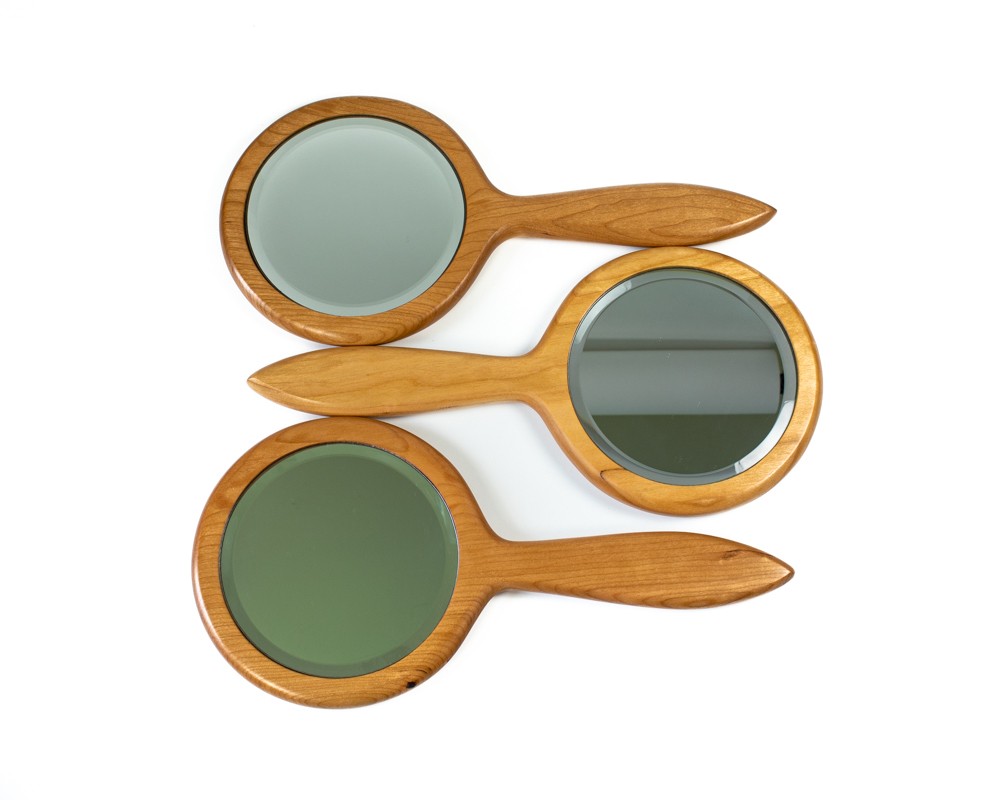
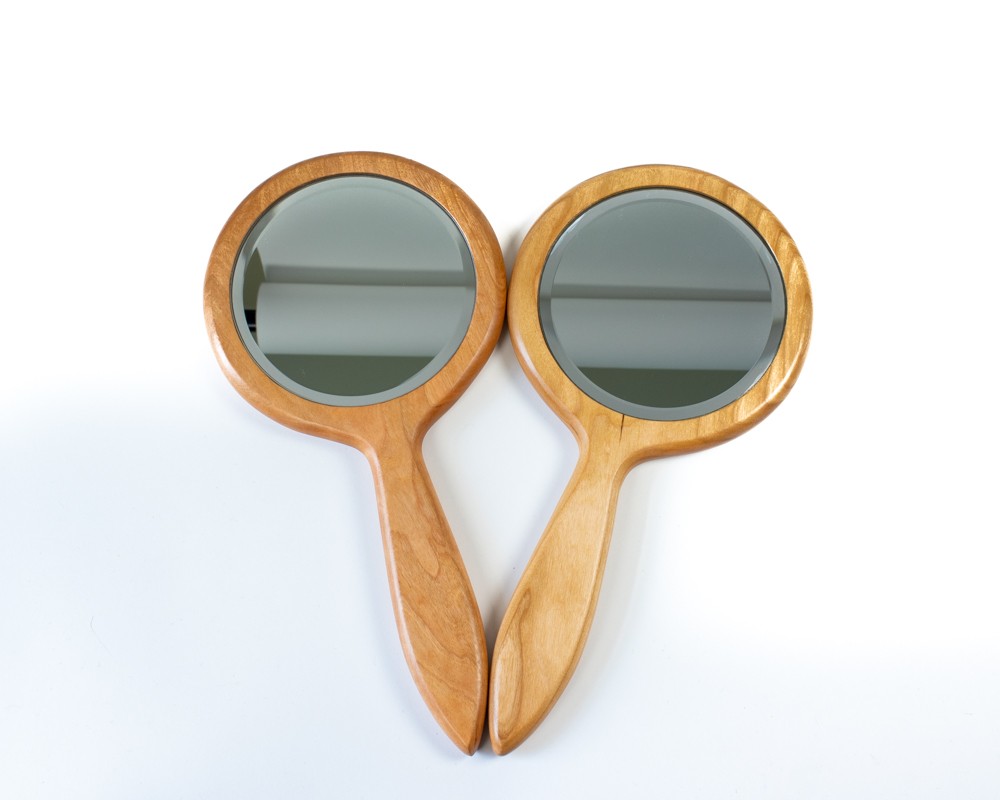
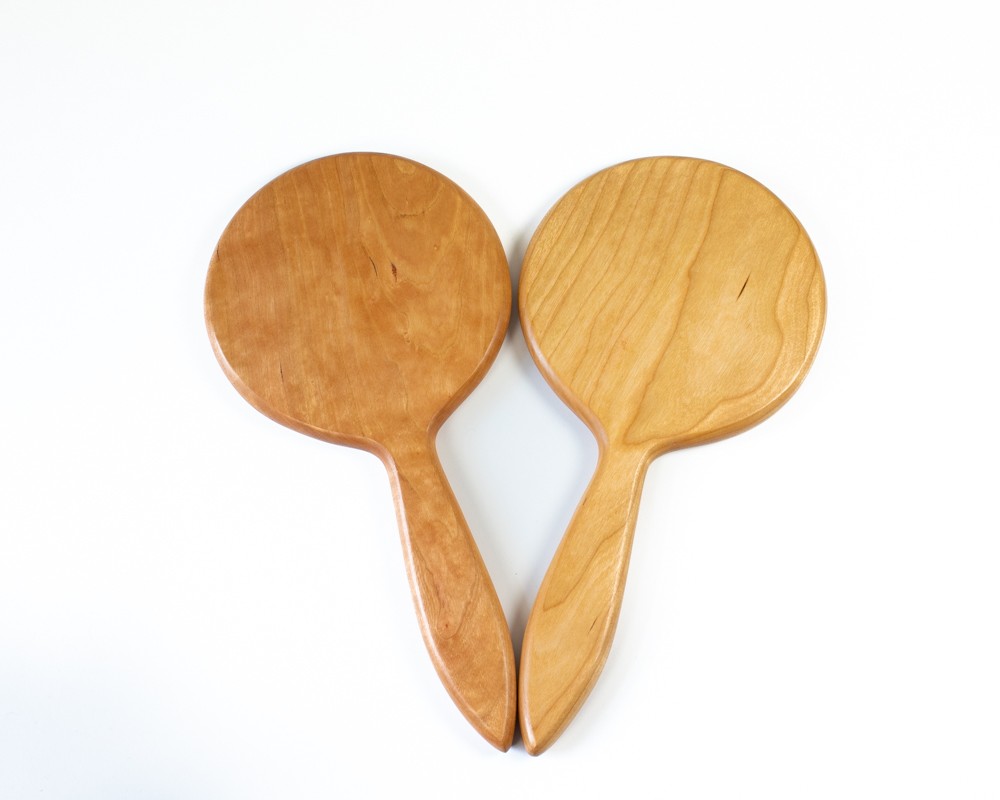
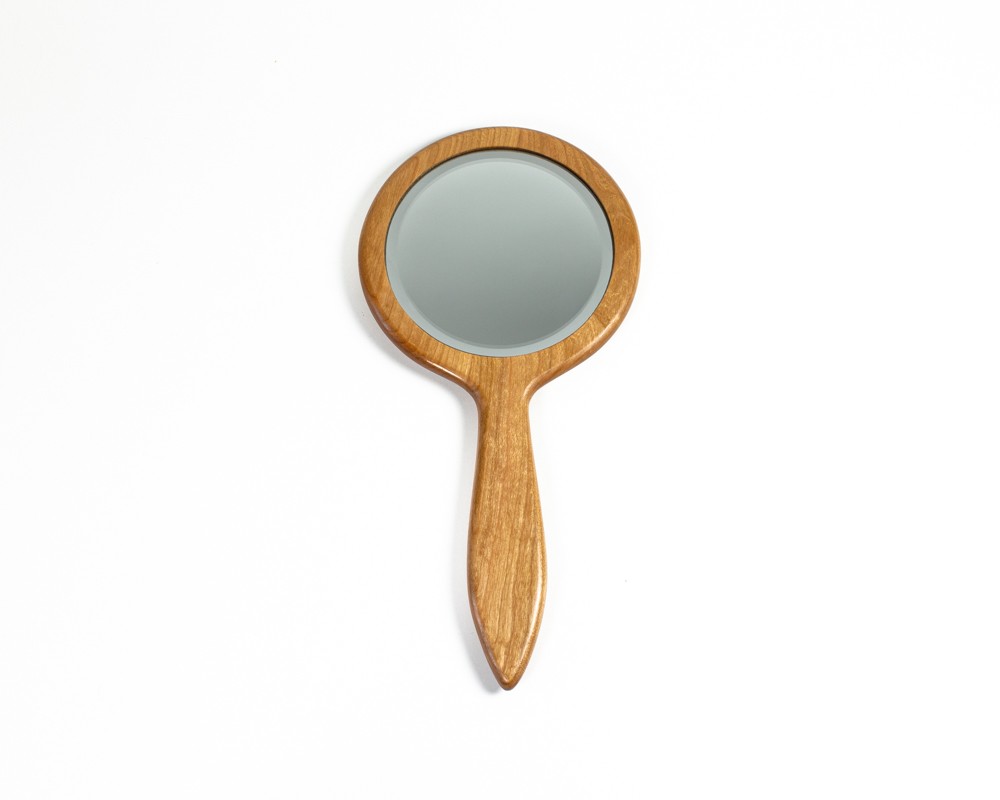
Made from solid wood with an inlaid 4.75″ mirror. Solid cherry wood.

Furniture and Gifts
Made from solid wood with an inlaid 4.75″ mirror. Solid cherry wood.
After nearly six months of work, most of which was spent with roughed out lumber stacked in the basement while it finished drying, the trestle table was completed in time to host Thanksgiving dinner. You can read earlier entries in the build process here and here. Additionally, I suggest taking a look at this article from Woodworking Magazine. This table follows the design from that article fairly closely, with only a few changes to top and the feet.
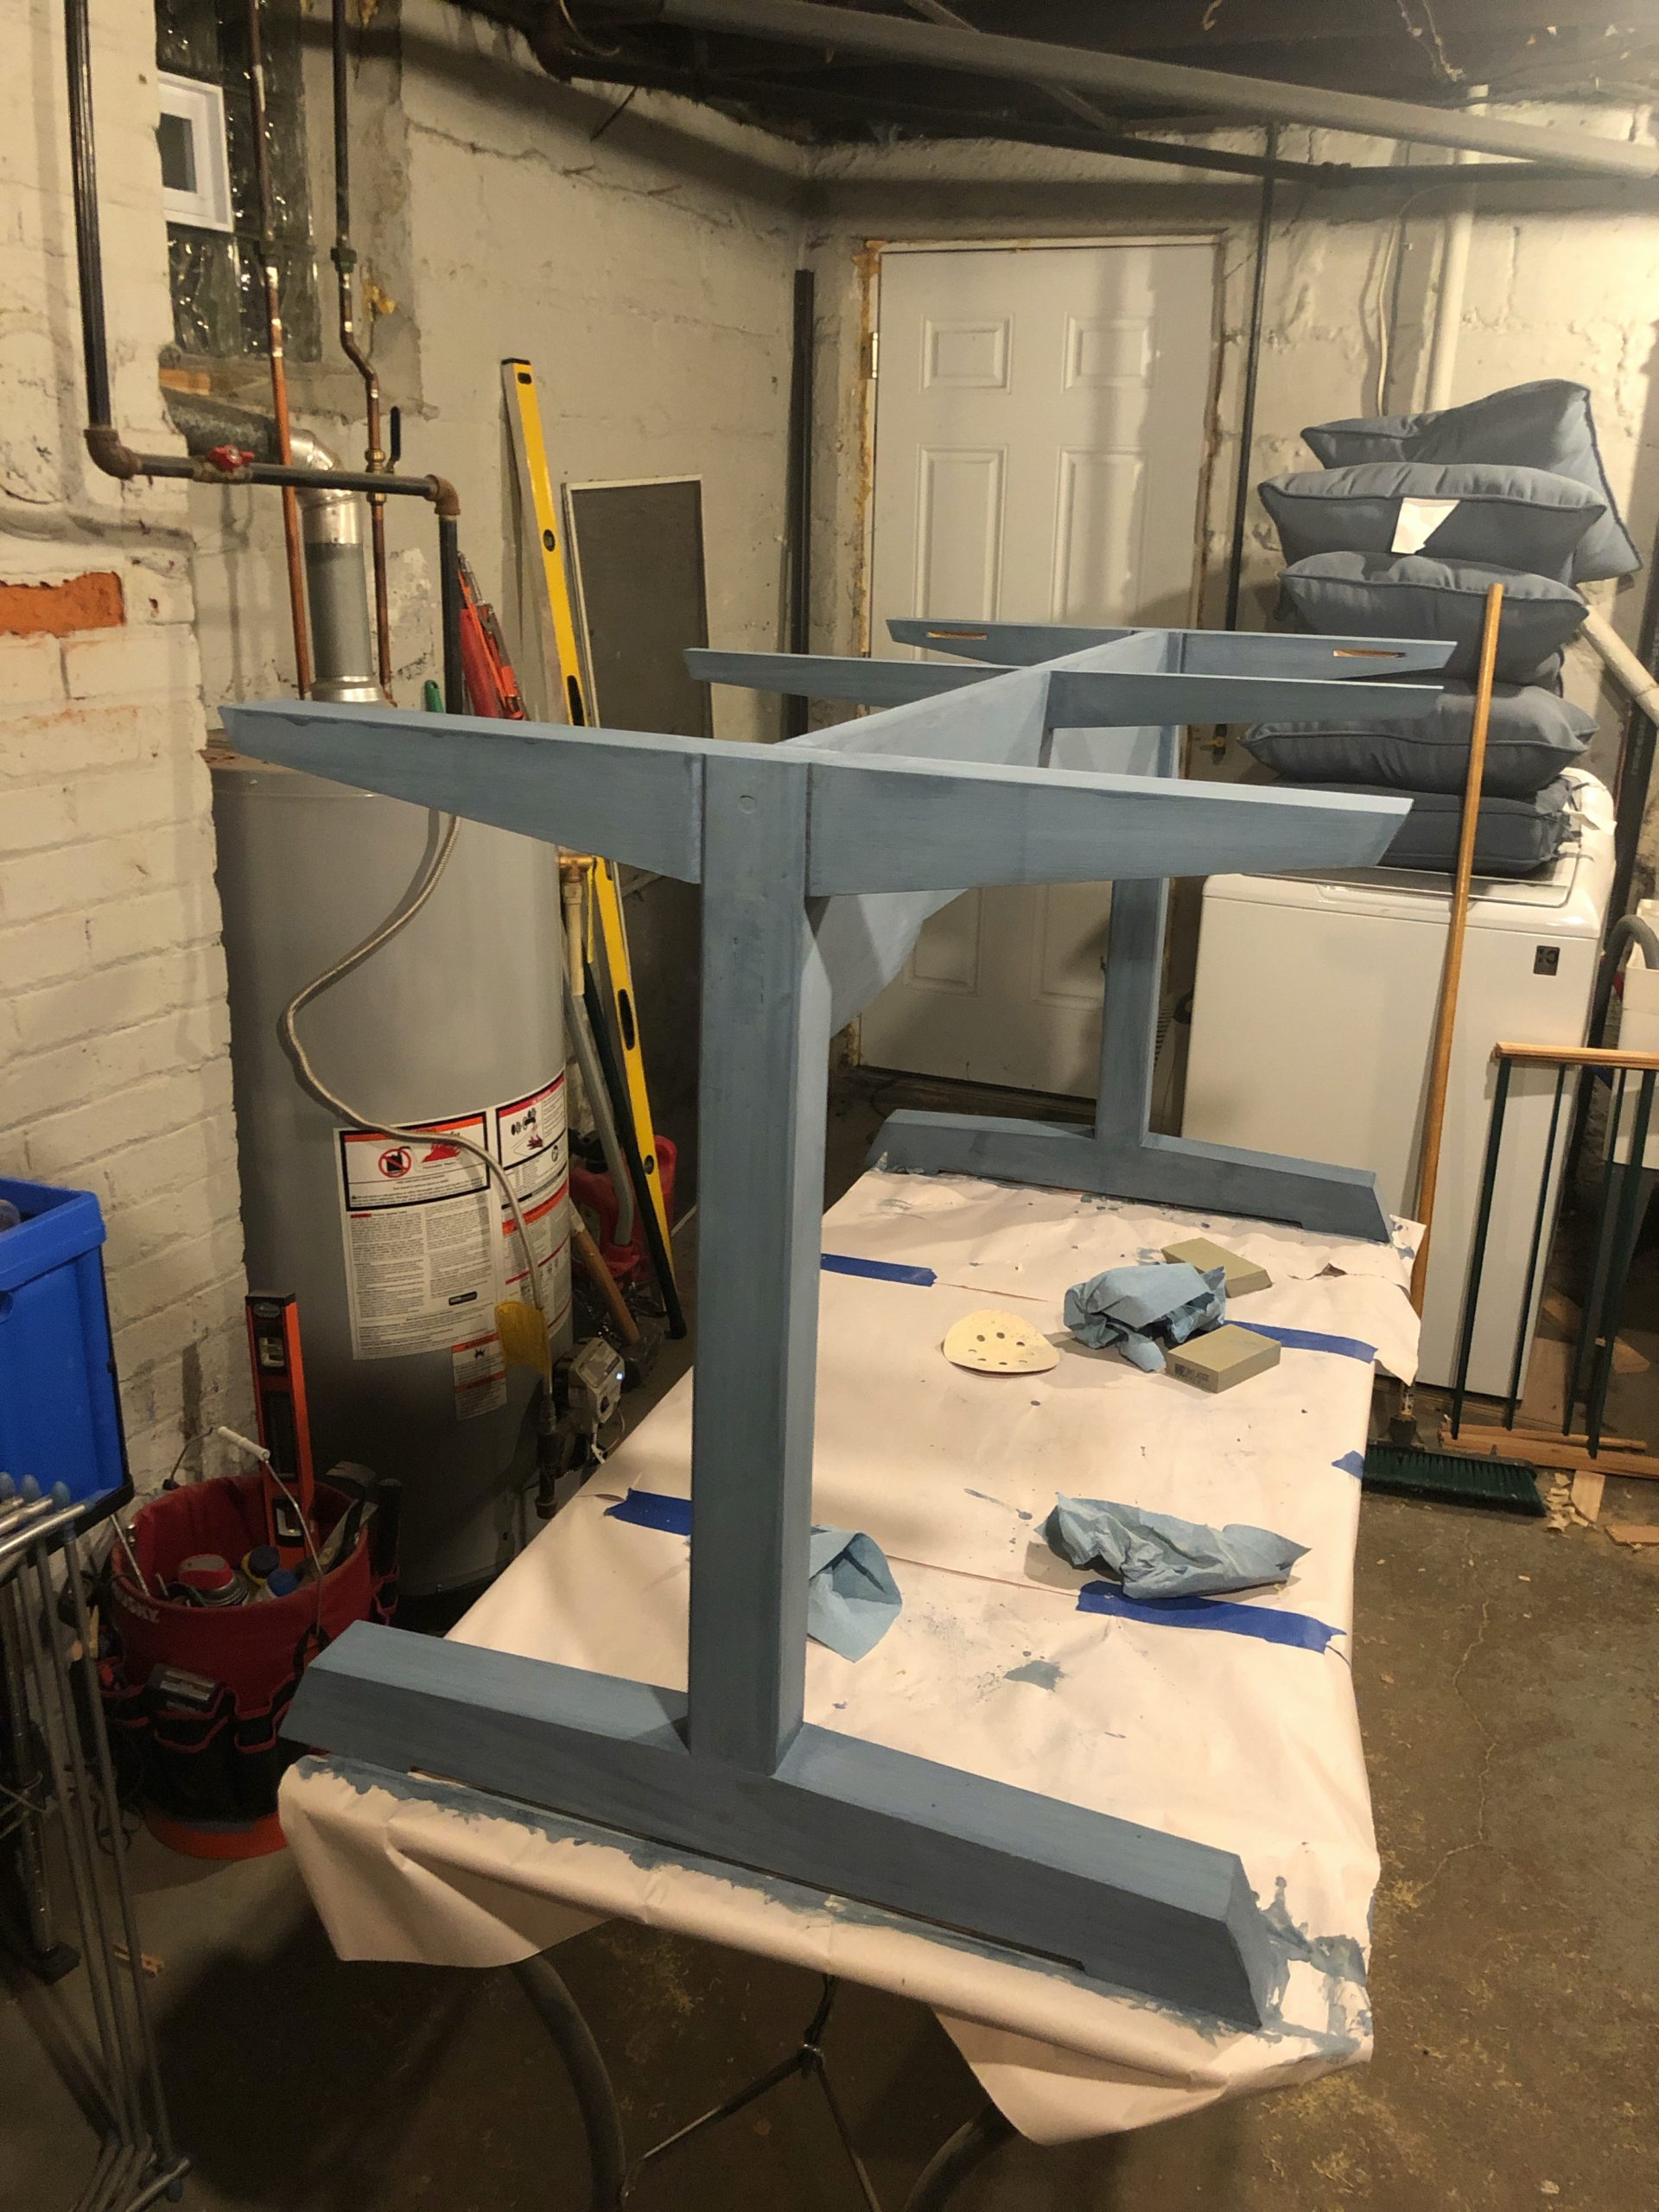
After assembling, gluing up, and truing up the base of the table, I applied three coats of Soldier Blue milk paint from the Old Fashioned Milk Paint Company. I find that milk paint adds color as well as texture and depth to a piece. Here, the paint was applied over the yellow pine base. While I don’t object to the stripey-ness of yellow pine finished with only a clear coat, there were several knots that were present in the table feet and stretcher. The paint did a good job covering those up.
Rather than applying paste wax as I had originally planed, I applied a few coats of danish oil over the base. This significantly deepened the blue color of the paint. It fits well with the colors in the dining room. In comparing the blue color from the photo above with the blue of the photo in the post, you can see just how much darker the blue becomes with the danish oil.
While the paint was drying on the base, I applied Tried and True Varnish Oil to the top. This was my first time working with a Tried and True product. The varnish oil has the consistency of honey. I applied it by wiping on a light coat and allowing it to penetrate the wood for about an hour. After an hour, the excess oil is wiped off and the table is buffed with a clean lint free cloth. The oil is then allowed to cure for twenty-four hours before applying each subsequent coat. A total of three coats were added here. In the future, I’ll plan on allowing more time for the final coat to cure.

The top and base were then flipped over and placed on a workbench. After getting equal reveals around the base, the buttons were placed into the previously cut slots in the base and used to drill pilot holes into the table top. The buttons were then screwed in. These will allow the table top to expand and contract throughout the year while remaining firmly attached to the base. A total of six buttons, one on each side of each brace, were used.
The buttons were unscrewed to allow me to bring the top and base upstairs where they were then reattached. The table ended up over six and a half feet long and about 30 inches wide. Eight people can easily sit around the table with serving dishes in the middle.
All in all, this was a good build. I found working with the width and length of the table top to be a larger challenge than any of the joinery or shaping on the base. Jointing nearly seven foot boards with only a short-bed jointer required building jointing sleds for the planer. Even then, without a seven or eight foot workbench, sag in the sleds when leveling the boards with shims proved to be a constant battle. While biscuits were a great help for alignment, I expect that I’ll likely slow down and do one glue joint at a time in the the future to help the accuracy of the glue up. Similarly, for any future large table top, I expect I’ll take a different approach to finally flattening and try to rent time on a large drum sander rather than attacking it with a No. 7 plane and belt sander.
Even with all of the challenges in this build, I think the table came out well and we look forward to using it for decades to come. Now I just need build chairs to match to the table.
I’ve been meaning to build a new dining room table for our house since we moved in last year. A quick look at my /Now/ page showed that I bought the lumber for the base back in May. (It also shows I should probably update the /Now/ page.) It had been roughed out and stickered in the basement since then. Back in July, I made a trip out to Keim Lumber in Ohio and bought 5/4 cherry boards for the top. With Thanksgiving fast approaching, and plans to host at our house, I really need to buckle down and get this table done.

The plan for the table is based on a design published by Chris Schwarz* in Woodworking Magazine. The base of the table is made from yellow pine. The top will be made from cherry. After deciding that it had acclimated long enough, I started the process of milling it down on Friday, Sept 27, giving all of the boards a pass on the jointer until flat and then a light pass through the planer. They were then left to sit until Sunday the 29th. The legs, braces, and feet were then milled to final thickness, and the mortises were cut in the feet using a dado stack on the table saw. These boards were then glued up. The same procedure was done for the legs. The braces did not require any dados at this point.
As of yesterday, I had cut tenons on both legs and fit them to feet. I tried this by hand on the first leg with not horrendous, but unacceptable, results. The leg ended up snug but significantly twisted in the mortise. This was remedied by moving the operation to the table saw. I squared the tenon up using the dado stack and then glued on pieces to replace the previously cut away wood. This sat clamped overnight and I re-cut the tenon faces using the table saw again today.

In the meantime, the tenon was cut on the second leg via the table saw. I also took the opportunity to cut the bridle joint in the top of each leg using the band saw and a chisel, as well as cutting the mating piece in the braces using the table saw and dado stack.
By using the table saw, I got piston-fit joinery without too much hassle. At some point an upgrade of the table saw is on my list, if I think that the shop can stand losing the space to it. I’ve been working on a Ridgid R4513 jobsite saw for the past few years. I find that the accuracy of the saw, including blade tilt and height as well as fence accuracy just aren’t a great quality. That said, the saw folds down to save space, and in a 9 1/2′ x 18′ space, every inch that I can save helps.
Now on to shaping the feet and braces, and cutting the tenons on the stretcher.
* I have built a number of pieces that Schwarz has written about/researched/designed/built. I think this is a function of a few things. First, he is a prolific publisher. Seriously, the mere volume of written word on woodworking that he has put out there means that you are likely to find some piece interesting that you’d want to build or technique that you want to try. Second, the writing is amazingly accessible. He’s concise, but descriptive, easy to read, and amusing. Finally, the styles and techniques that he writes about are what grab my attention. Let’s face it, everyone has different tastes things, be it furniture, music, art, clothing, etc. In terms of furniture, I’ve now read, and own, three of his books (Campaign Furniture, The Anarchist’s Design Book, and Workbenches). I reference these books constantly in the shop and have found the styles of furniture that he gravitates toward to be the same style that interests me.
The weekend of September 6th, 7th, and 8th brought the annual Fair in the Park in Pittsburgh. For anyone unfamiliar with this event, it’s a three day arts fair put on by the Craftsmen’s Guild of Pittsburgh. The event features artists working in ceramics, fiber, glass, metal, jewelry, leather, and wood. Every year, the western Pennsylvania chapter of the American Association of Woodturners, Turners Anonymous, has a booth, not to sell, but to show work from members and demonstrate.
With Fridays free from the 9-5 job, I signed up to spend the day in the booth talking to folks and demonstrating. There were lots of wonderful folks that stopped by to talk art and woodworking, watch shavings fly on the lathe, and look at the works on display. I also had the chance to browse the wonderful artist booths throughout the park.
In preparation for the event, I wanted to put together a few example pieces to show what I would be demonstrating. I considered small items like pens and stoppers, as well as candle sticks/holders, bowls, and boxes. However, I decided that I wanted to try my hand at a musical instrument.
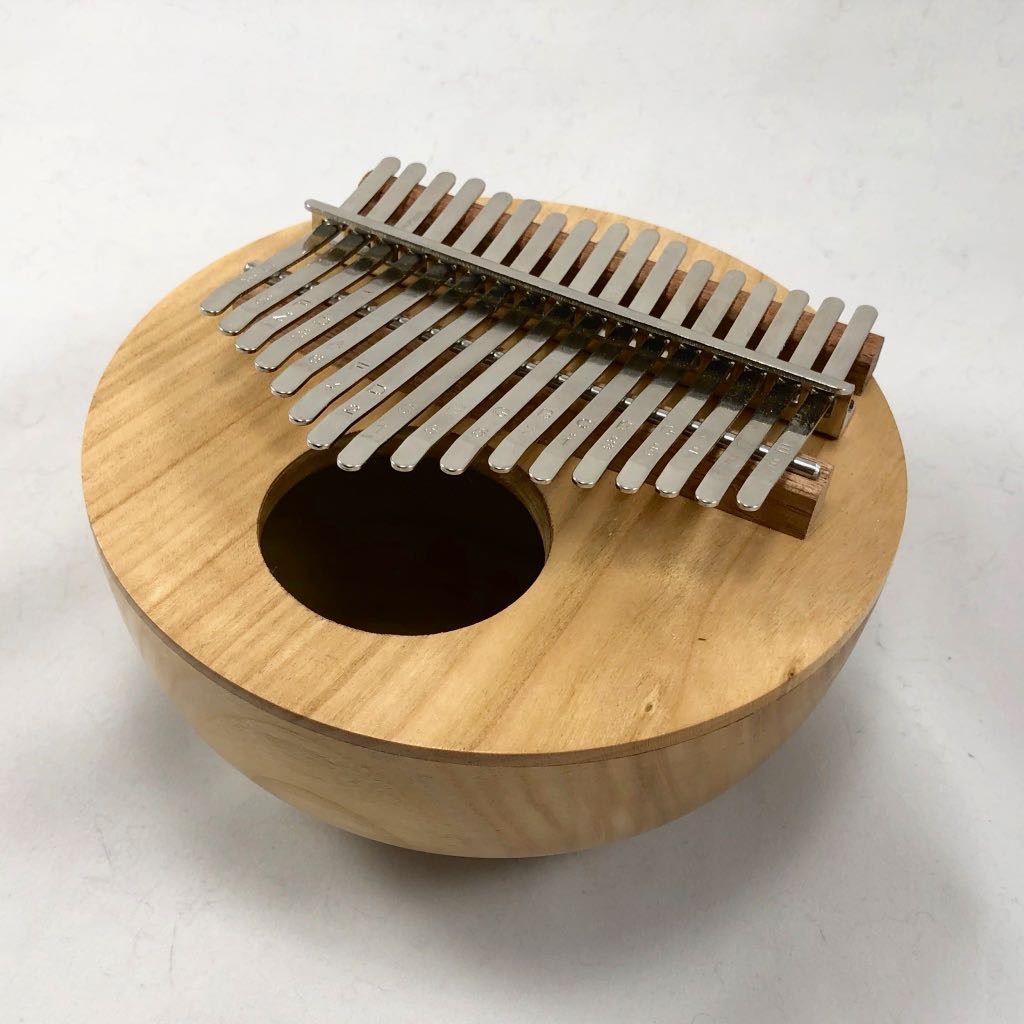
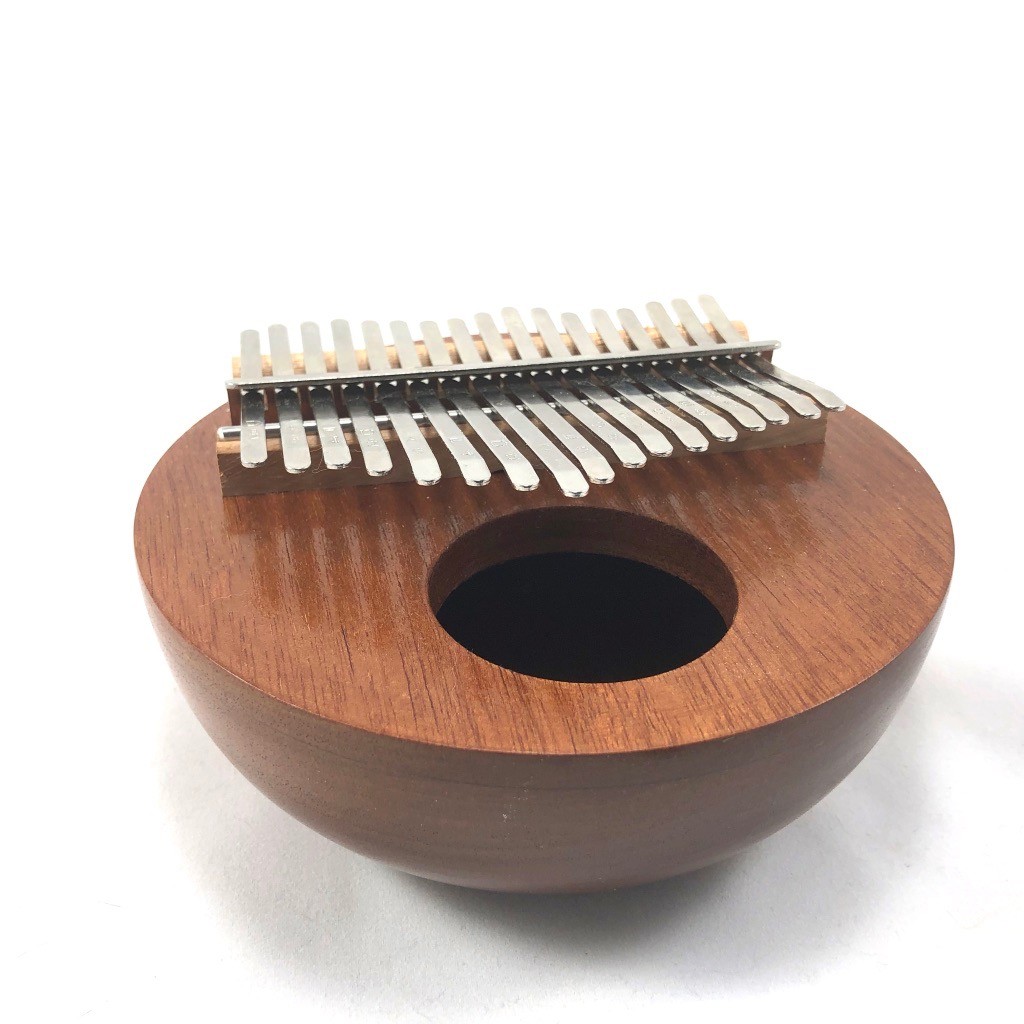
I remembered an old episode of the Woodwright’s Shop from the 1980’s where Roy looked at different traditional African instruments. One of the instruments, a mbira or kalimba, could be as simple as a board with metal or wooden tines set to be able to vibrate. Adding a resonating chamber to the board helped amplify the sound. So, if a box is all that was needed, why not a turned box? I obtained a tines and bridge hardware and set about trying to figure out the size for the turning.
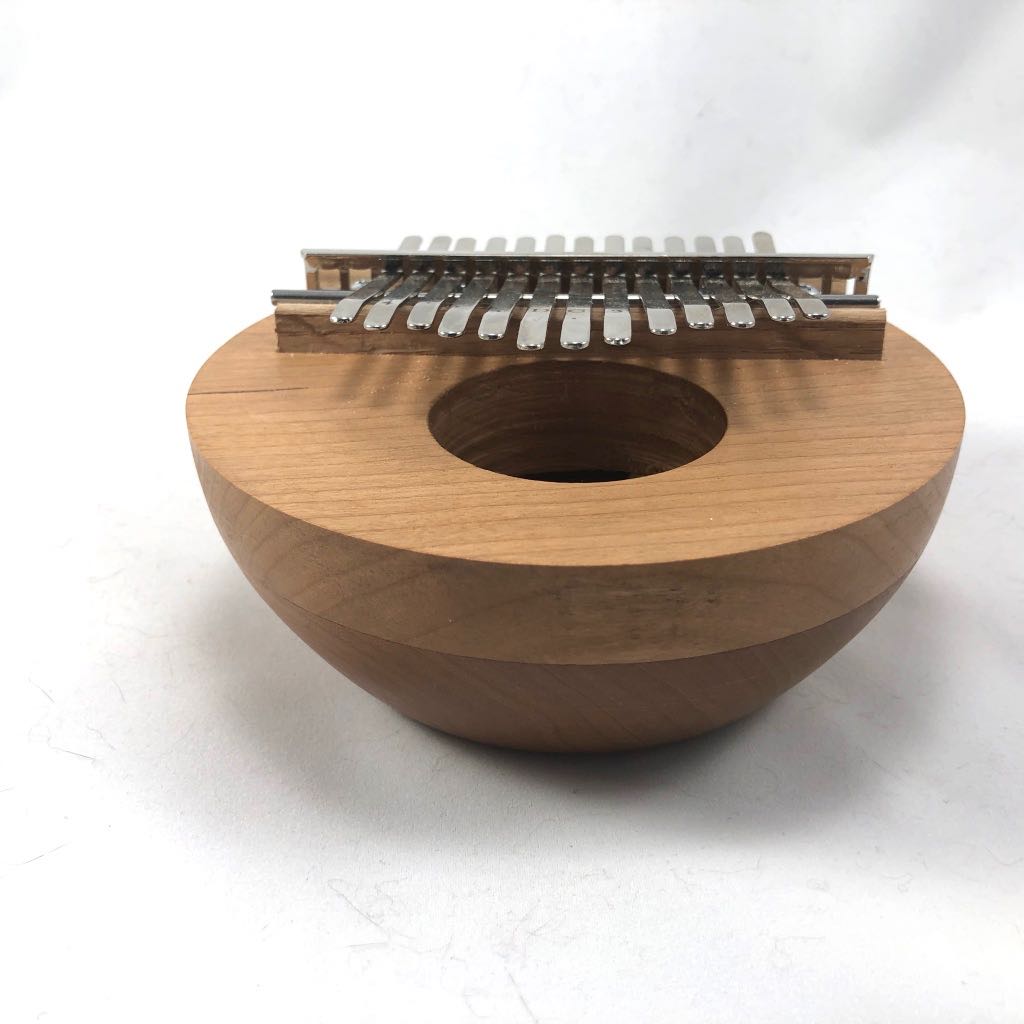
Kalimba #1 was made out of cherry and ended up a bit small. Additionally, the kit that I had obtained contained one inch screws, suggesting a need for a rather thick sound board. This first box was made with that in mind. The result is a much smaller resonating chamber and a quieter instrument.
Kalimba #2 was made from Hormigo (also called Orange Agate, Macacauba, or Macawood), a central american hardwood. I’ve worked with this wood several times before and find it to be easy to turn. It also accepts a very nice finish. The sound board was made significantly thinner. Due to the initial size of the blank, I was left with a relatively small instrument that could only accept nine keys. It has a very nice sound and handles very well.
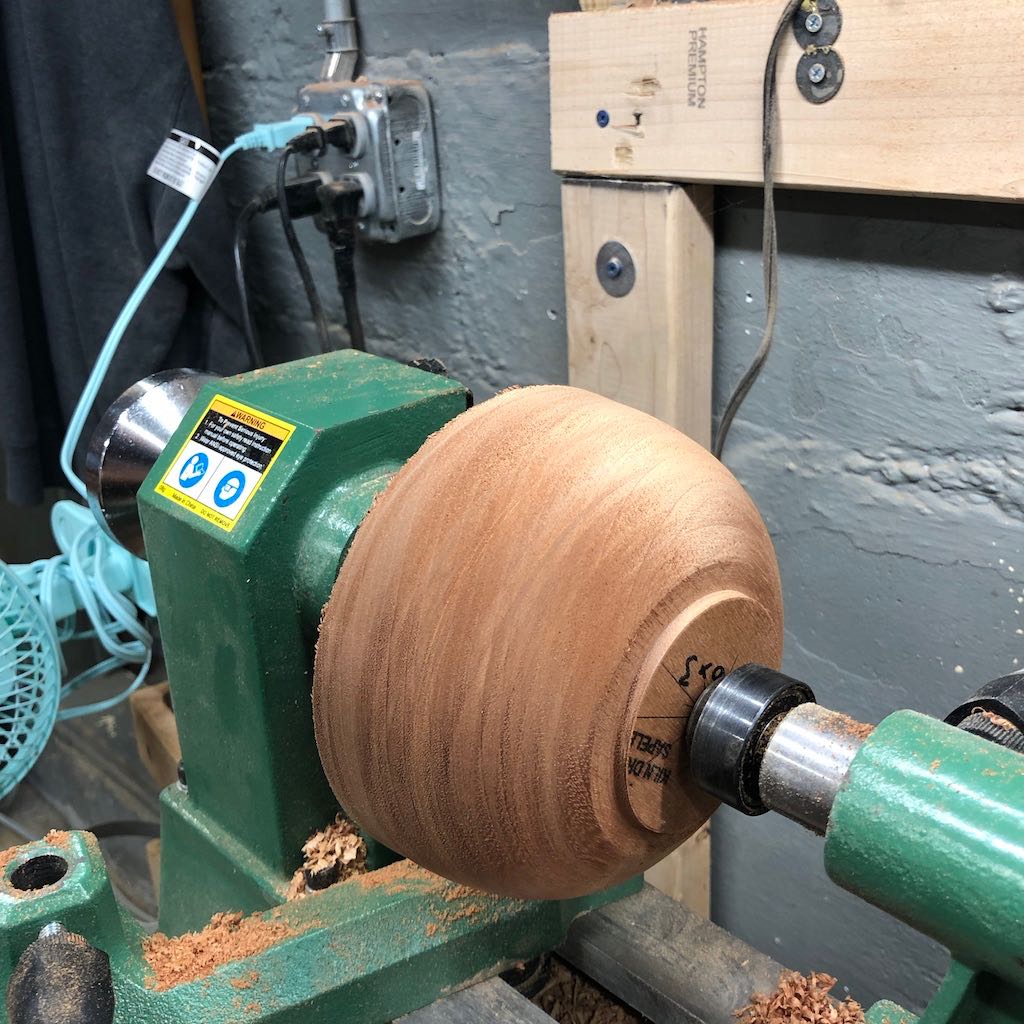
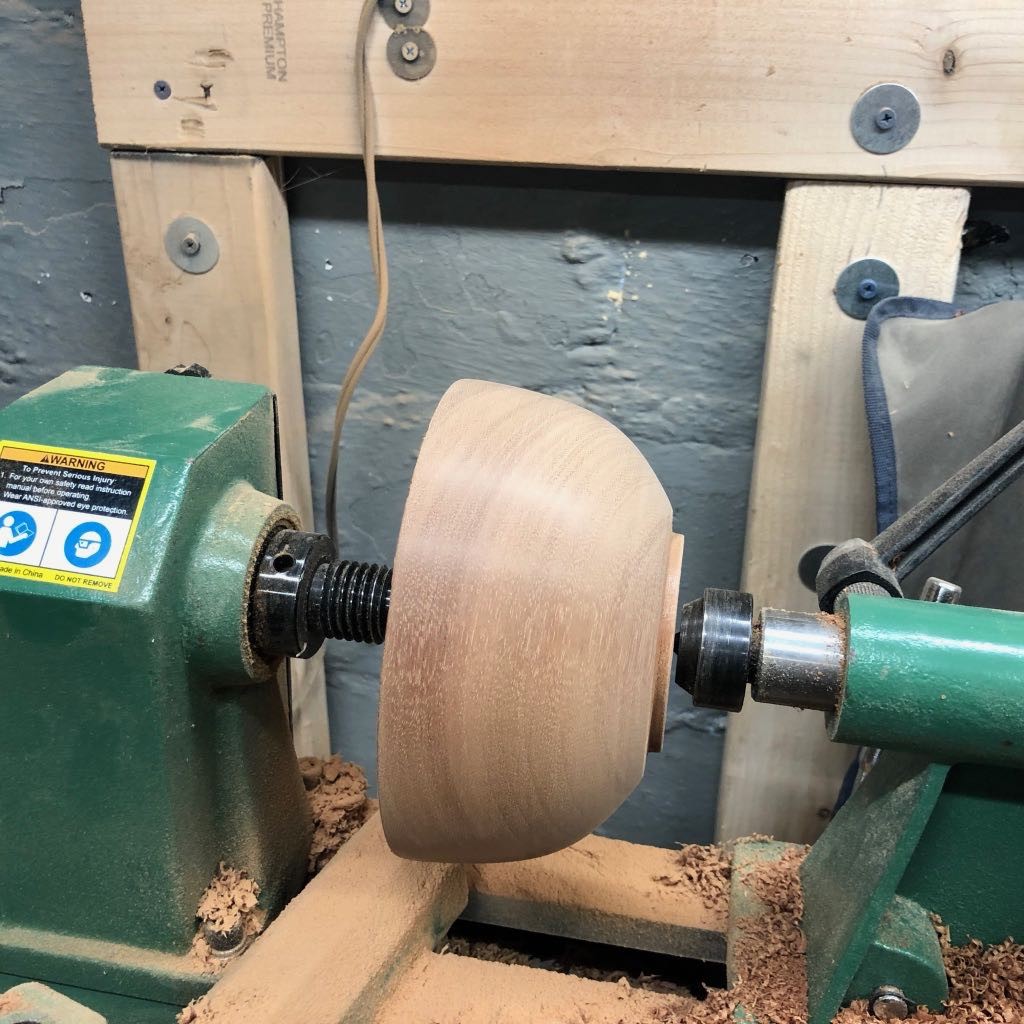
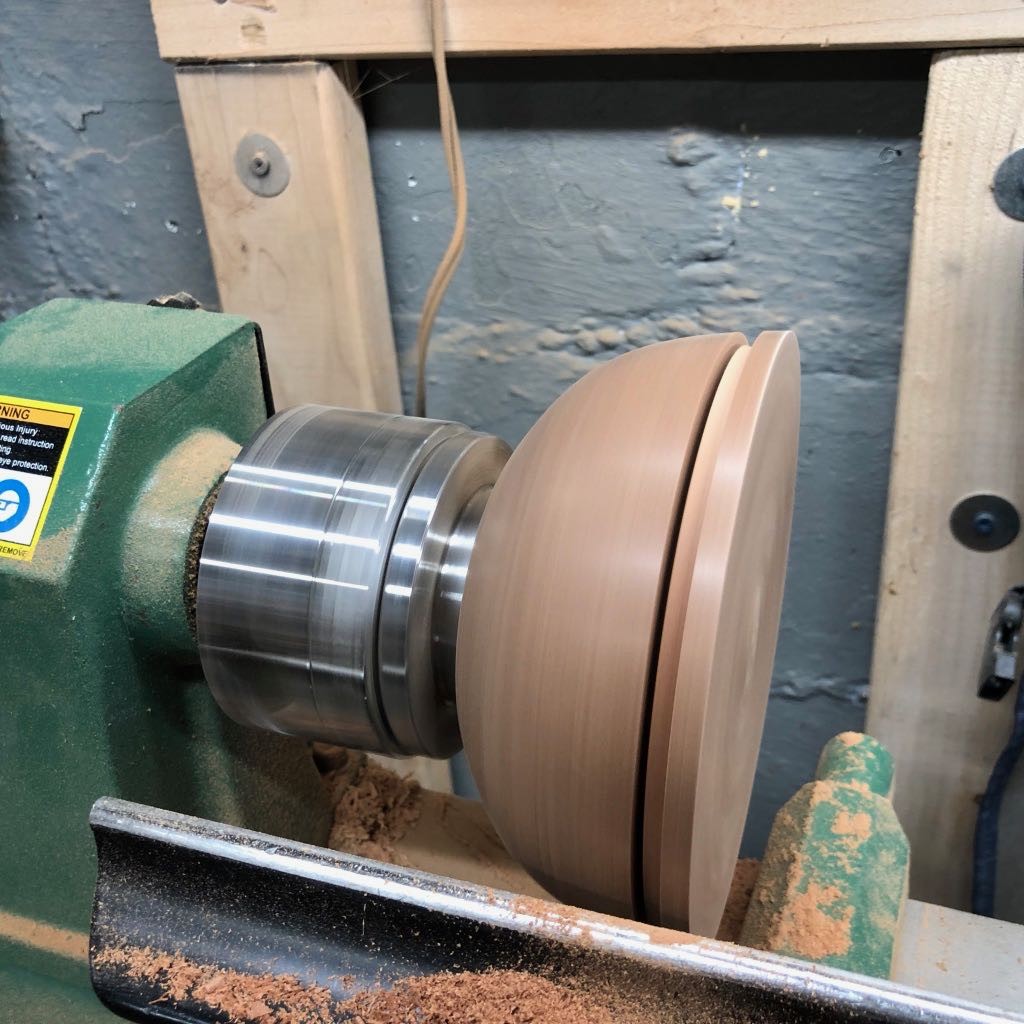
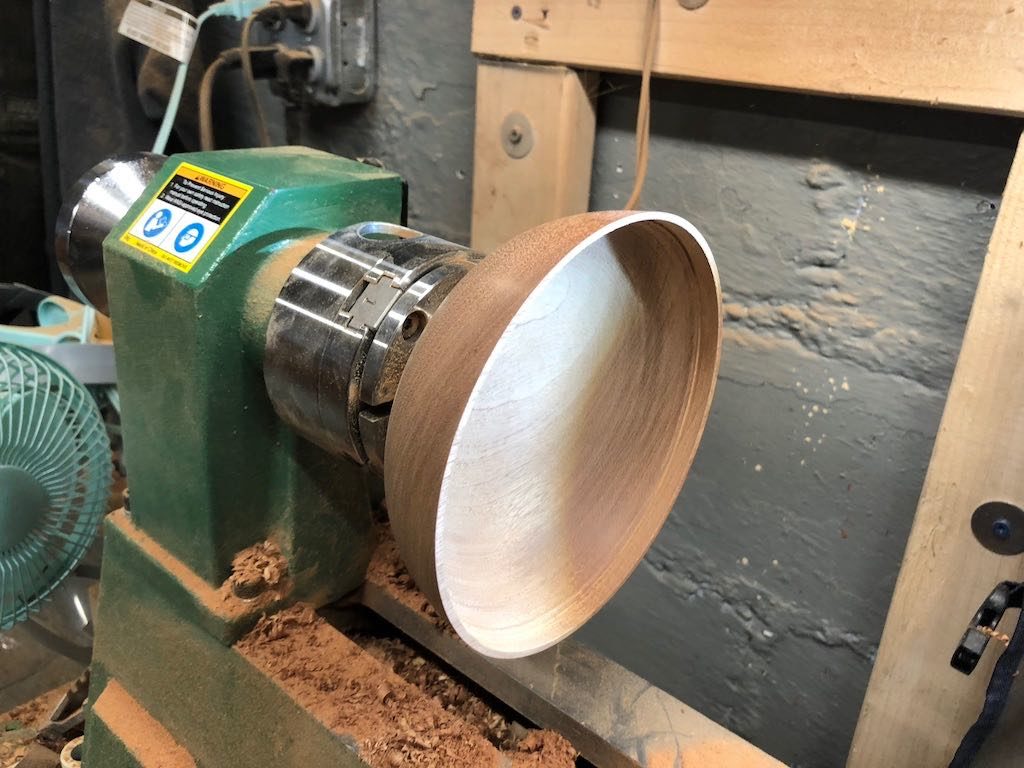
On the first day of Fair in the Park, I had an opportuntiy to demonstrate the making of the instrument. The process is fairly straight forward for anyone that has turned a lidded box before. After placing a bowl blank between centers, I turned down the blank, shaping the outside of the bowl and adding a tenon to the foot to allow the bowl to be placed into a four-jaw chuck. Once the outside was turned and sanded, the bowl is reversed placed into the chuck. The top of the blank is then flattened, taking care to remove any piercing from the spur center. Once the top is flattened, a lip is turned into the top where it will be fitted to the bowl. After the lip is established, the top is parted off. The cherry blank used for Kalimba #3 was larger than #1 or #2 and I did not have my handsaw with me. This made parting off a bit of a chore.
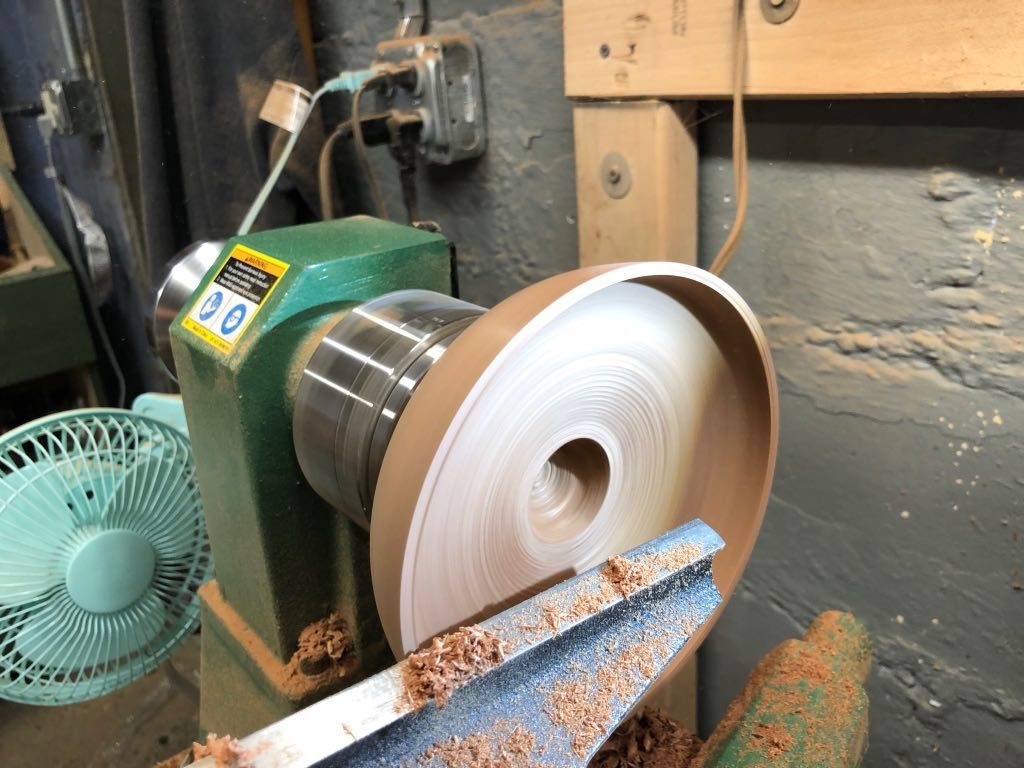
After the top is parted off, the next step is to start hollowing the bowl, taking care to establish the side walls so that the top will fit snuggly. Once the walls are established, the rest of the bowl can be hollowed out and sanded. Finish, if desired, should be applied to the inside of the bowl at this point.
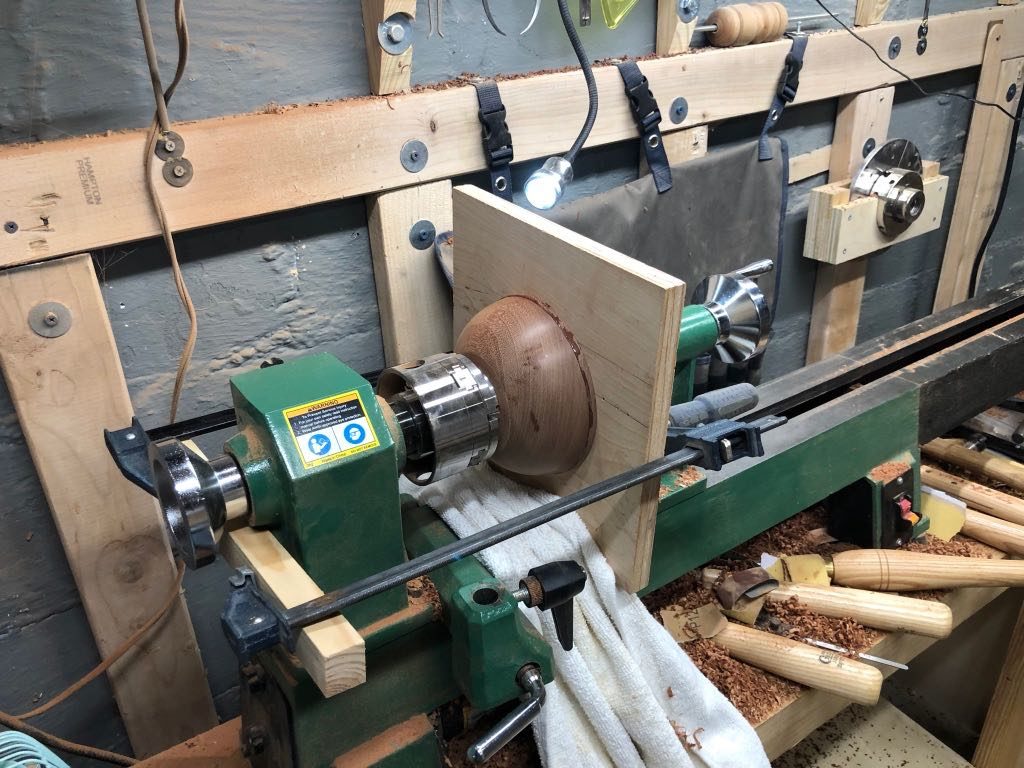
Once the bowl is finished, the top inside lip of the top is coated with an epoxy and fitted to the bowl. After giving the epoxy time to set, I then cleaned up the transition between the bowl and the lid. The lid is then flattened, the sound hole drilled, and pilot holes for the screws for the grounding bar are also drilled at this point. The entire bowl can then be removed, flipped around, and placed in cole jaws to remove the tenon and clean up the bottom. Final finishing can then be applied. After the finish is cured, the grounding bar, bridge, and tines can be added, and the instrument given its first tuning.
Kalimba #3 was made from cherry. The top was made significantly thinner and the bowl much thinner, resulting in a larger resonating chamber. The sound quality remained clear with the ability to amplify sound much better.
Kalimba #4 was made from sapele. The initial process for this was the same as the prior three instruments. However, I wanted to obtain a perfect grain match. The sound boards for kalimbas #1-3 were each made by flattening the top of the intact bowl, creating a lip on the outside of the bowl, and then parting off the top. The top was then flipped over and placed into the hollowed bowl. This resulted in an inability to get a perfect grain match.