I brought a fir 4×4 down to round this morning. I need to sit and sketch out the pattern that I’d like for it, including taking measurements from the article I am working from to lay out for the top tenon and the bottom sliding dovetails.
The blank was roughed out with a 1″ spindle roughing gouge. I then decided to get some practice with the skew chisel. Taking a 1″ skew to it, I immediately had a catch and tear out. I’m not too worried about it as I have at least a few more blanks worth of the fir that is nice and dry. After resetting, I continued to use the skew and was able to get fantastic curly shavings. While the round blank is clearly nowhere near a finished state, I found that the skew leaves a fantastic surface with minimal tearout. I’m going to try to use it as the primary tool for this first turning to get more practice with the tool.
Workbench
I stopped at Rockler this afternoon and picked up a bed extension for my lathe. It will give me the ability to turn 39 inches between centers when attached. This will be great for making a campaign chair and stool in the future. However, I have run into a bit of a problem. While it gives 39 inches between centers, it needs a wider workbench to sit on. That means that my current workbench (48 inches) is not going to cut it.
I initially thought that I would build a dedicated bench for the lathe (using a similar design to the saw bench I build a bit over a month ago). However, I’ve been thinking of building a new workbench for some time and this is probably a great reason to build a new main bench.
As I work in a narrow one-car garage, a proper 8 foot bench is out of the picture. The garage is about 9 feet at its widest. I’m considering a bench between 5 and 6 feet long (which would leave only 18 inches on either side if build to 6 feet) and 20 inches deep. After working on a number of projects so far, I’ve found that my current depth of about 30 inches is unneeded. The space at the back of the bench is just about never used for any operation. It usually just collects tools and shavings or allows me to be lazy and not put the lathe away when not in use.
I didn’t have a chance to spend much time in the shop today. What time I had was spent checking lumber stock and testing some of the auger bits that I have recently restored.
Testing bits
However, I was able to test an expansion bit and a no 13 Irwin auger bit with my brace after having cleaned them up a few days ago. Both of those bits have rather large square tapers that barely fit into the chuck of the brace. They cut nicely when I was finally able to chuck each of them up. I’ll sharpen them when I have a bit of time.
Chess table project
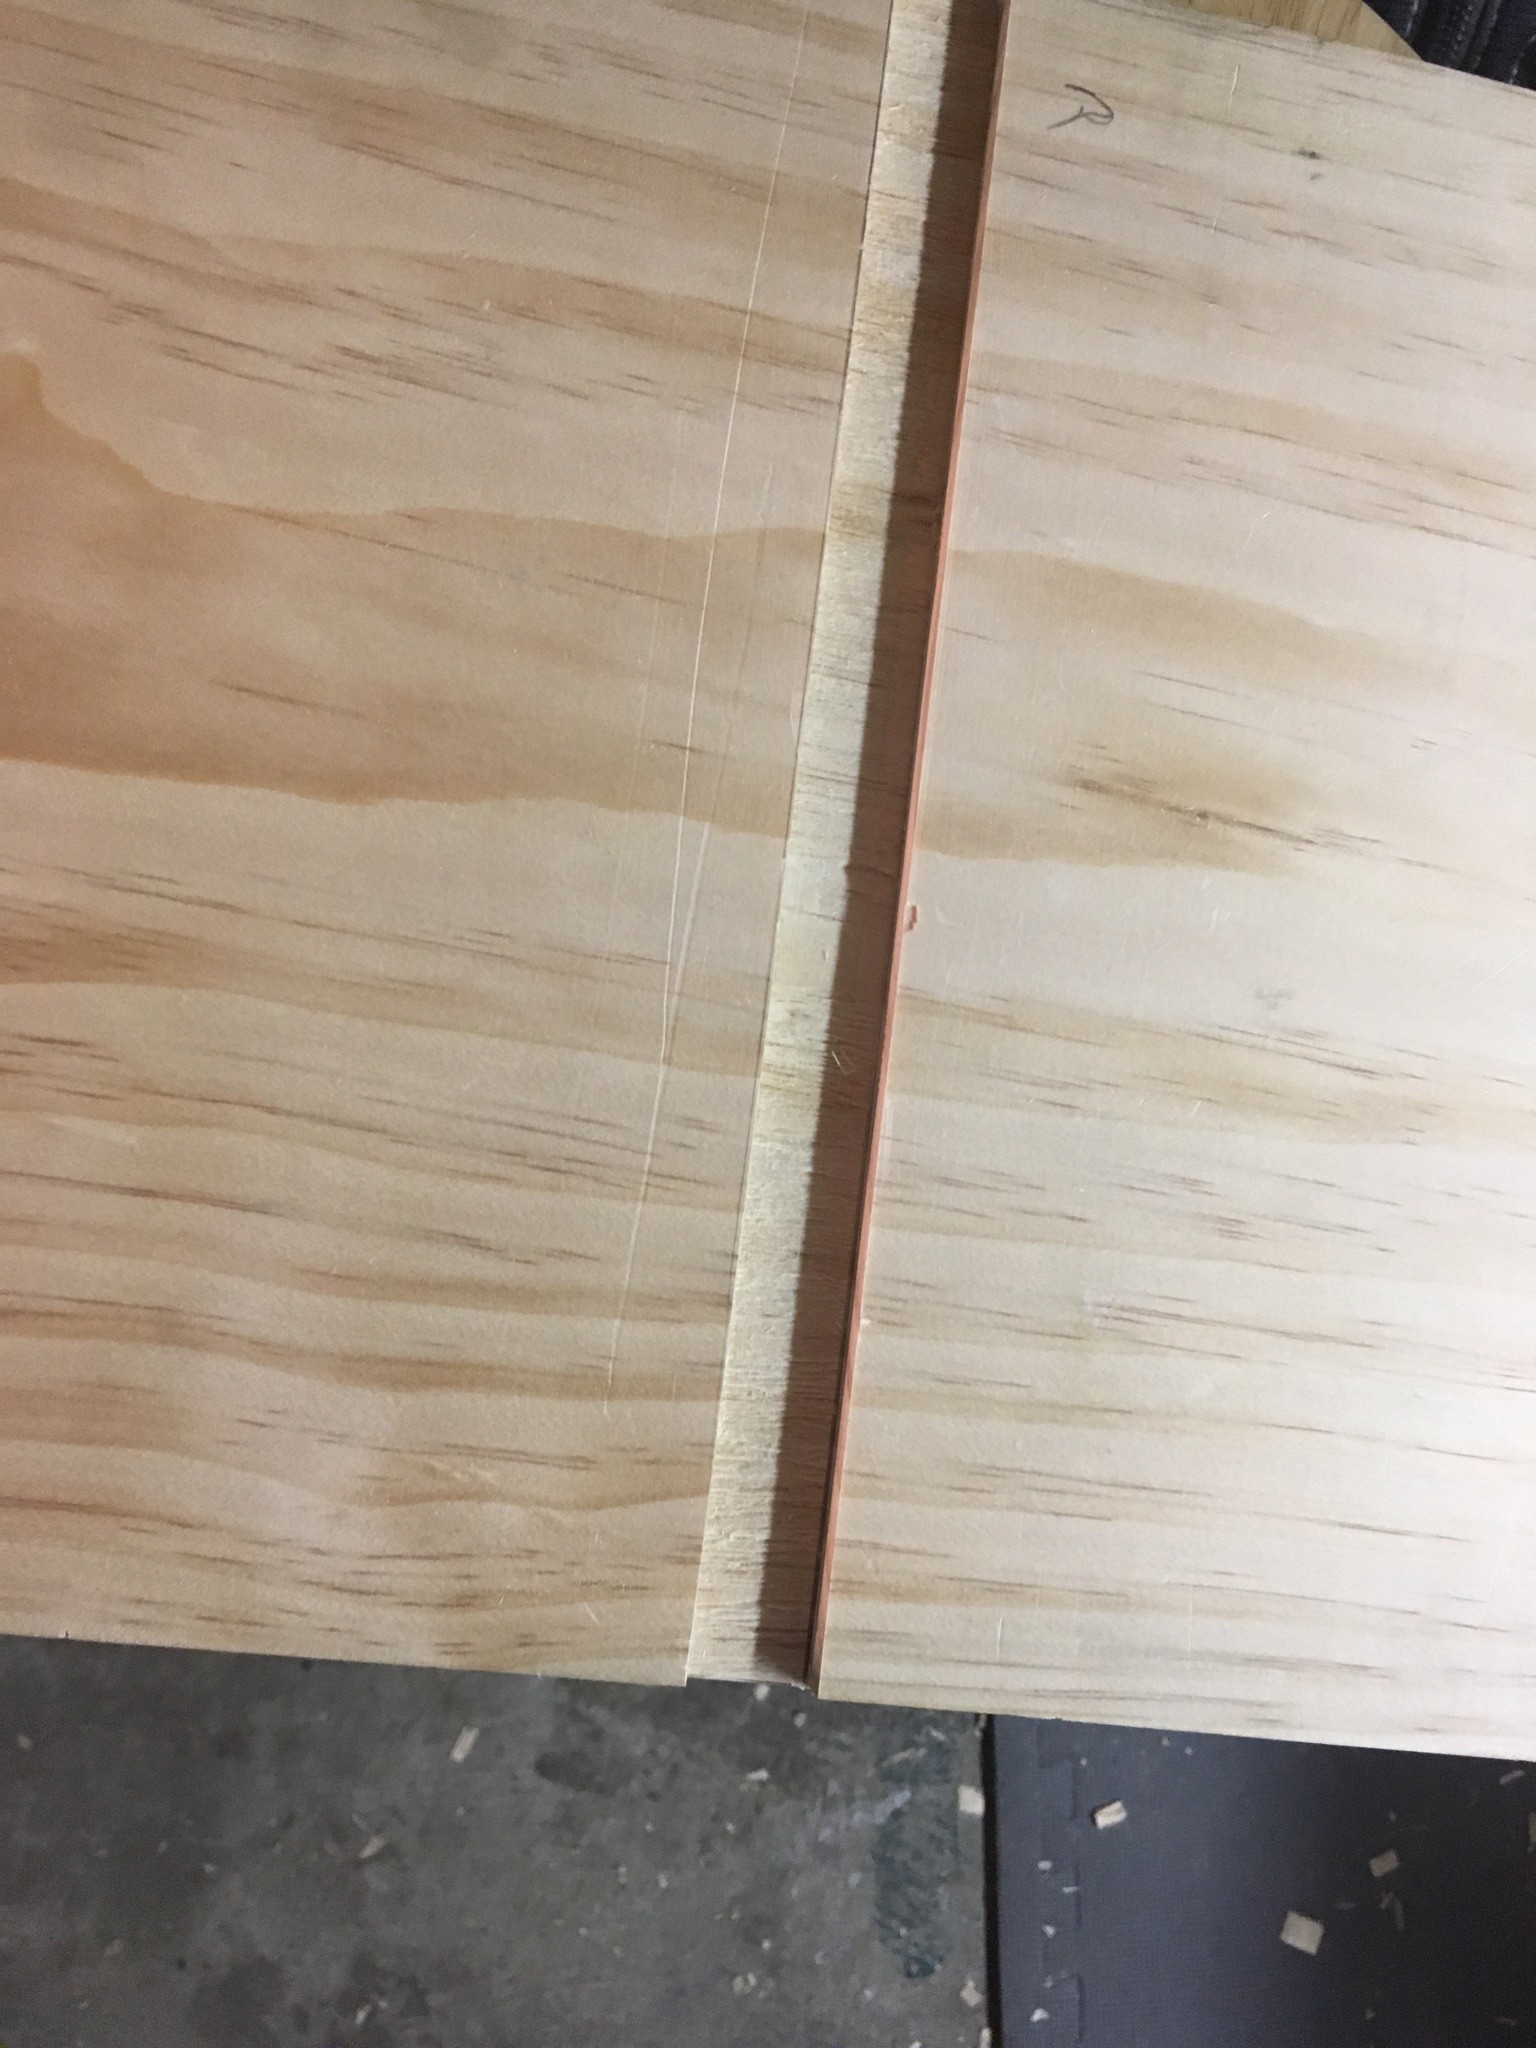
I will need to make a trip to a lumber supplier for this table project. I had a chance to look through the wood I have available. I would like to make the top, drawer fronts, and legs out of maple. Unfortunately, I do not have nearly enough of the ambrosia maple I had been saving for all of those parts. I think I have enough to do a three board glue up for the top only.
I have a fir 4×4 that I would like to use for the post. It is leftover stock from building a cat tree about four years ago. I already did a rough cut to 18 inches. It’s nice and dry. I’ll have to chuck it up tomorrow and see how it turns.
The following appears to be my cut list for the project:
Item
Length
Width
Depth
Number
Wood
Top
20″
18″
3/4″
1
Maple
Legs
9 1/2″
10 3/4″
3/4″
3
Maple
Post
18″
3 1/2″
3 1/2″
1
Fir
Center Cleat
16 1/4″
2 3/4″
1″
1
Maple
Side Cleats
16 1/4″
1 1/2″
1″
2
Maple
Draw Fronts
5″
3 1/2″
1/2″
4
Maple
Drawer Sides
16 1/4″
3 1/2″
3/8″
4
Maple
Drawer Runners
16 1/4″
3/8″
3/8″
4
Maple
The original plans had called for using pine for the top and drawer sides. I may still do that. I’ve made the top thicker than indicated in the FWW article as I’ll be inlaying a chess board of 1/16″ veneer. The original had called for a 9/16″ top rather than a 3/4″ top. We’ll see how that progresses.
Since I have finished the dutch tool chest last week, I’ve been thinking about the next project that I would like to make.
My goal for this project will be to:
Learn at least one new technique; and,
Make something that I will want to use on a regular basis in my home; and,
Give a home to some rescued items.
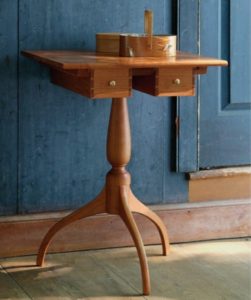
I’ve been spending time looking at a number of traditional furniture styles with an eye toward the Shakers. In particular, I think that I’d like to make something along the lines of a traditional candle stand.
However, I think I would like to add some inlay to this table. I have a set of chess pieces that were rescued from a basement. They are currently sitting wrapped in old newspaper and need a more permanent and appropriate home.
Shaker-inspired sewing stand from Christian Becksvoort. Appearing in Fine Woodworking Issue #261
I’d like to base this on the table made by Christian Becksvoort in the May/June 2017 issue of Fine Woodworking. However, I will be adding an inlayed/veneered chess board to the top of the table. The drawers will act as storage for the chess pieces.
There are a few skills and techniques that I think this project will require. This includes cutting sliding dovetails and veneering. I have some ambrosia maple boards in the shop that might be perfect for the top. More later…
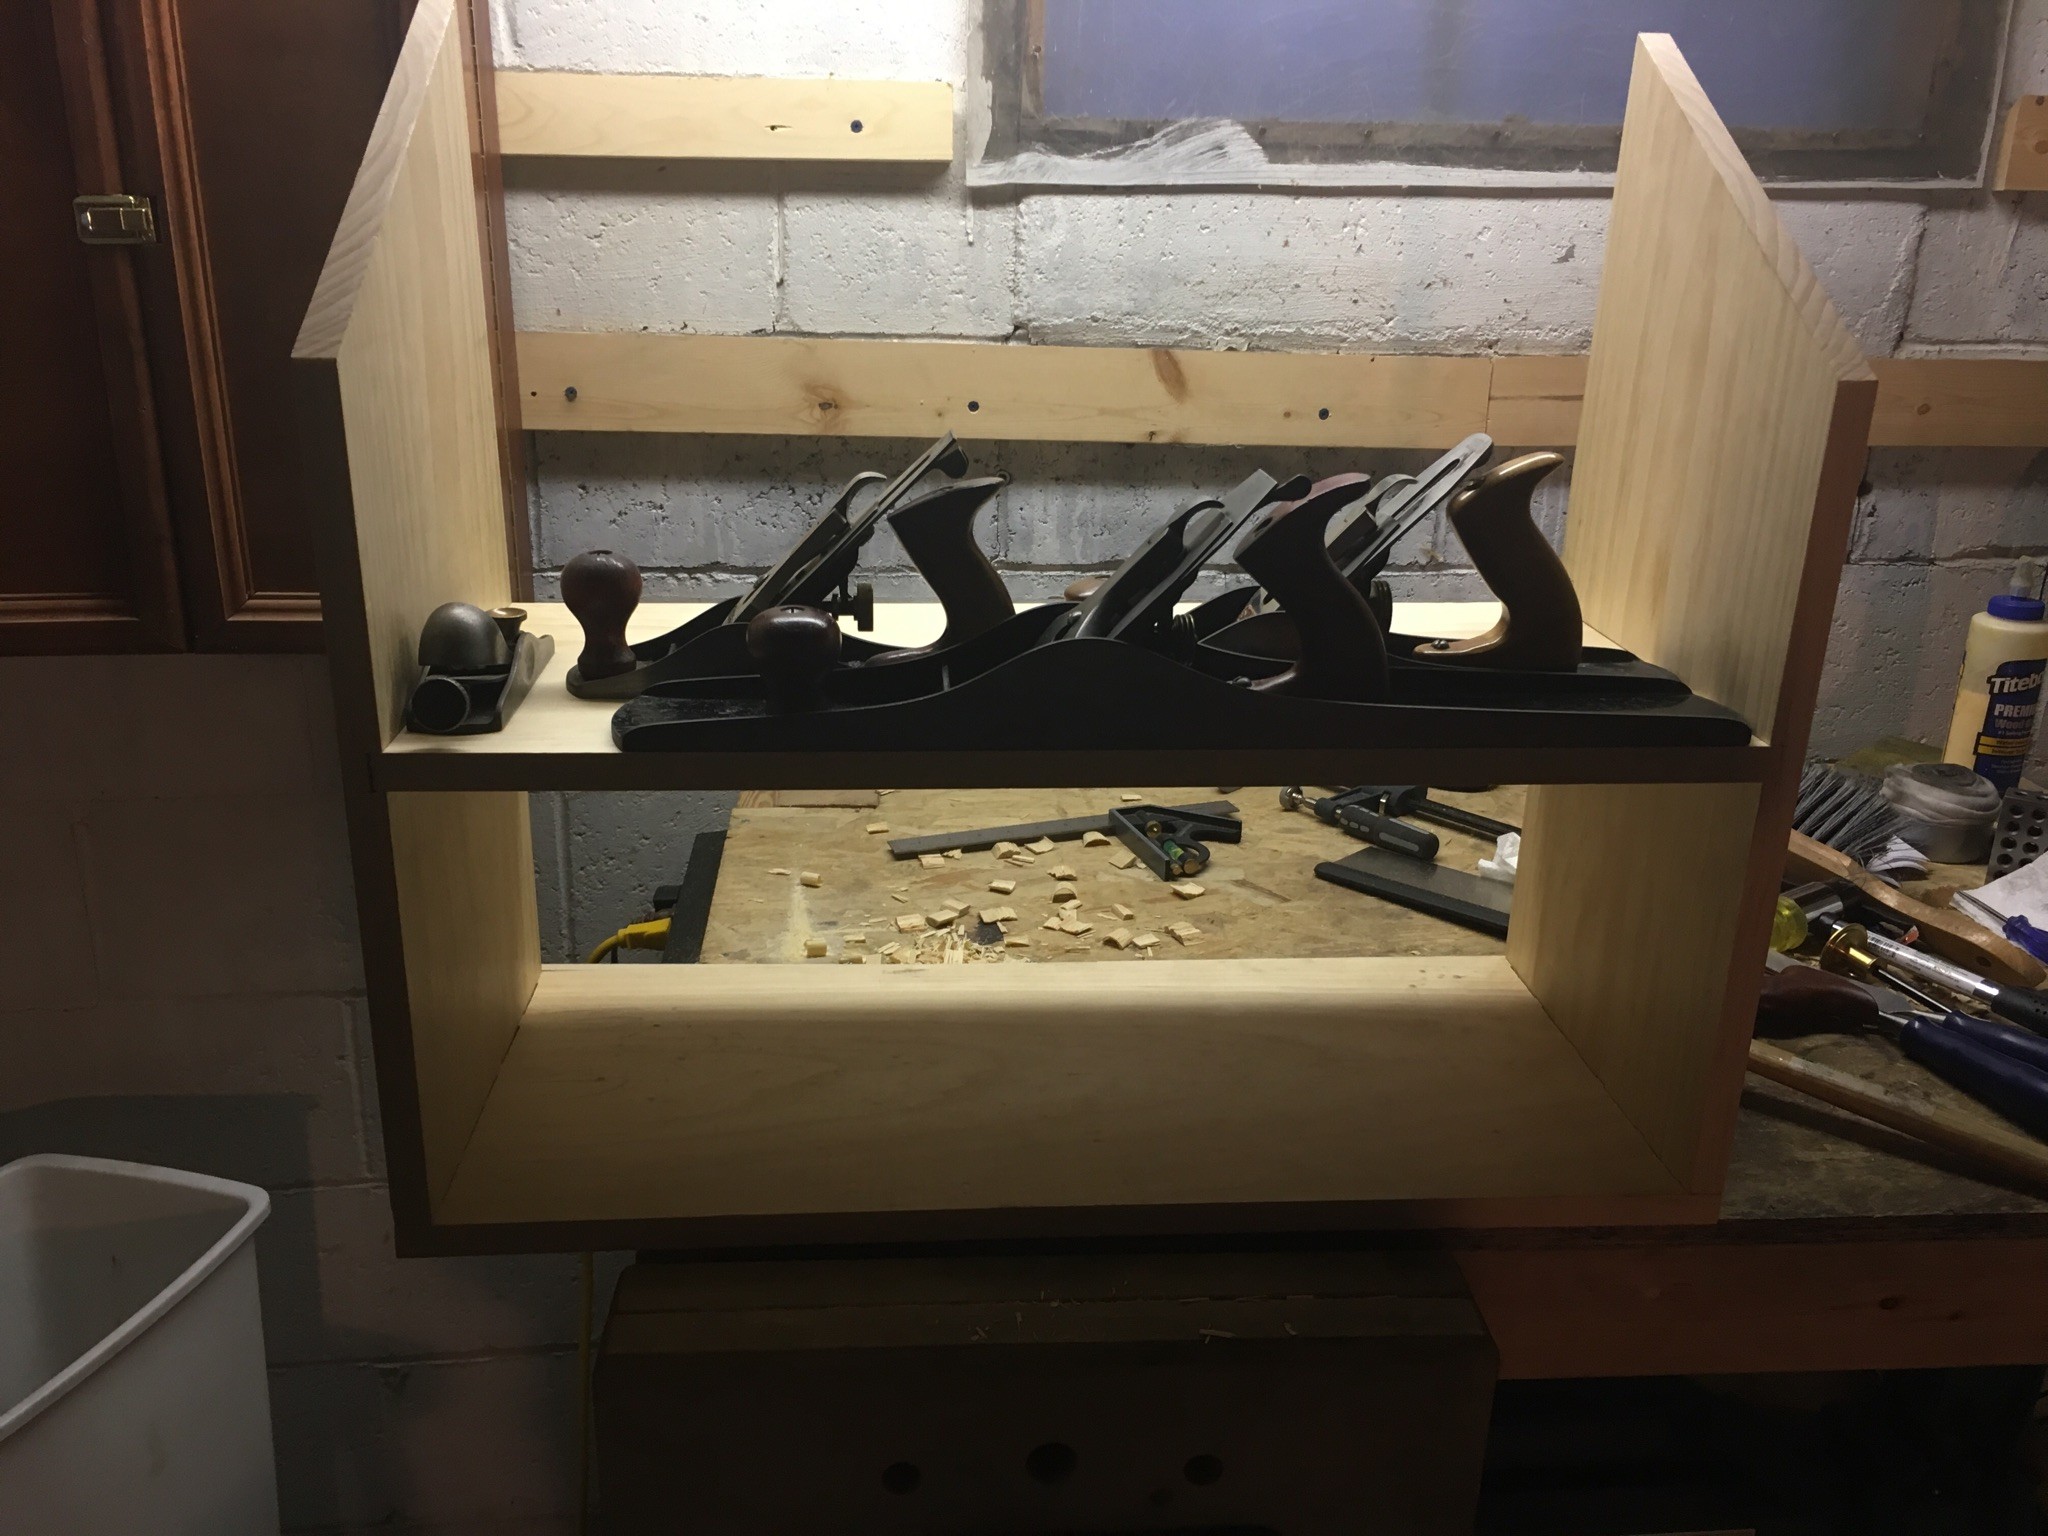
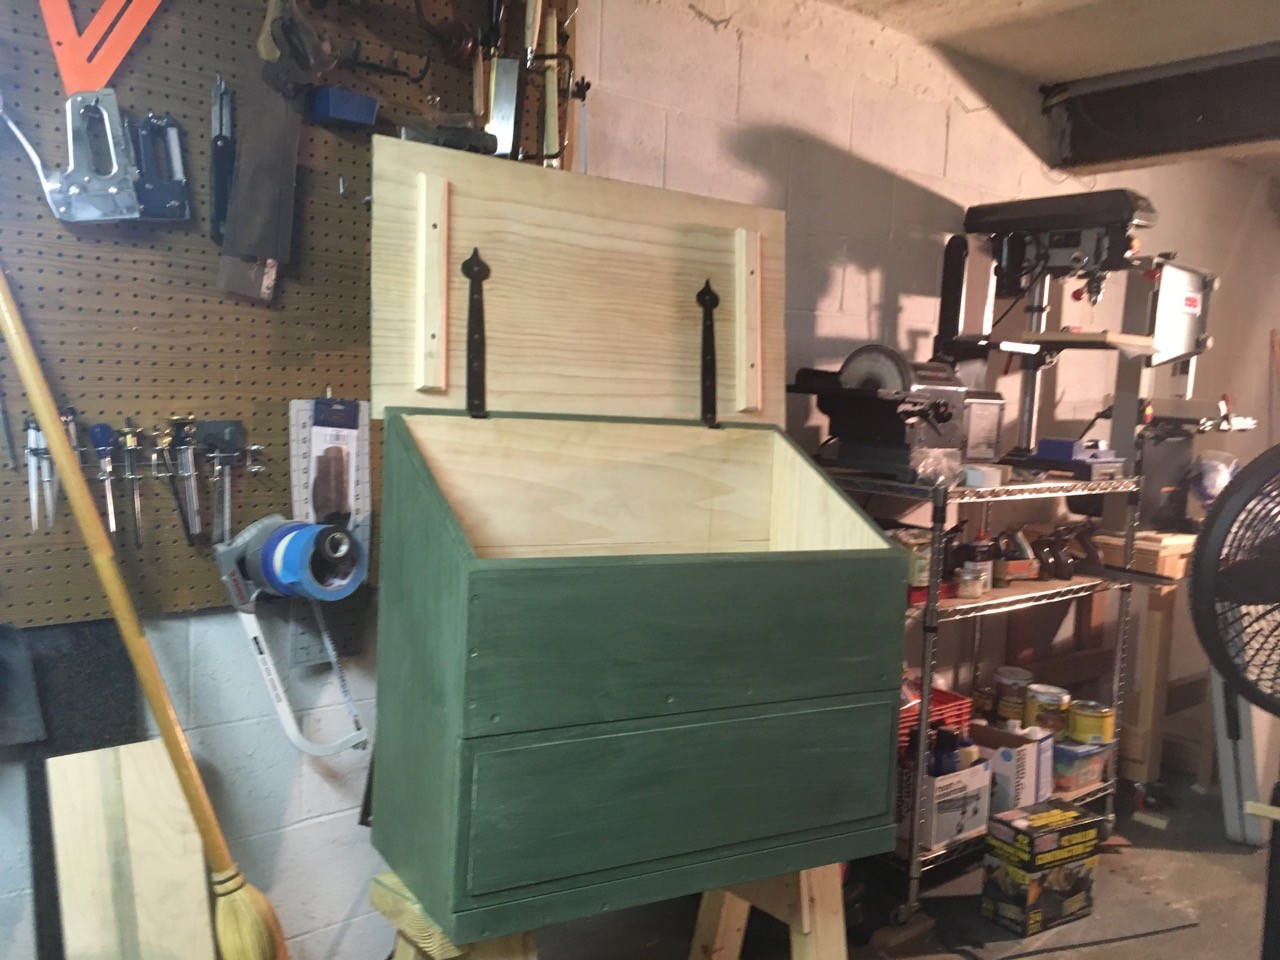
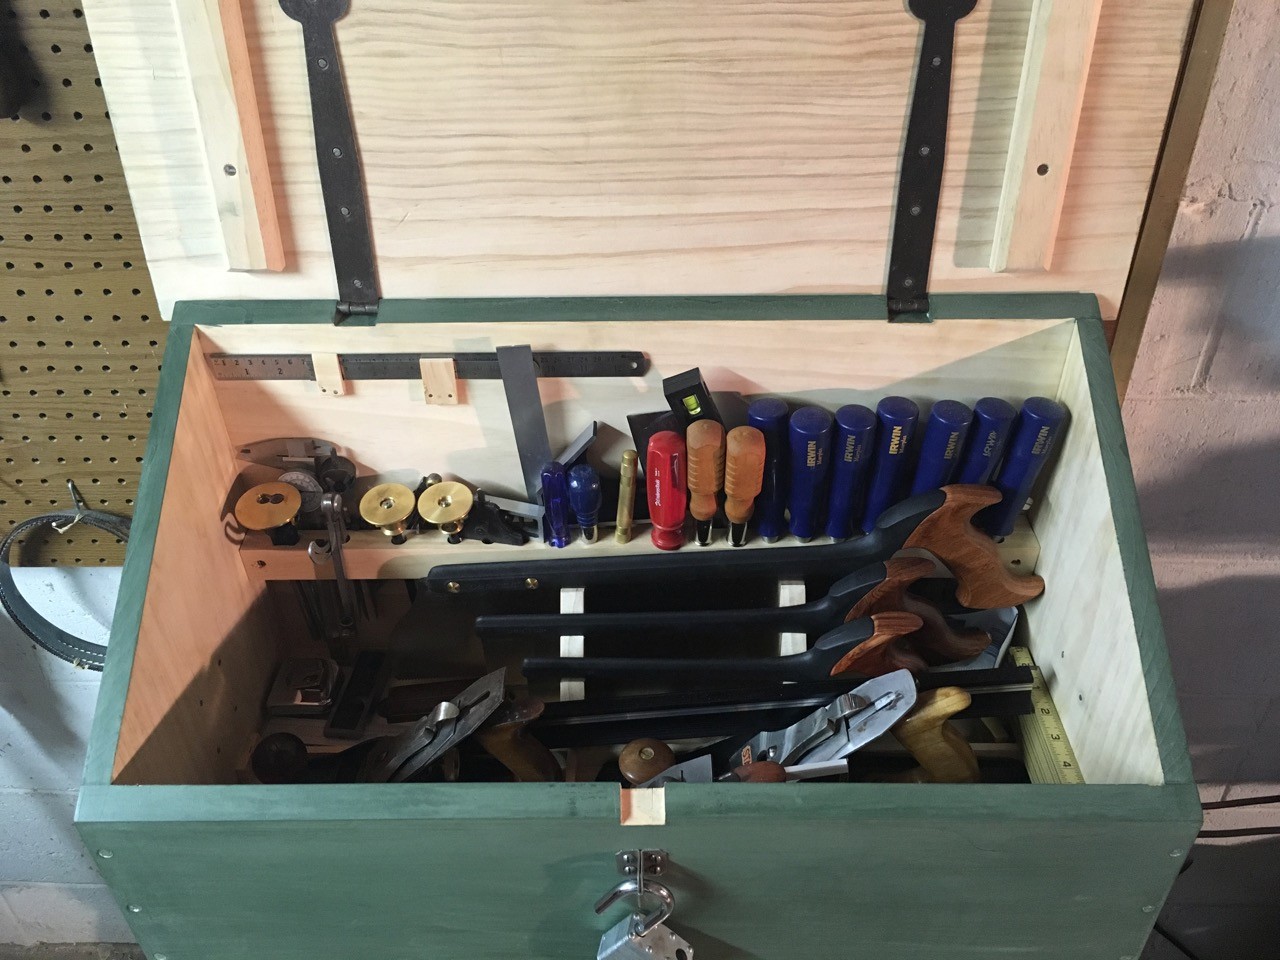
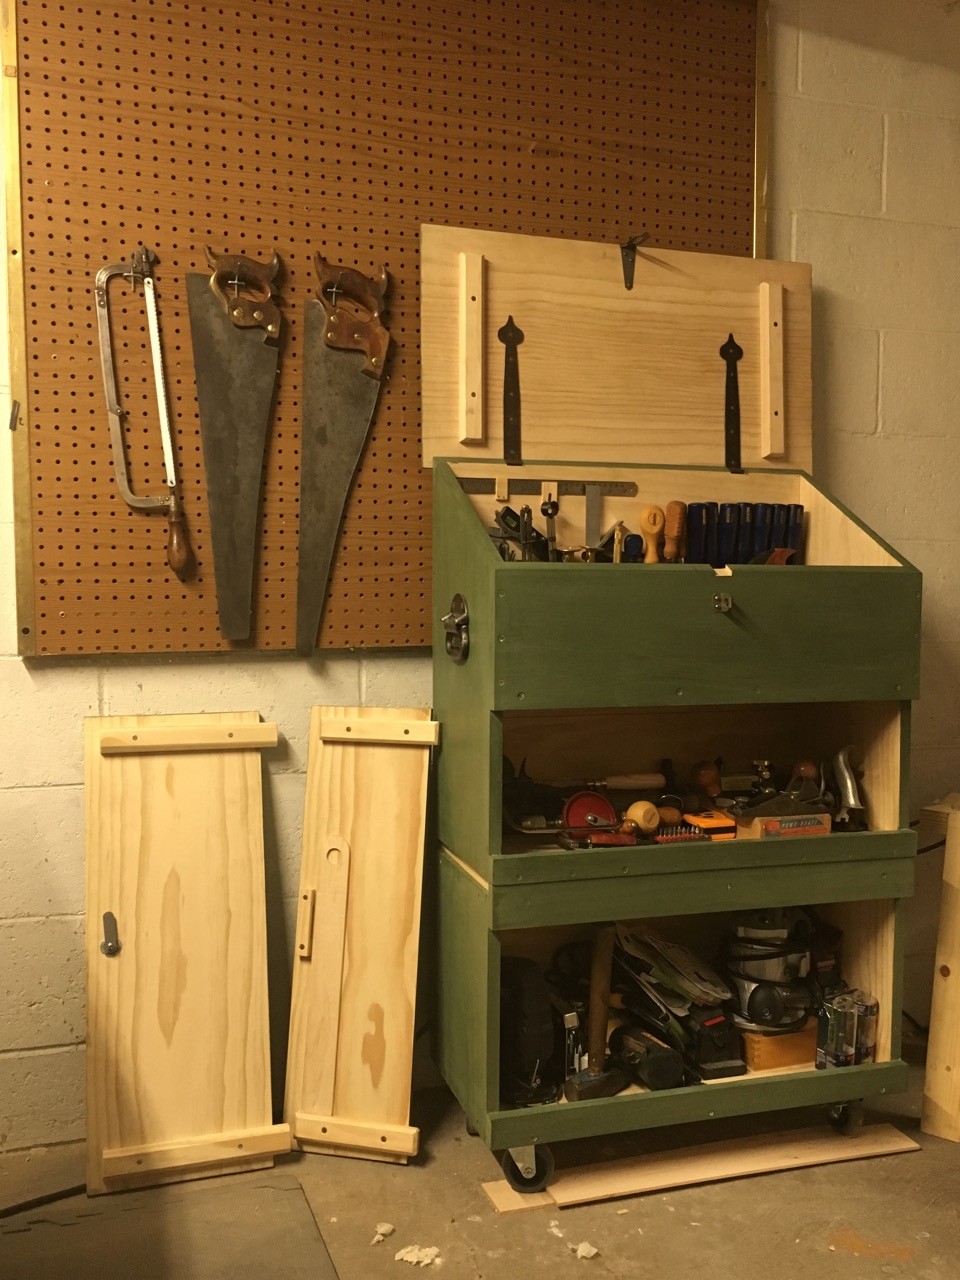
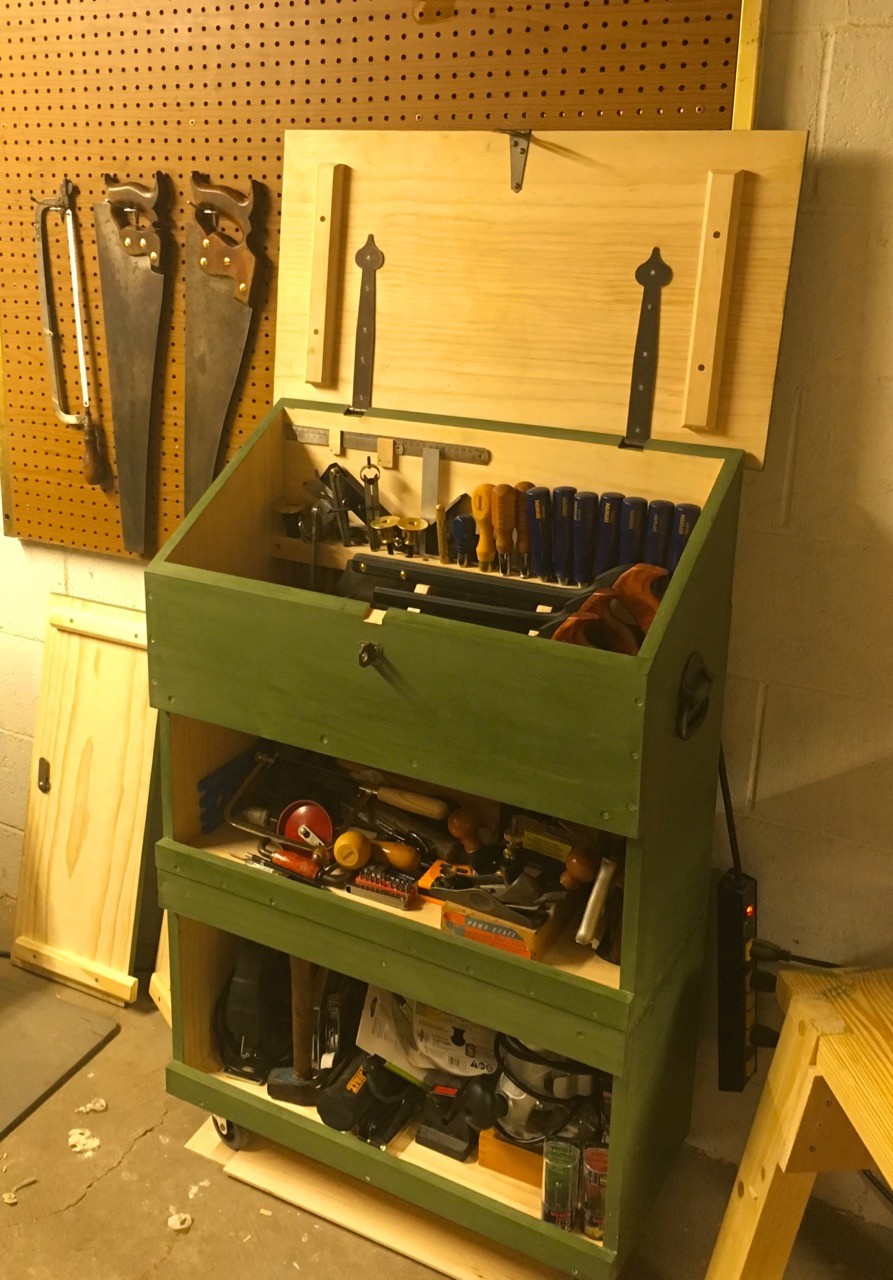
Since starting to do more traditional woodworking over the past year, I have built up (amassed) a set of hand tools. They had no home in my workshop. Some were on a pegboard, others on shelves, under my workbench, in boxes, etc. I think I spent more time moving things around to make room and hunting for tools than actually making anything.
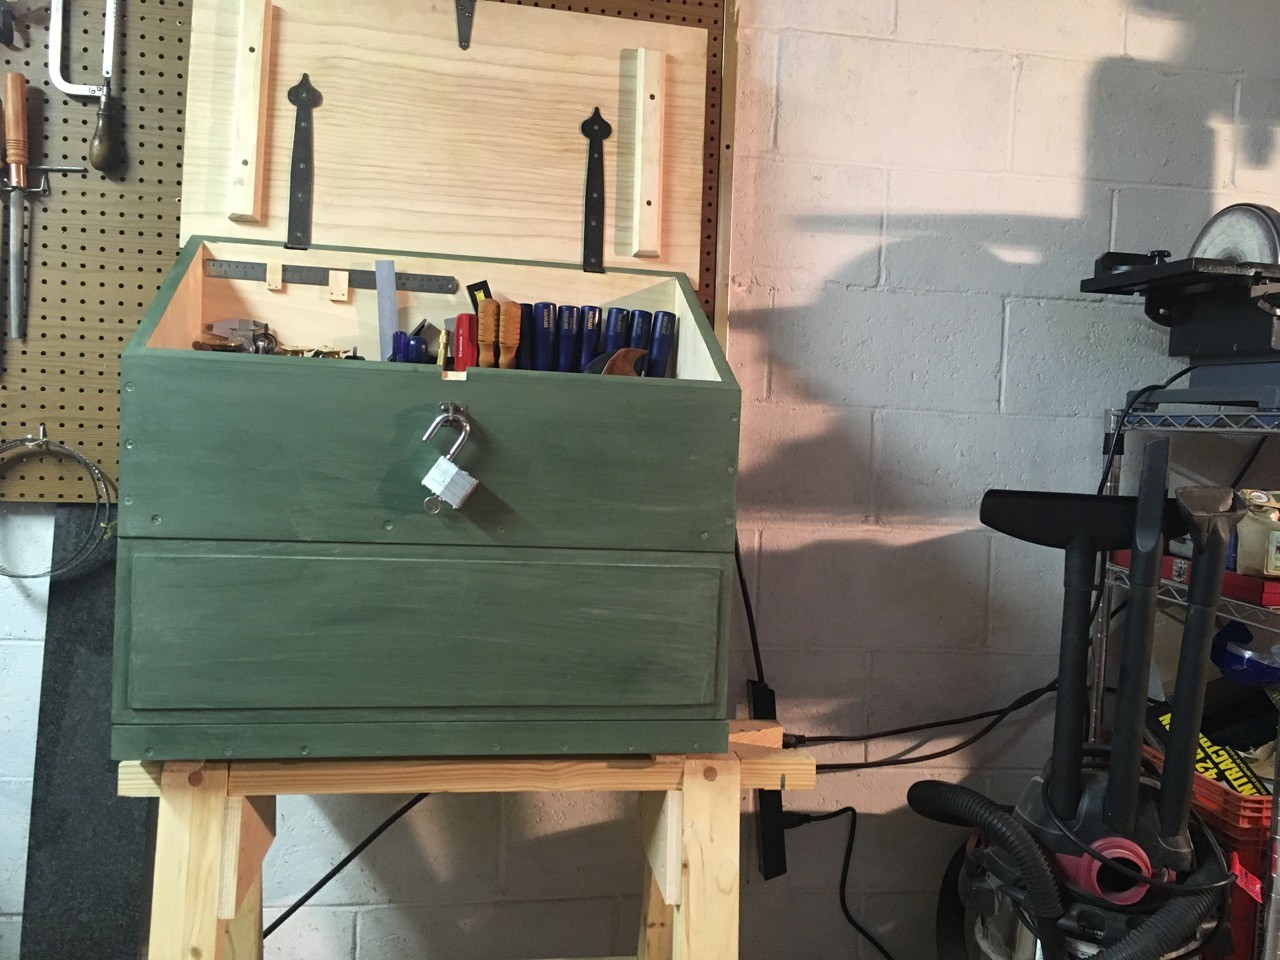
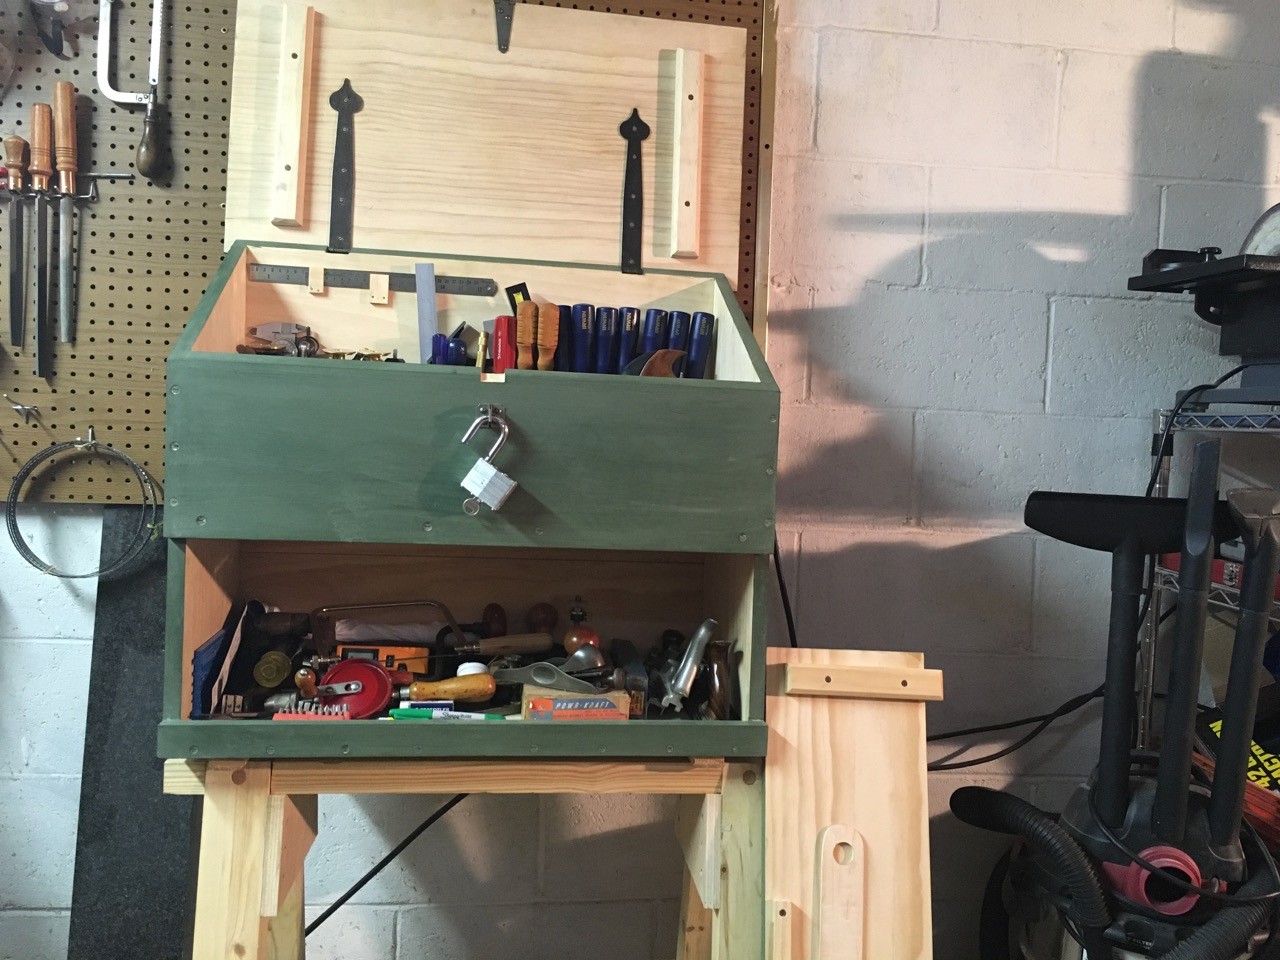
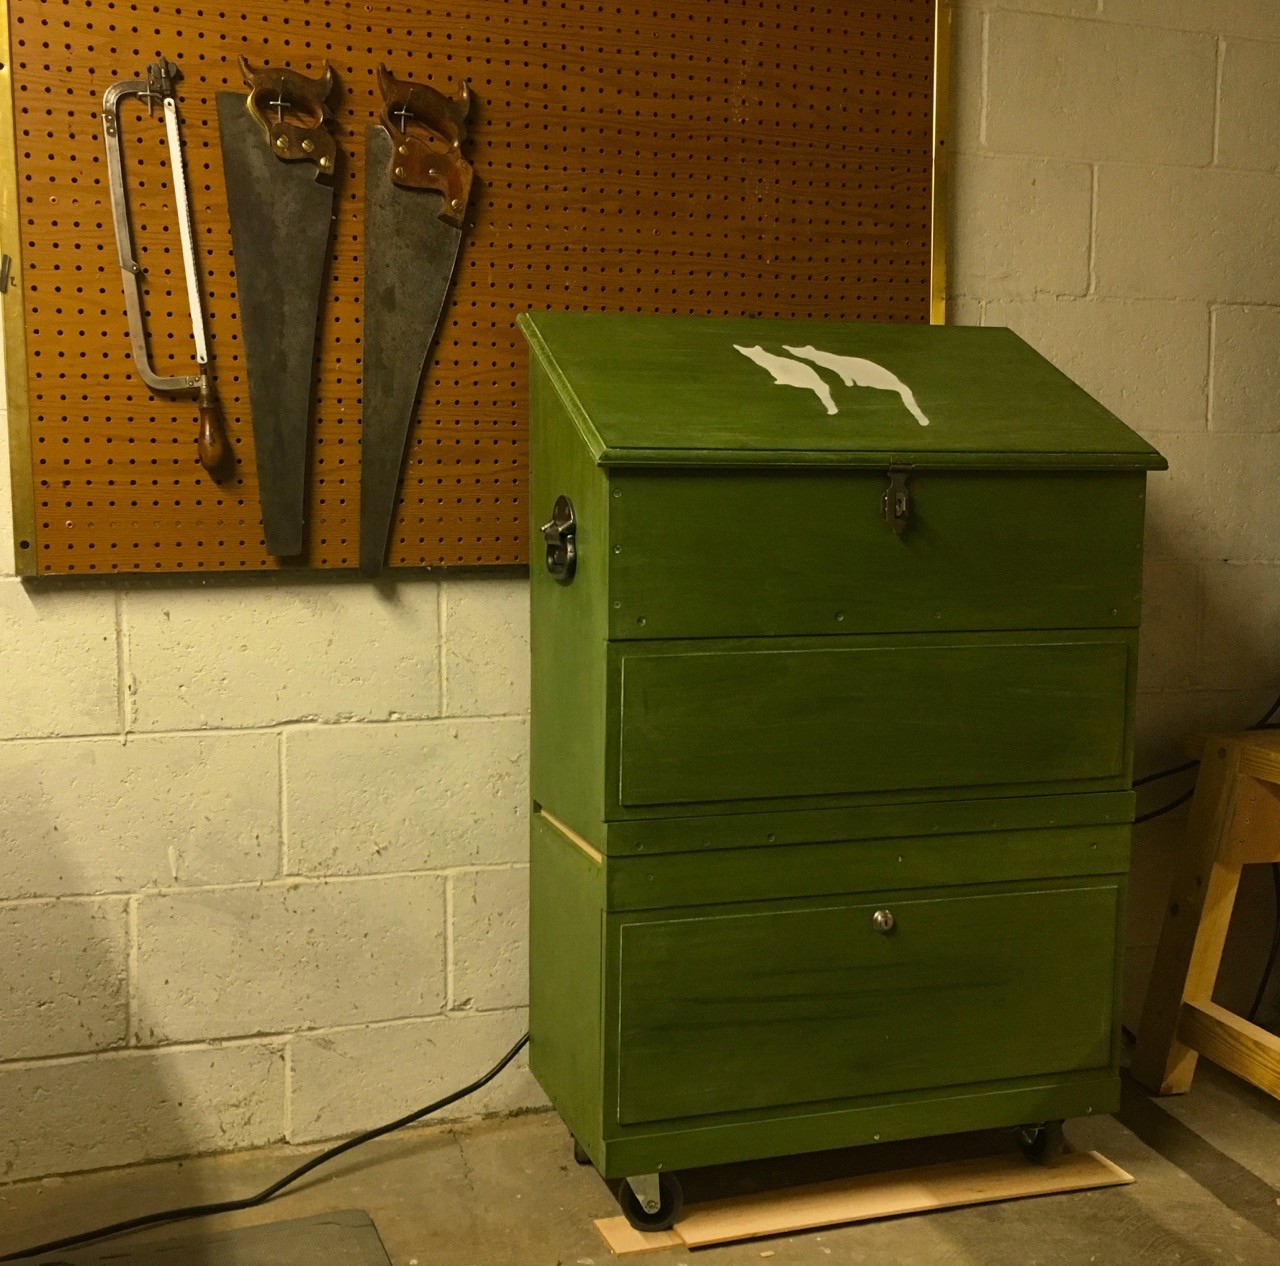
The upper unit stores all of my hand tools. The lower unit stores a number of the handheld power tools I use, including a router, random orbital sander, and a jigsaw (thought I can’t remember the last time I used the jigsaw for anything). These had been scattered around the shop in various tool bags. Using the lower unit for these adds good weight to the bottom and keeps the shop organized.
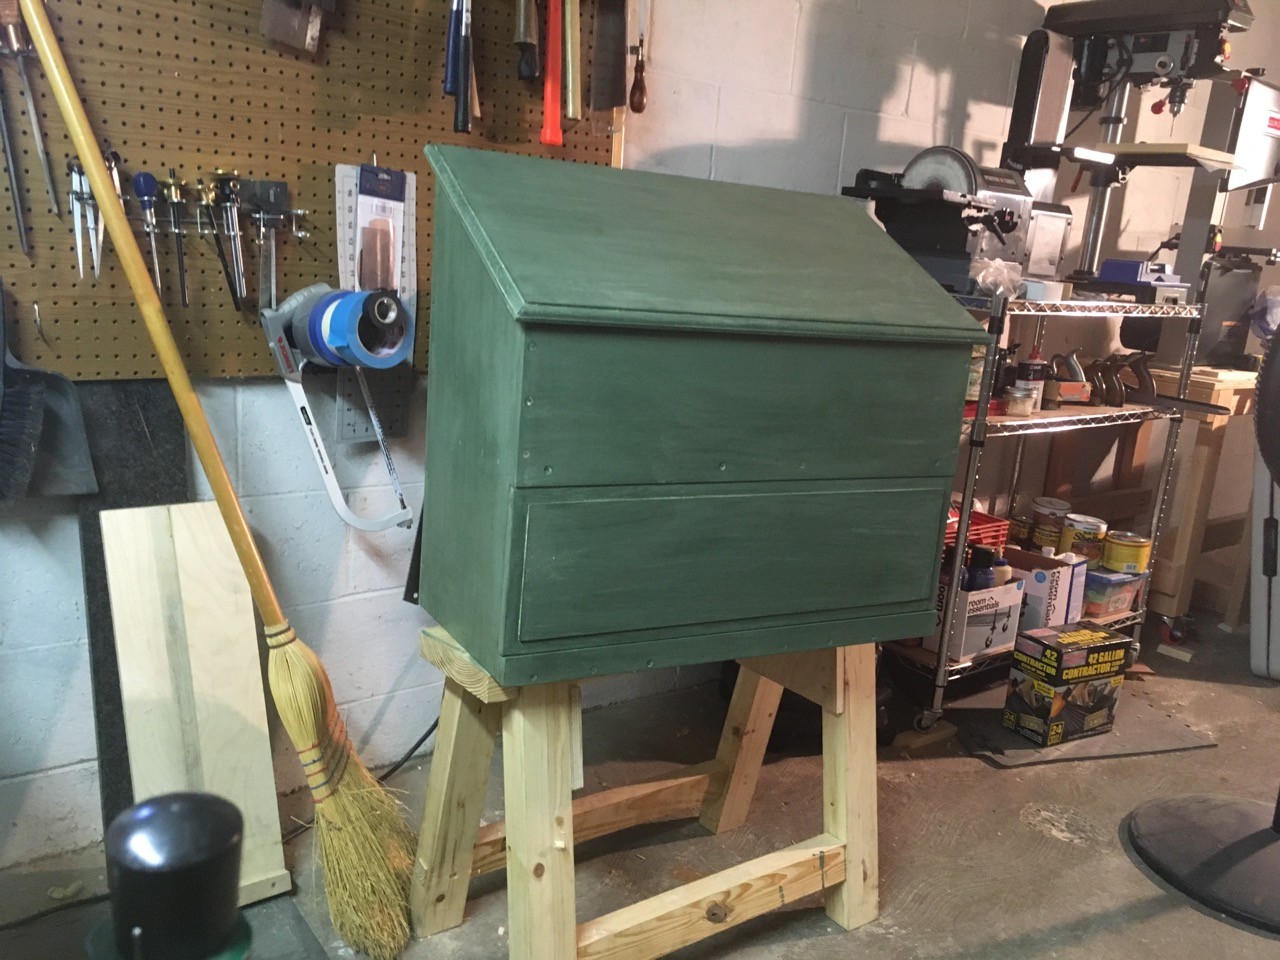
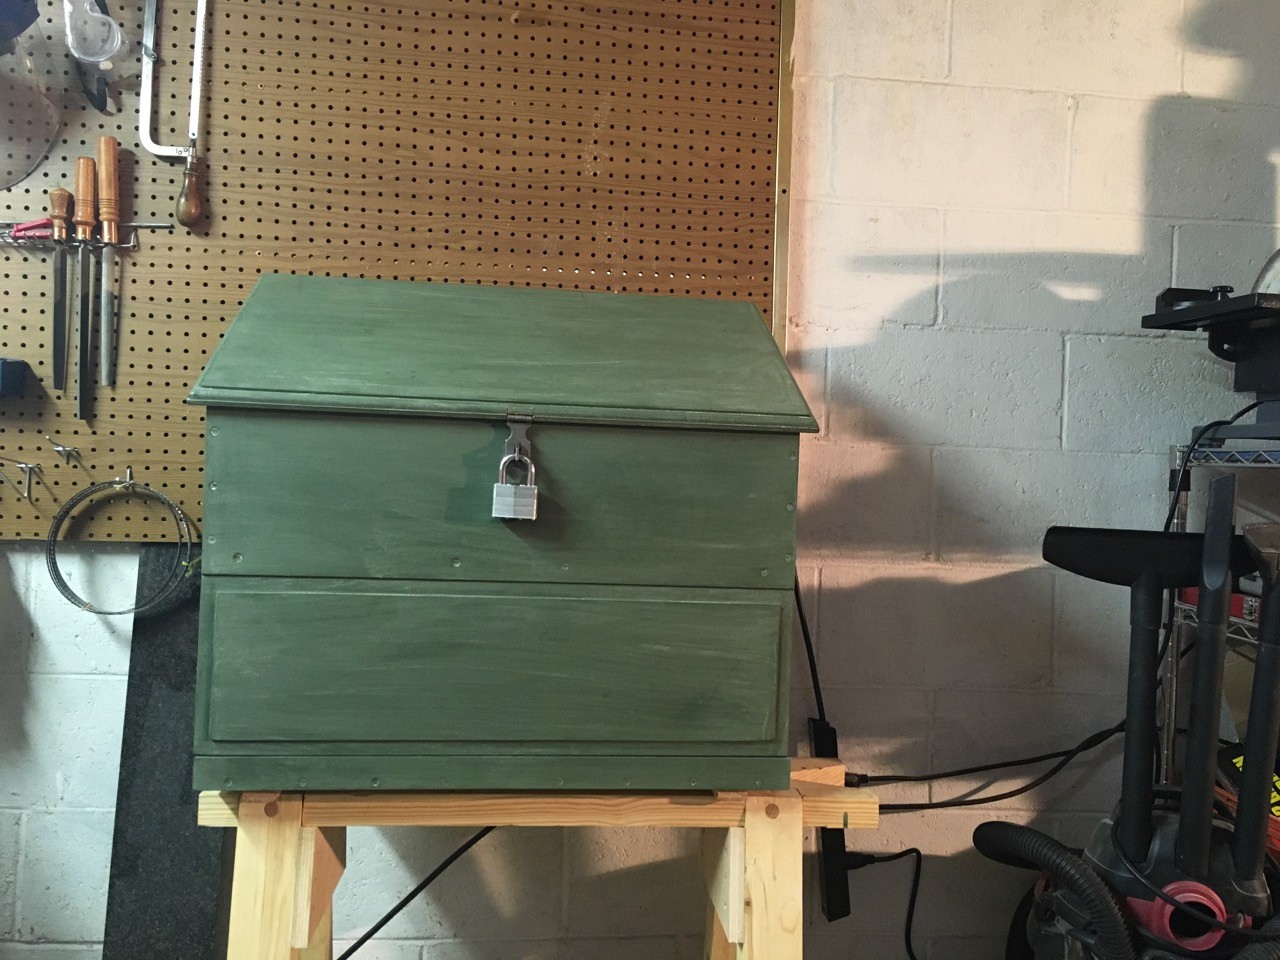
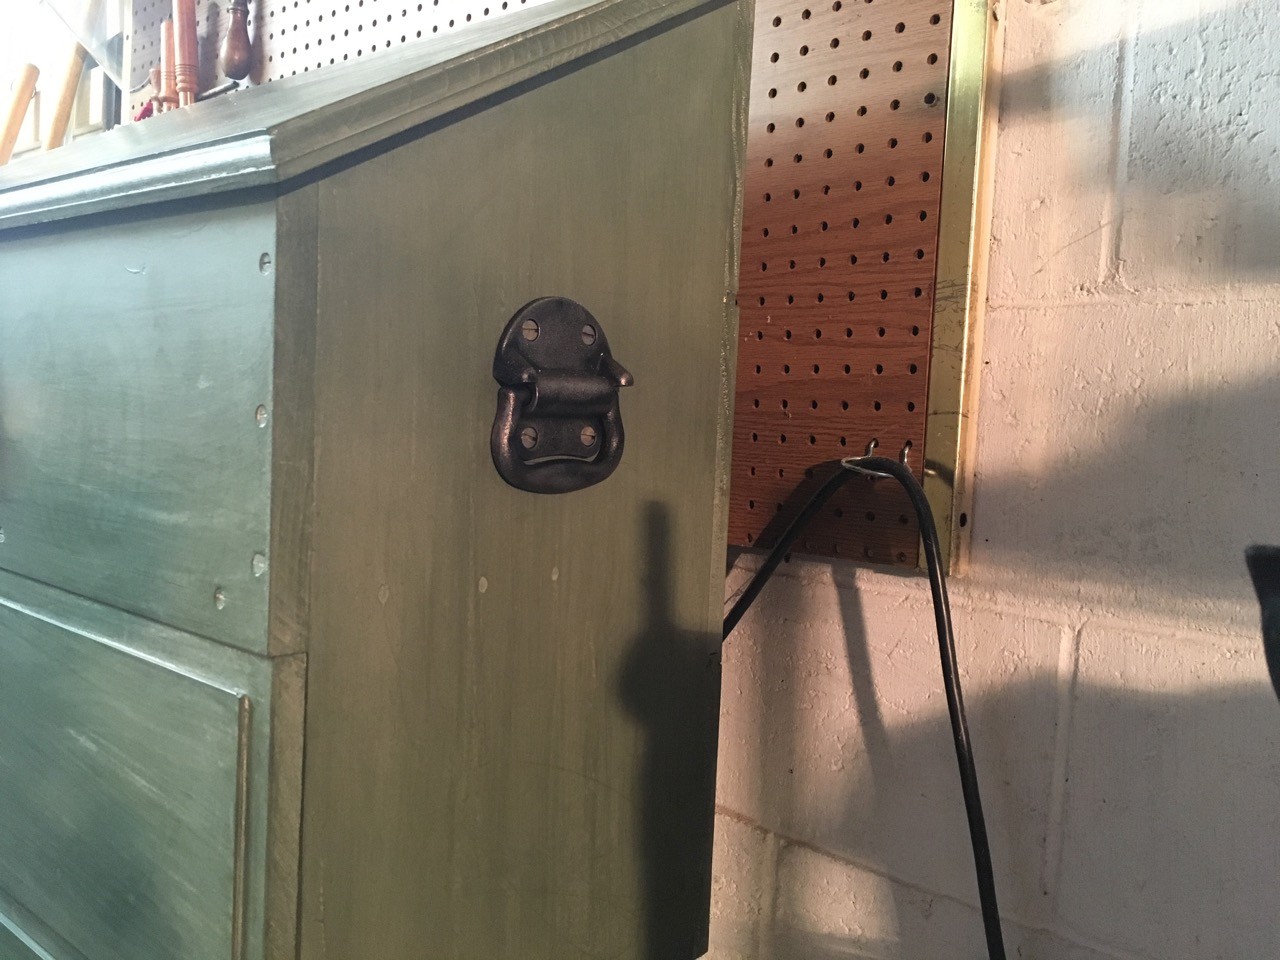
The hinges and lifts are from Lee Valley. The hasp, casters, and the cabinet lock for the lower unit are from the BORG. The finish is Lexington Green milk paint from Old Fashioned Milk Paint. Two coats, sanded 320 in between and topped with paste wax. The top silhouette is from a photo my wife took of our two cats sitting in a window.
I still have a few finishing touches to do on it, including an upper saw till for panel saws and some storage for pencils, marking knife, and similar. I may add chest lifts to the lower unit as well.
Addendum: The chest and bottom casters. However the floor of my workshop is most definitely not. Shims are added to keep everything appropriately upright.
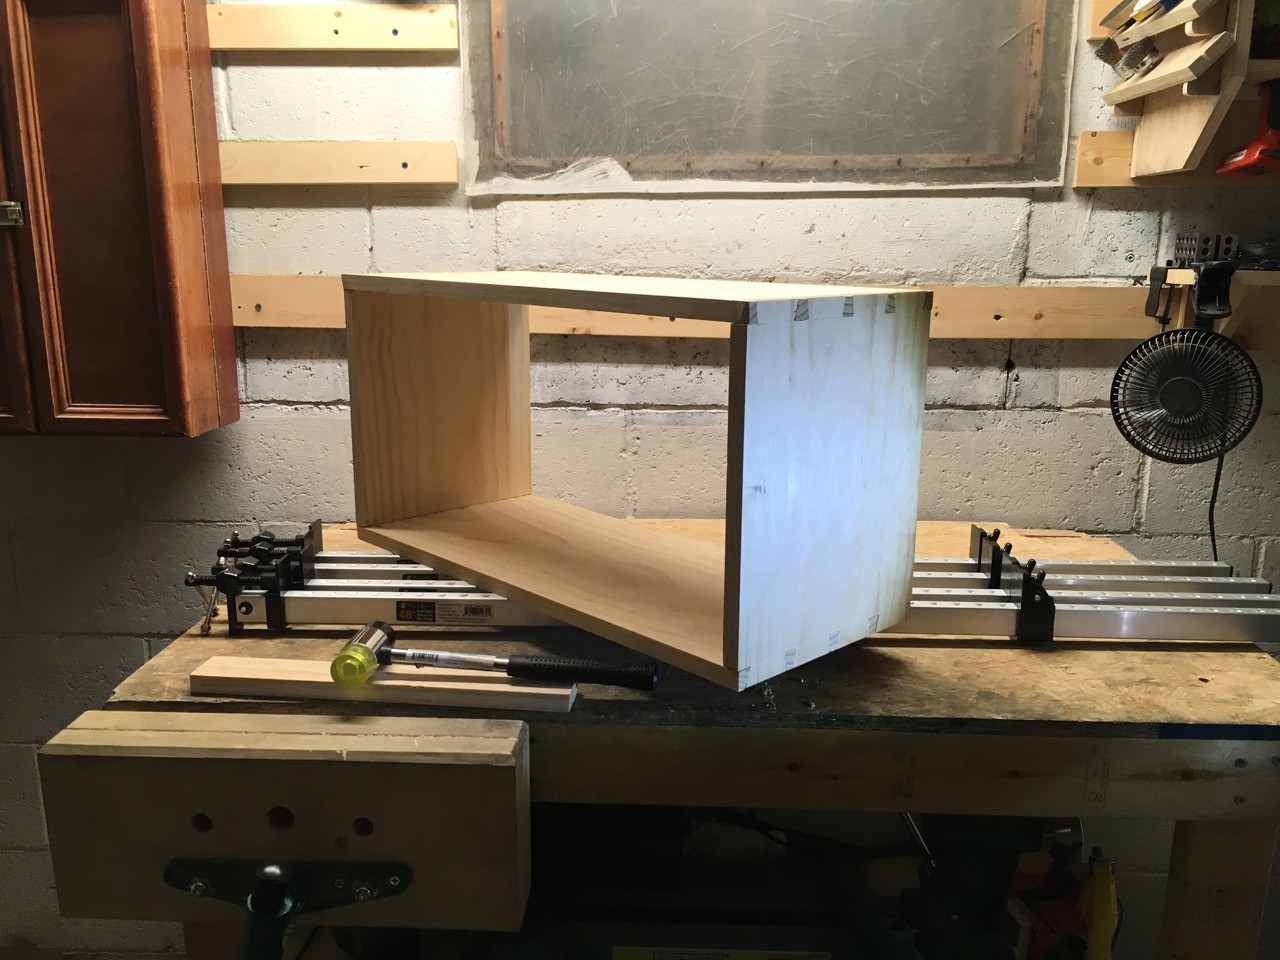
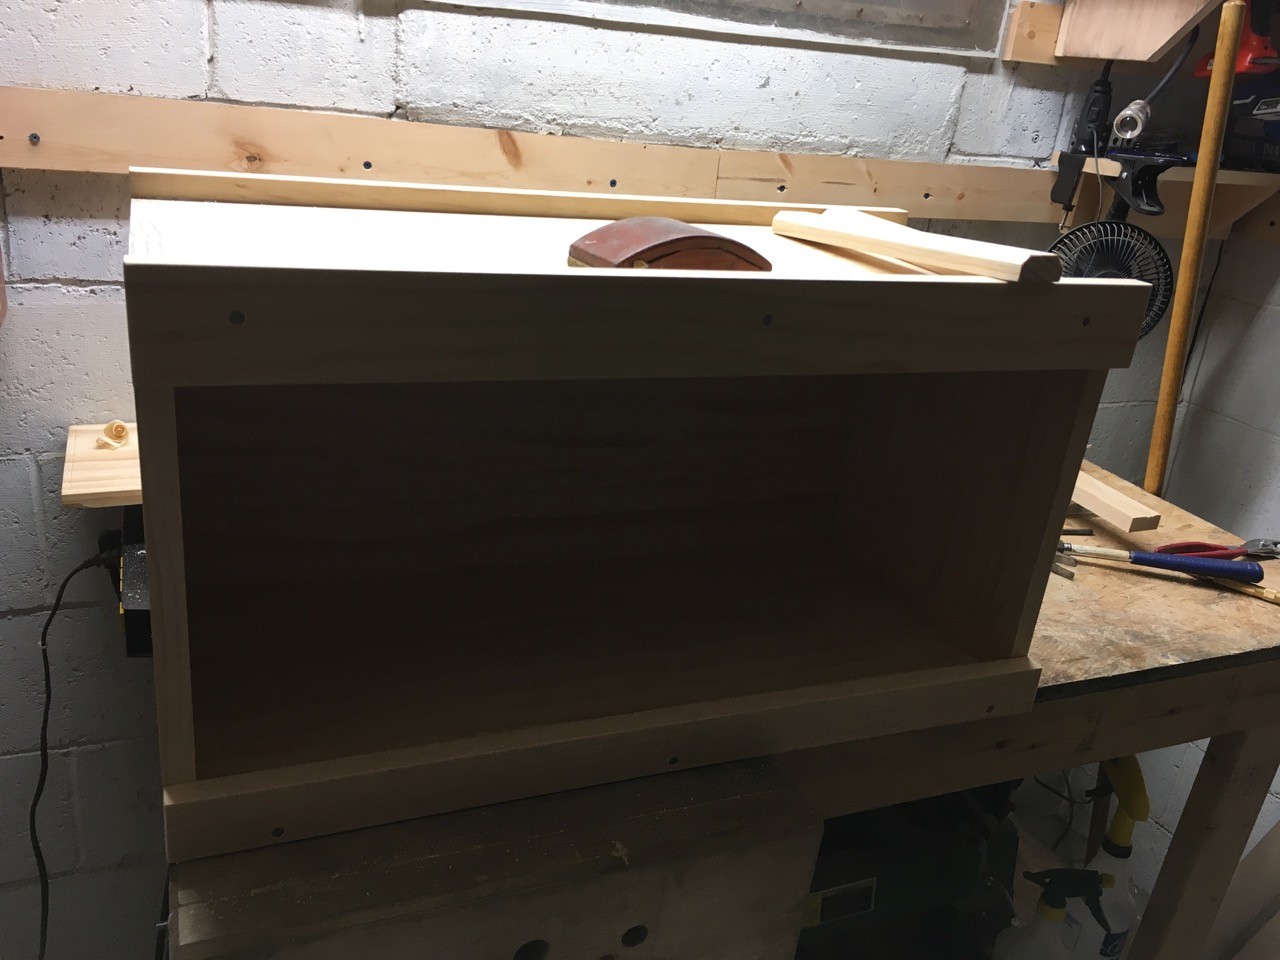
The carcase is dry fit to ensure things are linked up prior to gluing. That’s a union No 7 plane for size reference in the front. I thought I had everything square when I did glue up, but it turned out that the sides narrow a bit toward the top. I would definitely proceed a bit differently regarding glue up if I were to build this again. I glued the shelf and dovetails at the bottom all at the same time. I’m thinking I should have glued the dovetails (and ensured squareness), then done the shelf (using its length to correct anything out of square).
Pre-hardware closed chest.
I finished the finish tonight… this is Lexington Green milk pain from Old Fashioned Milk Paint. Two coats mixed 2-1 water to powder, sanded at 320 between coats, rubbed down with paper to knock off the dust/chunks, and paste wax on top. I finished installing the hinges tonight. I am still deciding whether or not to to go back and install a hasp. If I do, I’ll need to cut a mortise for the barrel and plate into the lid.
The lifts came with a thick black coating. I wasn’t a fan so I took a wire cup wheel to them to remove some of the coating. They were then topped with paste wax to protect the cast iron.
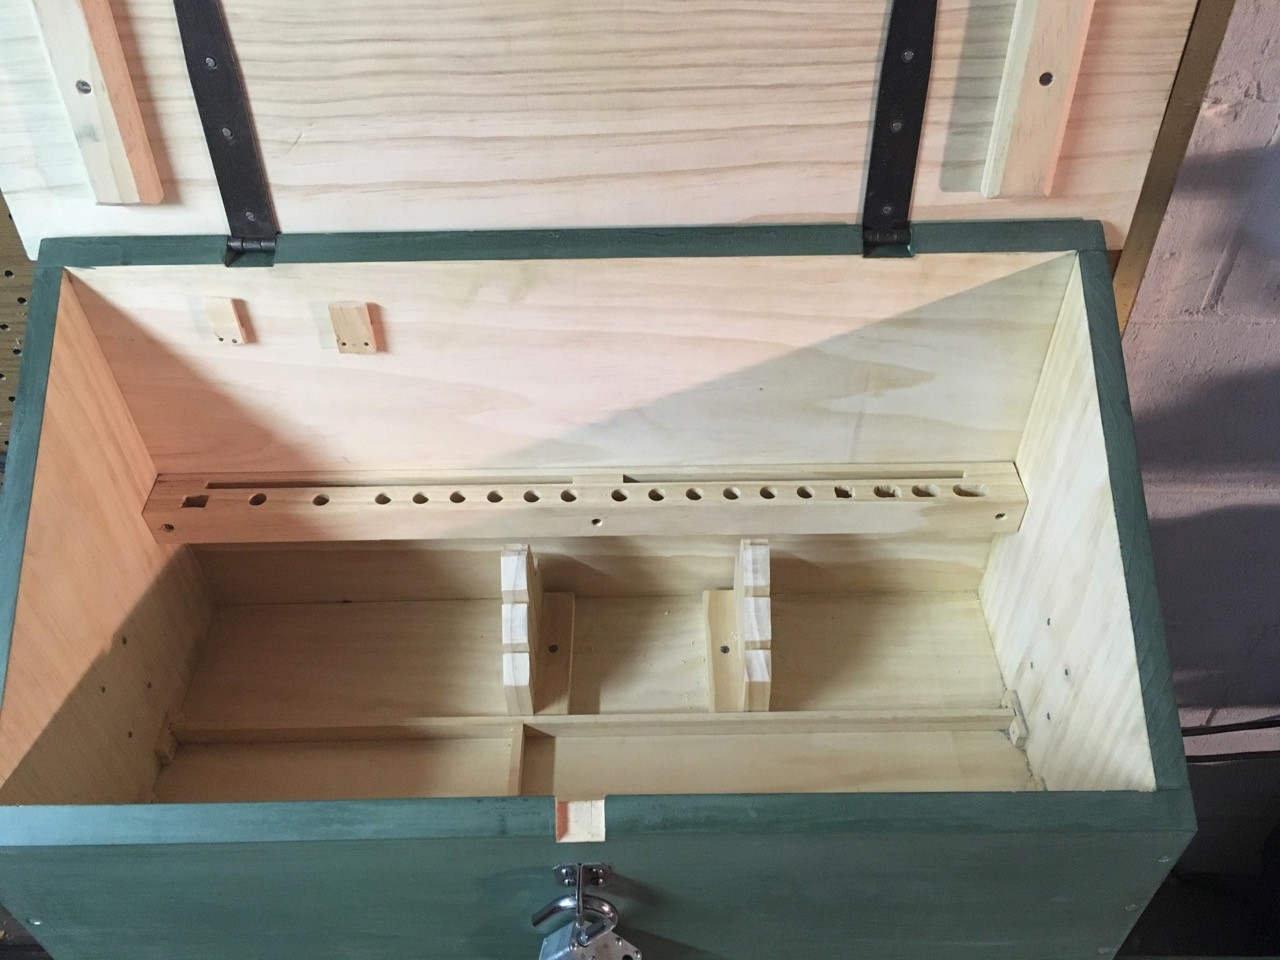
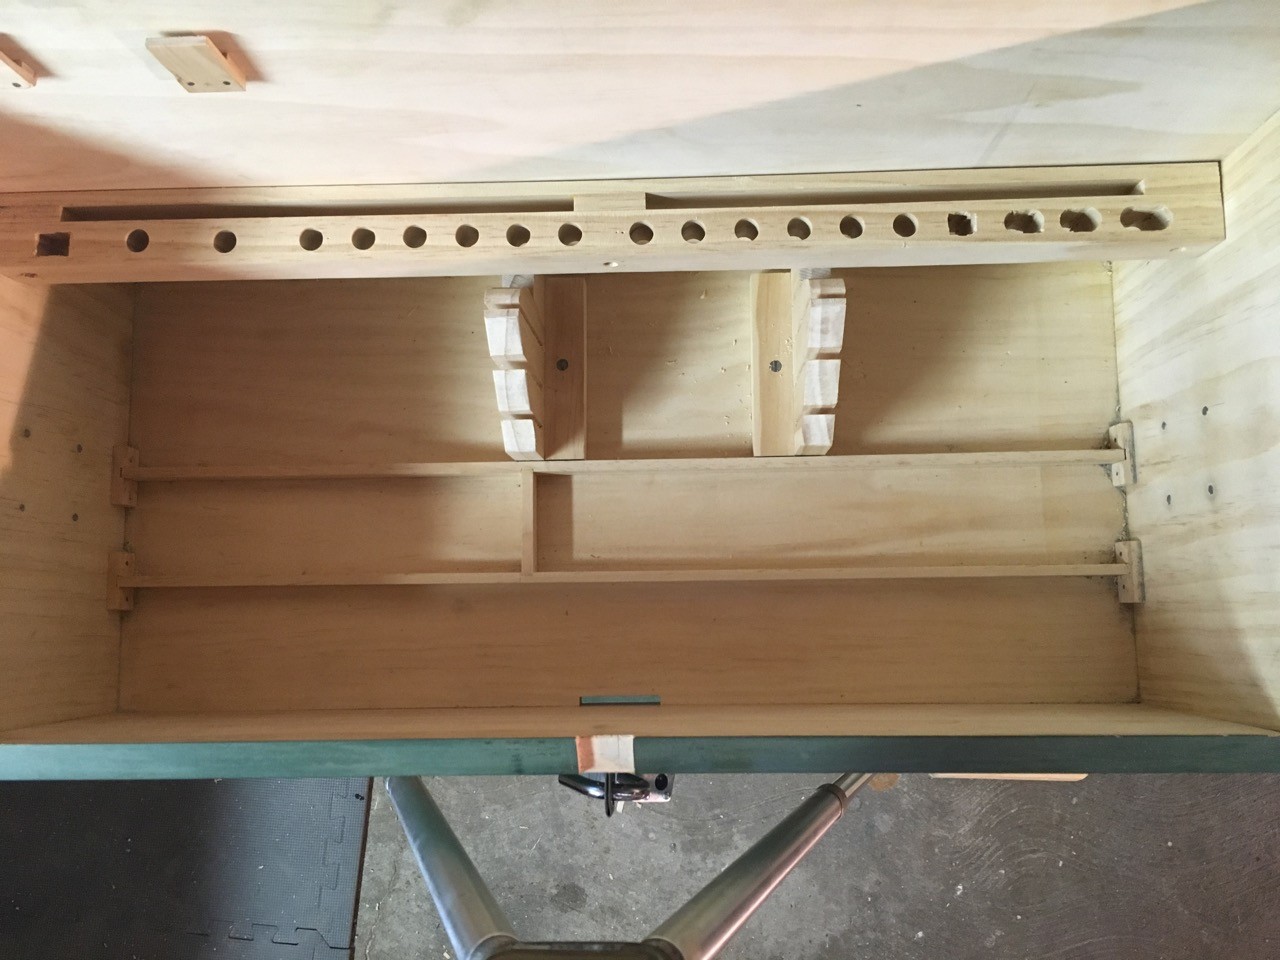
The empty upper interior. I made a double rack. The back (slotted) portion holds various measuring devices, including a small double square, my 12 inch combination square, a few sets of dividers, inside and outside calipers, bevel gauge, and protractor. The front portion holds chisels, marking gauges, screwdrivers, an awl, and, center punch, additional dividers, and a depth gauge.
I was originally going to try to fit 4 saws in this till. Three in the front part and a small gents saw underneath. While it would “fit”, there was no way to actually get the saw in an out. The dividers in here prevent my planes from banging around. Because the sides of the chest are only 3/4″ thick, the #12 screws holding the lifts on came through. I cut the ends off with a hacksaw blade and filed them flush with the sides.
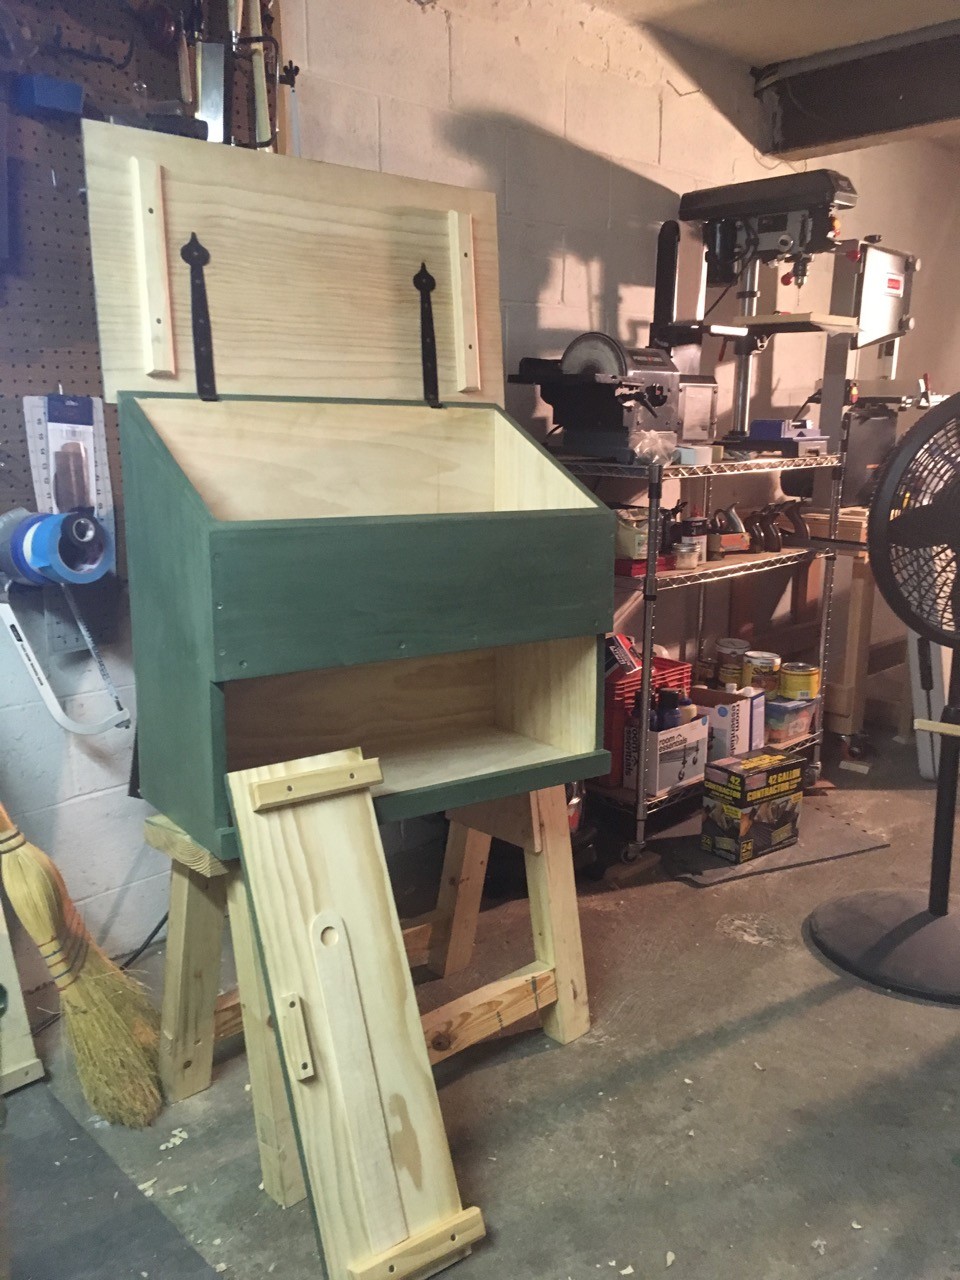
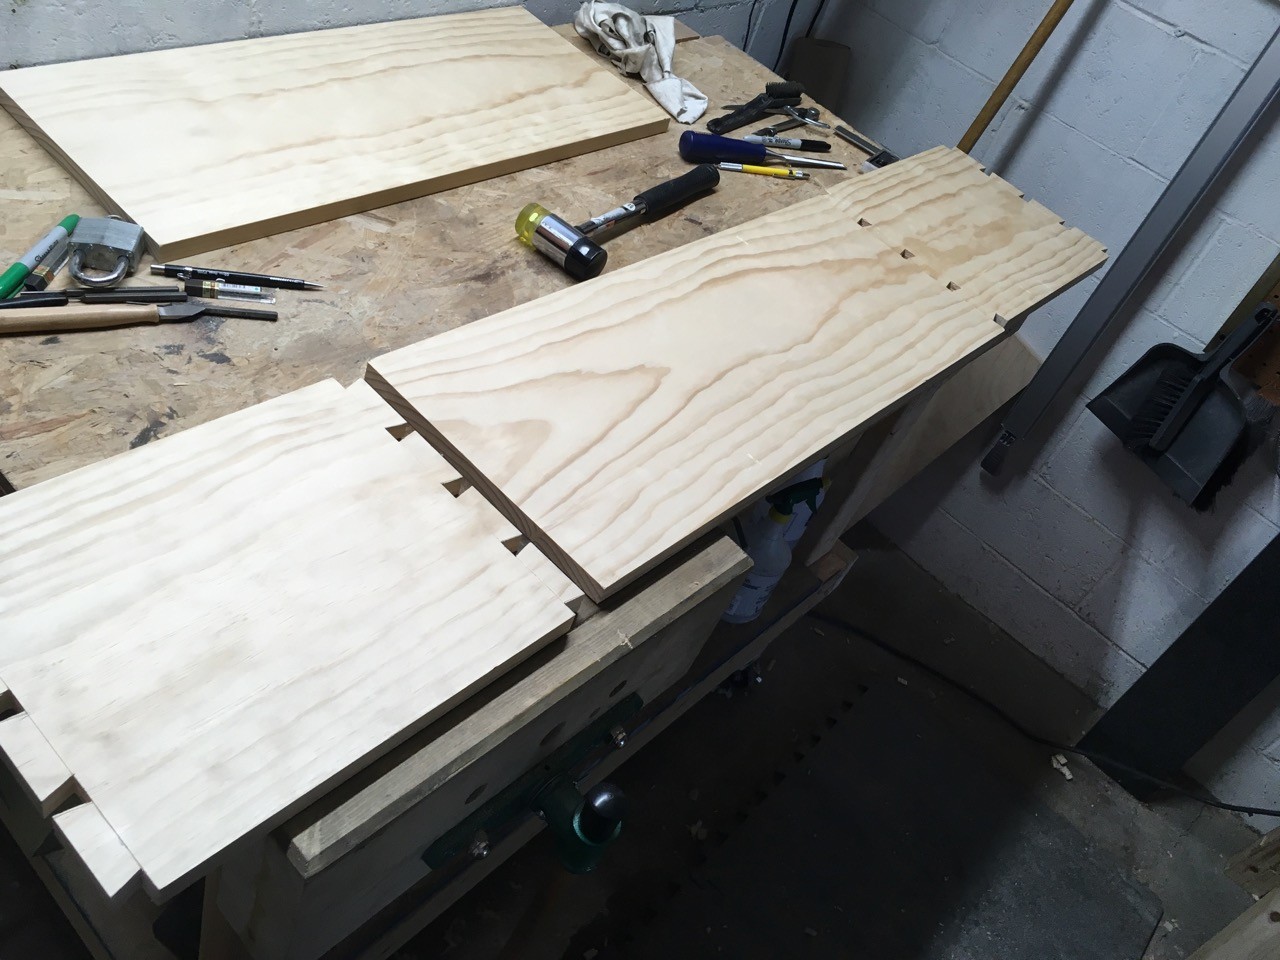
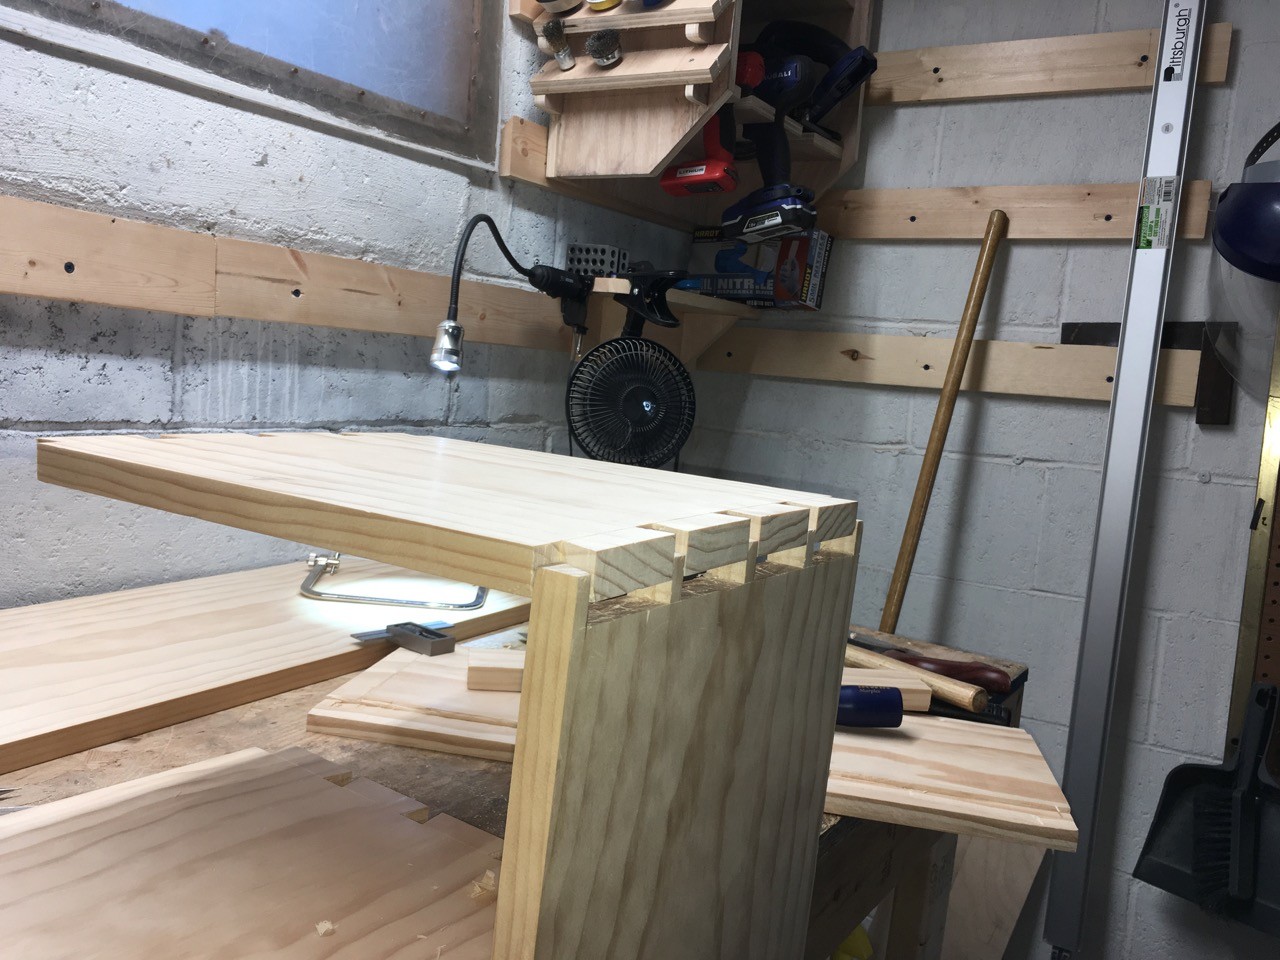
Now it’s time to build the lower unit. I’ve already cut out the top, bottom, and sides as well as and planed square. Here, I’ve gang cut tails on the two side pieces.
Now it’s time to build the lower unit. I’ve already cut out the top, bottom, and sides as well as and planed square. Here, I’ve gang cut tails on the two side pieces.
First set of matching pins cut. They required a bit of paring to get a good dry fit.
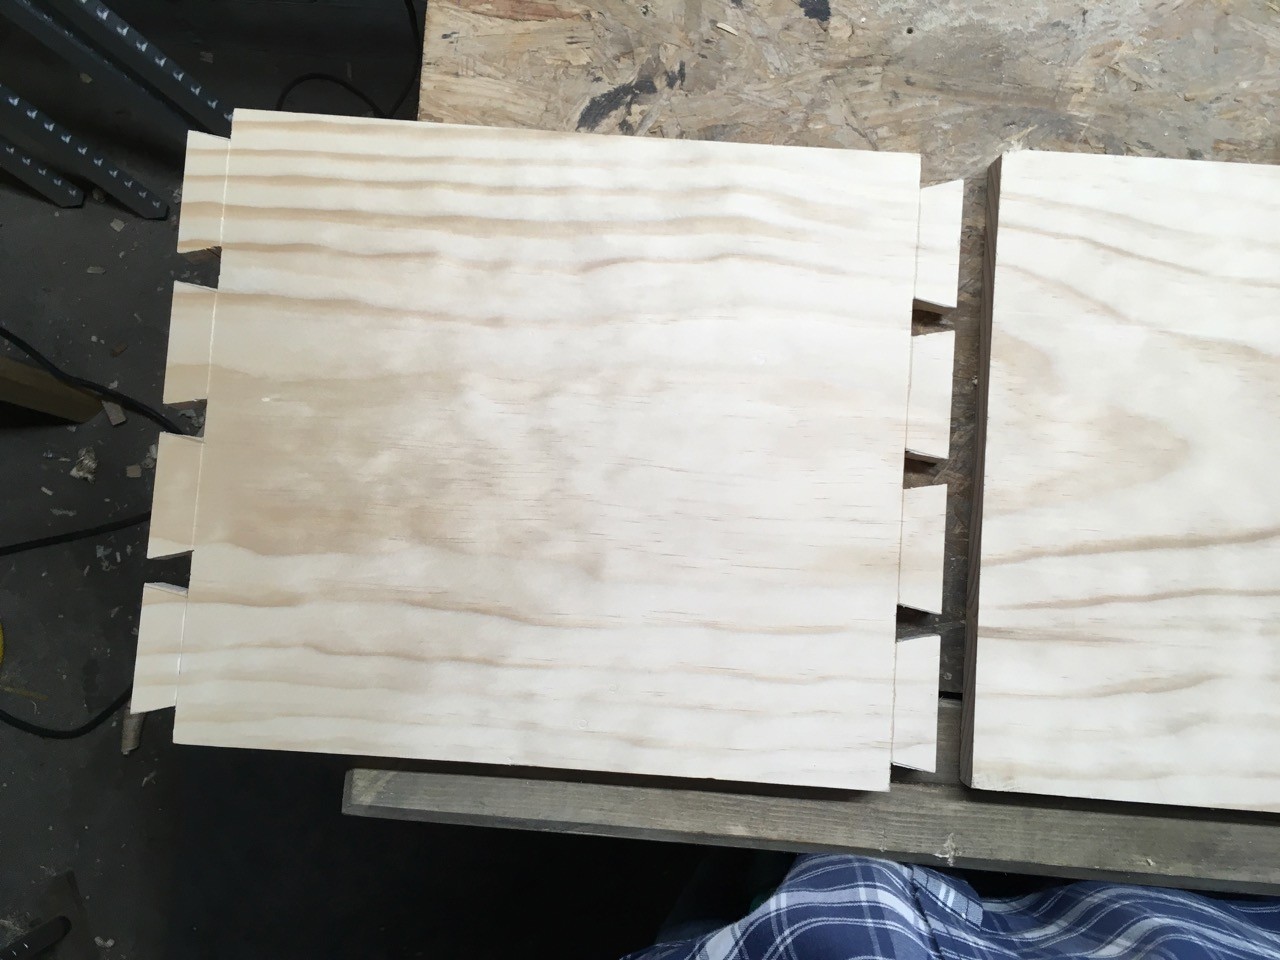
All four corners are cut and the carcase is dry fit.
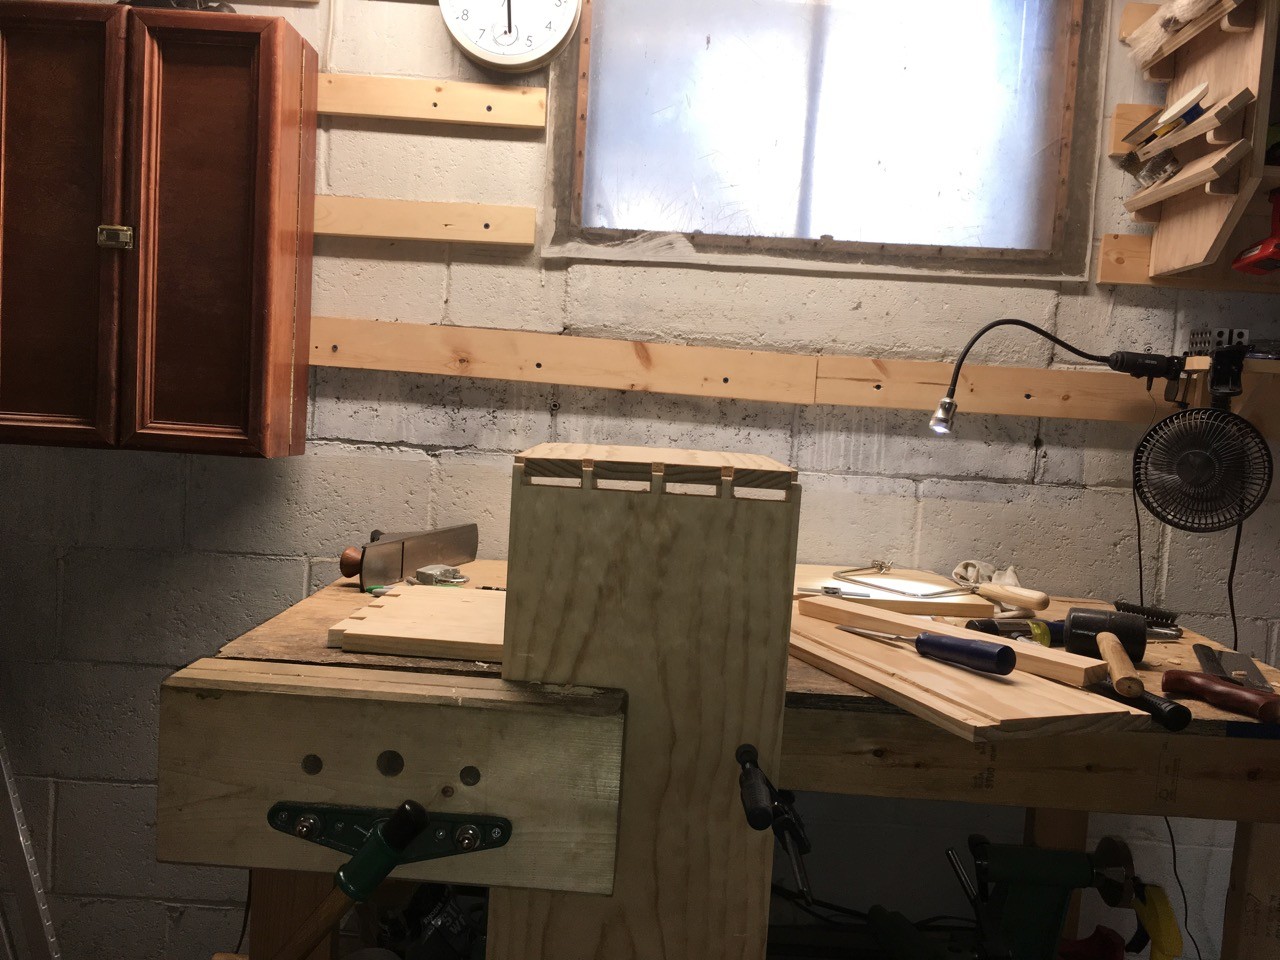
Carcase all glued and clamped up. It ended up being much more square than the top unit.
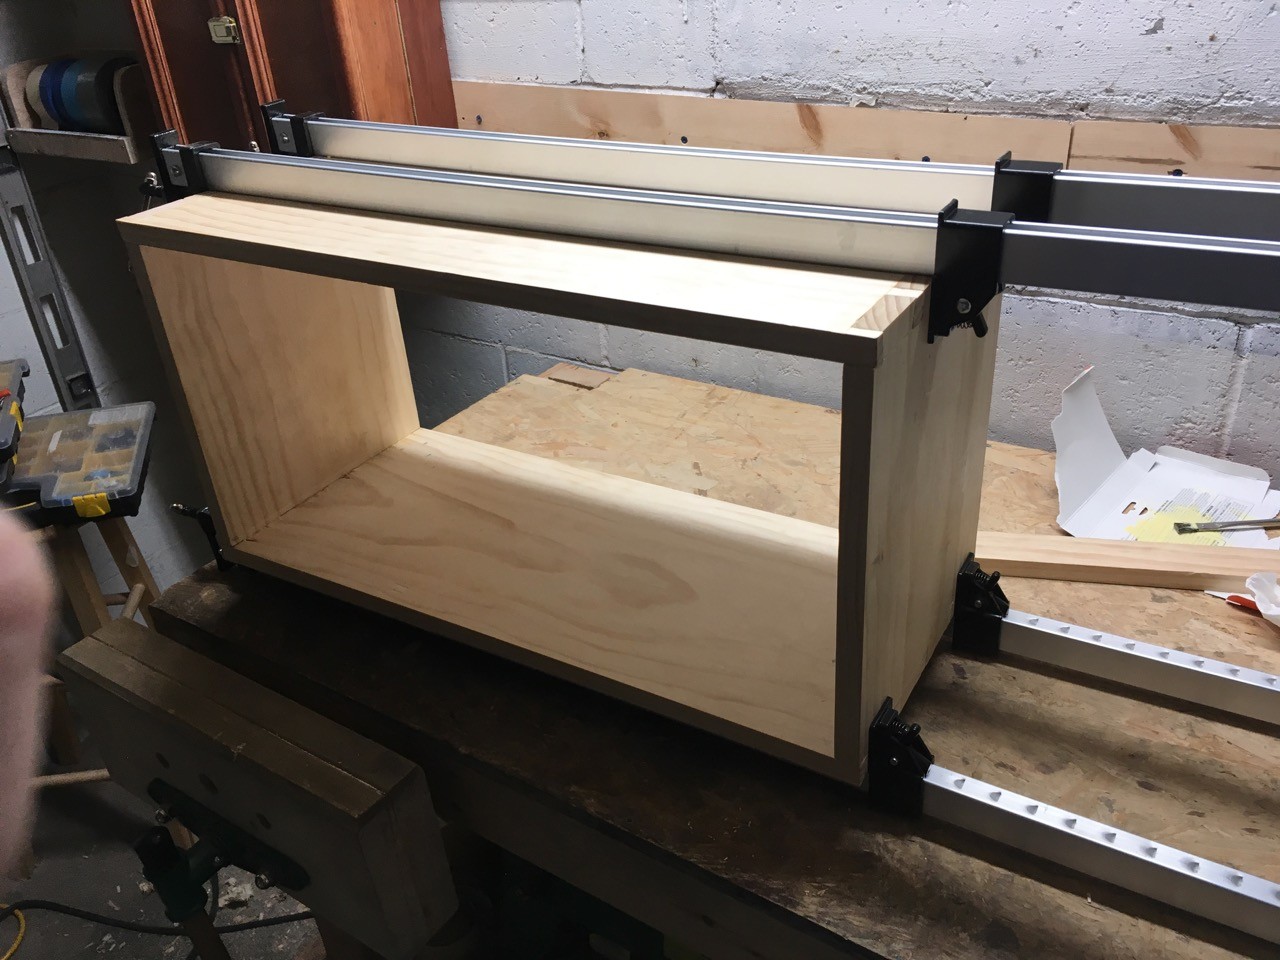
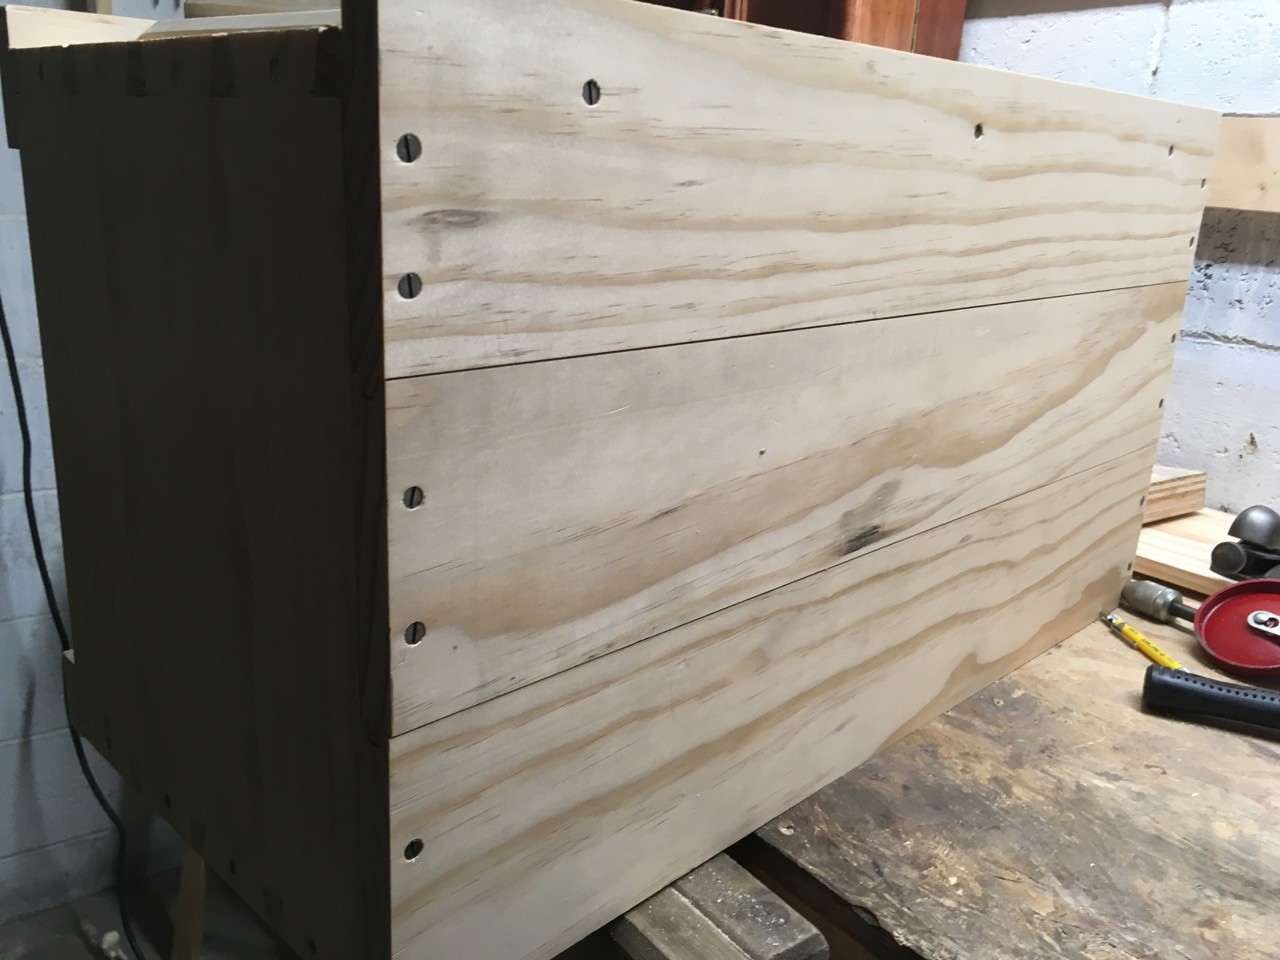
The carcase is now glued up and cut nails were driven into all of the tails. The front pieces and back pieces have all been cut to length and cleaned up. After choosing board order and jointing edges, the back boards now need tongue and groove cut into them.
The back and front boards are joined to the case with #8 wood screws.
Slight gaps were left between the tongue and groove boards to allow for wood expansion. You can also see that the boards (front and back) extend 3/4″ above the top of the case. This will be used to hide the cleats from the upper chest.
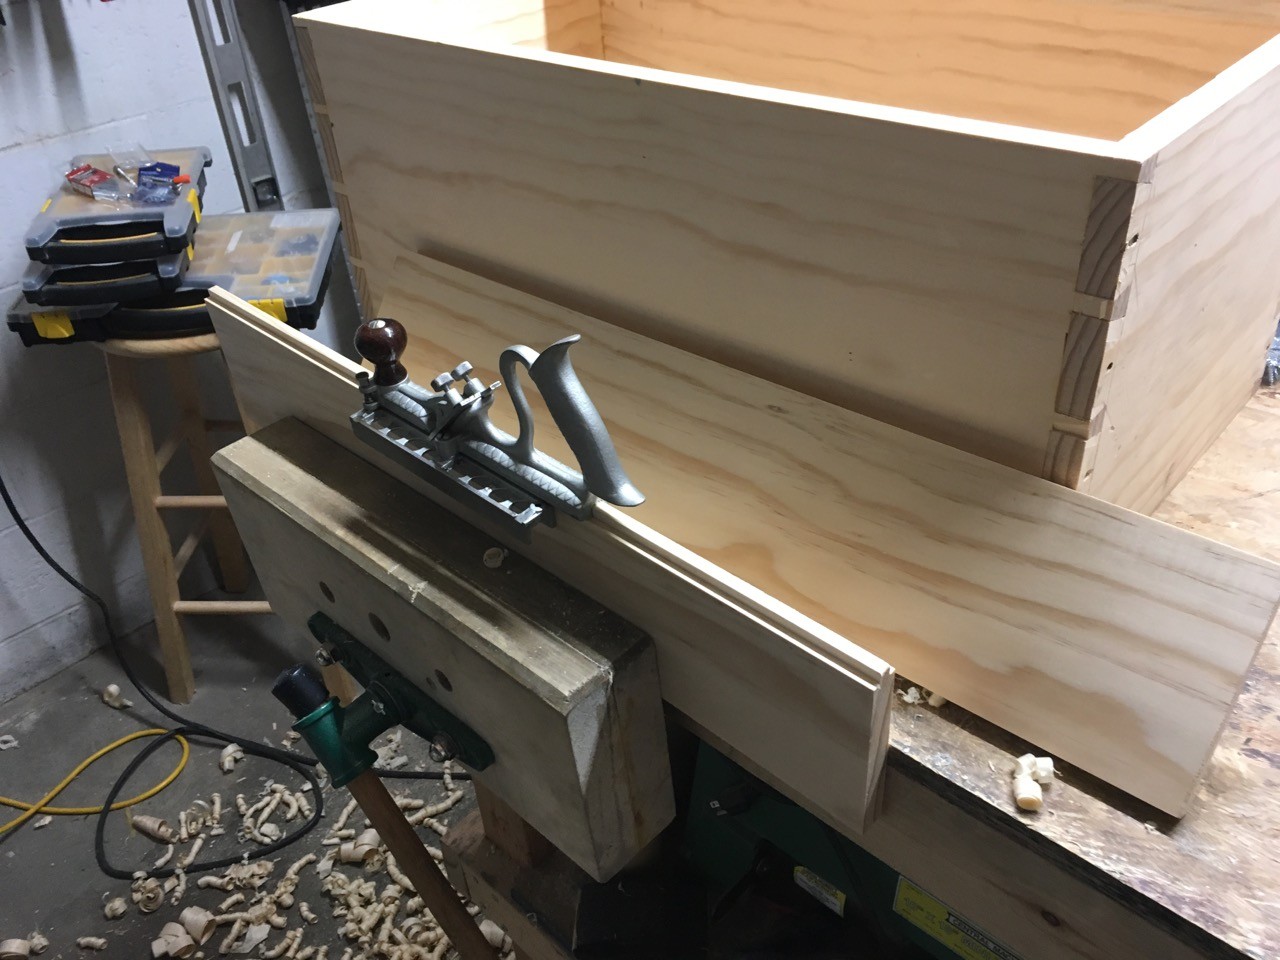
Adding a chamfer to the cleats for the top of this unit.